Leaderboard
Popular Content
Showing content with the highest reputation on 14/02/22 in all areas
-
5 points
-
5 points
-
Okay, a wet weekend meant loads of time indoors. Perfect opportunity to apply 20 (yes 20) coats of paint to the shell. The last complex paint job I did was on pretty much the same shell (see below). So, emboldened by previous success, I thought I'd go more complex again (5 colours instead of 3, lots more fine line masking). Masking took a while. 6 coats of Tamiya PS-2 Red (it's really transparent so needs more coats than other colours I find). 4 or 5 coats each of Yellow and Orange (PS-6 and PS-7). You'll notice a couple of spots where paint managed to get under the tape. I found it much tougher to prevent this happening with the really fine tape and so many coats of paint. Room for improvement but the overall effect is still fine. After that I did 4 coats of Tamiya PS-1 white (it covers much better than the other colours), 4 coats of Tamiya PS-12 silver leaf (as backing and for the rear bed, front bumper and tailgate trim) and then, lastly, a coat of matt clear coat on the outside of the shell over the front bumper and rear bed: The front grill that comes with this body is black (not chrome). It did not look great so I masked and sprayed it with Tamiya Silver Leaf TS-30. I was really surprised by how well that came out. It only took one coat and I was left with a sort of old chrome/aluminium finish. Looks perfect on this truck and matched the other silver areas well too. I also added the usual cheesy £11 interior which fits this shell particularly well (with a bit of trimming). With all that, the roll bar and minimal decals applied, it ended looking like this: I was fairly happy but thought the wheels looked too small. Maybe try some class1 tyres on 1.9" wheels I thought? Before diving into that though I thought I'd try moving the side bars back out (they were fully retracted) and use their runners to cinch the body in slightly around the middle (I had to trim ~3-4mm off the bottom of the body to do this). Aesthetics are weird, this minor mod made all the difference. Not sure if it comes across in the pics but, somehow, the wheels look spot on now. I might want to move the rear ones out by ~3mm or so per side but, otherwise, I think it looks great: I have to say, I think this shell is the bees knees. Absolutely delighted with how it ended up sitting on the chassis with really very little fuss. I'm not quite done with the build yet though. The extra weight of the battery and shell means the back suspension is now too soft. So, heavier springs are on order. I'm also waiting for a 72T spur gear and the last part of the rear drive shaft extension. Beyond the basic mechanicals, I want to extend the rear bumper mounts so that the rear Vanquish bumper sits just inside the shell (rather than ~2.5cm inboard as it does right now). This won't end up being visible but should provide a bit of protection for the shell when it tumbles. I have some brass tube on order to help with that. Looking forward to seeing how it handles once I've sorted the gearing (and this constant bl**dy rain stops for a couple of days).5 points
-
The new body shell arrived today, well done to Wheelspin models for good price and fast delivery, when i bought the XC i was torn between yellow pickup or green snot box, i now have the choice, this is just a new shell on the original chassis, but i suspect it will stay like this now for a good while3 points
-
3 points
-
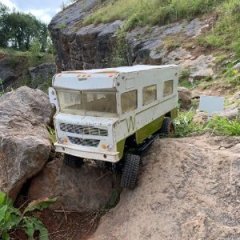
That seems sensible. I've made a few mistakes with the magnets, but it's all part of the learning curve. It turned out that the glue wasn't attached very well to the paint either, and it peeled off really easily. From what I've heard of Shoe Goo, it's not supposed to be that easy, so I think I probably tried to remove it too early, and weakened the bonds. I'm giving it another go, and it's been curing for about 12 hours now. 🤞 I made a few modifications, too.. Shortened the lower links by 3mm, therefore giving it the correct 280mm wheelbase (it was 282mm), and clocking the axle to try and sort out the reversing issue. Put M3 tubing around the threaded rods, so things are a lot more accurate underneath. Replaced the shocks with cheaper-than-chips Banggood shocks. They're listed as 100mm, but are actually 90mm, and they're really stiff, but that's a good thing - the old shocks were sagging under the weight of the hardbody. EDIT: Don't buy these shocks - they're terrible, badly made, leaky pieces of crud. Attached all the lighting to the D90, thanks to some LED clip things that came with the front bumper, and a spot of hot glue. I also removed the link from the light circuit to the throttle, which was working reversed. Bought a metal steering link rod wotsit, a metal servo horn, and a better servo. Naturally, it's now fixed itself. 🤔 I'd take a photo, but I'm not going anywhere near it for another 12 hours.😛3 points
-
3 points
-
2 points
-
2 points
-
2 points
-
Good old eBay Germany! Not out till March 30th here. Not saw another one in the UK2 points
-
many thanks to @.AJ. for helping me sort out this little buggy 🙂2 points
-
1 point
-
1 point
-
Sprung weight is never ideal, id say it would hinder weight distribution, id be aiming for unsprung weight lower down eg metal diff covers, metal axles, beef tubes. The trx4 is quite tall there for any weight above the axles will have a slight negative side effect.1 point
-
1 point
-
That looks bloody fantastic in the Toyota IMSA colours 😎1 point
-
I ran it quite a lot before it got put in the shed and the motor was always OK.That was on nimh and a 2s lipo.Maybe I got lucky.The stock motors are cheap tho so that's not a problem and knowing my boy he will want to get back to his xbox before the motor has a chance to get warm😪1 point
-
1 point
-
Just get a spare motor, wont be long before its "daddy the car wont go and is smoking" I swapped to drill brushed motors as they seemed to last longer but still was basically cooking a motor per outing.1 point
-
1 point
-
Sorry for your loss mate. Sadly I don't have a TT or any other chassis suitable. But I wish you and your family all the best. 👍1 point
-
I could be a great actor I reckon!!! So long as you want a tradesman🤣👍1 point
-
1 point
-
Finally managed to score a Playstation 5. It genuinely might be easier to purchase weapons grade plutonium than that stupid console.1 point
-
No I haven't ran it how it is yet in its current form.Its not a basher as mentioned above but when I used to use it it was OK but this is for my son now as a trail truck.I have done the battery position mod and just waiting for a radio to turn up.It has the carbon chassis,fro t sway bar,alloy trailing arns,trailing arm mounts,front hinge pin holders,ackerman plate and alloy rear chassis braces oh and badland tyres.A Park near me has massive mud hills that are great for rock bouncing up so hopefully it will be good for that.1 point
-
Took the TRX4 out for a walk with the dog in the wind and rain.1 point
-
1 point
-
Re mag mounts the ones I printed still use the original body holes to mount the bracket with which means you don't get the stealth look but then avoid the issue with gluing to the body and removing the paint.1 point
-
Nope! Motor mount is perfect! Problem are the rear shaft and the bulkhead! Rear center shaft get's out often and bulkhead melted...but i always fixed the rear center shaft with a screw and a nut! But Rear bulkhead needs an alloy one now... Here is the last video of it:1 point
-
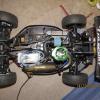
Couple of weekend "tweaks". Managed to snag a new/unused carbon fibre Scorched Parts ackerman plate from Facebook so to go with that I bought a carbon fibre Scorched Parts steering top plate. Both parts as expected from Scorched Parts are very good quality and perfect fit. Little bit of weight savings over the OEM Arrma parts. OEM top plate: 14.19g Scorched Parts CF top plate: 7.51g OEM ackerman: 4.85g Scorched Parts CF ackerman: 3.78g I also modified the front plastic chassis brace just to give a little more clearance to make fitting and removing my larger driveshaft easier.1 point
-
1 point
-
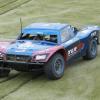
Went out early with these two and unfortunately traction rolled the PTG-2. Not one for having a shelf queen or keeping things perfect but this one did annoy me. Might even buy a 2nd body for when it is sat on a shelf 😆 Also spotted that the PTG-2 wheels have started to split for some reason even though it has only been out about 4 times on tarmac? Any recommendations for a decent wheel and tyre combo?1 point
-
Come on now, I'm gonna leave a few weeks of space below me (hope I'm not taking up all the music bandwidth on MSUK 😄) Show me your tunes. Ya wee hero ! Save us with another "Queen" Ballad1 point
-
Some folks truly are crazy ! I was just repeating the lyrics of the tune, I can't help it if your name is David and you've taken offence, I've always loved that pop tune by JoJo. Jeez Oh, chill out, try posting decent tunes. Also If you haven't realised yet, I'm not involved in the manufacture of Methamphetamine !1 point
-
1 point
-
1 point
-
With the power upgrade done, time to sorting the issue of lift. I felt the issue was the curve on the underside of the bumper mount acting as a wing. Replaced the part with a bolt on splitter that also has to work as body post mount, angled lip splitter will pull the front down, sideskirts that lock the body into place and car down, diffuser because cant hurt right... March it will get a good shake down and see if makes a diffrence.1 point
-
I’ve not seen this show but I believe the guy from man verses food, the original sho of this genre, is now a mega health nut1 point
-
1 point
-
Member Statistics

