Leaderboard


Popular Content
Showing content with the highest reputation on 24/06/21 in all areas
-
lately i have been reading loads on paranormal stuff. went to bed last night and woke up at about 6 am and i saw a head, i thought it was the devils head then realised it was my fan 😄5 points
-
4 points
-
Nothing RC related today but finally got my hands on a PS5 😁
 4 points
 -
Just added the Outcast exb 8s to the fleet should be here tomorrow can’t wait4 points
-
Got my new storage box. In general it’s a nice box, construction is very similar to the bigger ones just with a change to the lid catches. It’s not bad for keeping spare parts in (for my 1/14 scale cars) but is a bit too big for storing loose screws/nuts (you also only get eight of the small tubs, and six of the bigger ones which isn’t the right mix for what I wanted) so I think I’m still on the lookout for something smaller to put my screw collection into so i can ditch the little plastic bags.
3 points
-
Painted and put decals on a fresh body for my tamiya ta-03rs and put a new set of wheels and tires on it, looks much better now3 points
-
Great to have found this forum and thanks to walkbythesea for pointing me in the direction of this thread. Recently got a Zorro having started on a 1/18 truggy with my son who loves RCs. I've also managed to get some friends into it and now we have three FTXs (Zorro, Carnage, Vantage) and a Traxxas Slash between us. My son quickly got through 3 of the stock brushed Zorro motors! I'm in the process of upgrading to brushless with a small false start through getting a motor with too high a kv rating. I'm sure the mods will continue once the motor is sorted...
3 points
-
Aren't you off work for 2 weeks....🤔🤣3 points
-
Guy in front of us drove like a dog today.3 points
-
2 points
-
Refreshing the exterior and interior... Micro sub install2 points
-
You did have a hankering for that 1 so enjoy it mate2 points
-
I may try that instead. I find the seal helps to keep the lid closed without the latch coming undone. I may cut it on the corners, which have gaps in the metal trim.2 points
-
Perfect, I'll bag some.2 points
-
Turned the pins down half a mm. Then it's a straight fit. Could drill the axles out to a 2mm hole. But I think modding the pins is better2 points
-
on my ammo case i cut about 3 inch of the seal on 2 sides as i would not want an ammo box to become a huge grenade in the event of fire2 points
-
Bought one for my boy, and despite having the HD axles we've managed to bend one of the rear ones nonetheless! I'll be doing the washer mod later today (if I can get the hexes off, one of which now seems tricky to remove on the bent axle). Been running t on 3S and it's great fun.2 points
-
Seal removed 😁2 points
-
You take the seal out to reduce danger of ammo box exploding due to pressure build up Lipos when on fire produce their own oxygen so continue burning even when starved of air2 points
-
You can use Firestarter by Prodigy as the music then though...2 points
-
Started to refresh the f3502 points
-
2 points
-
Thanks! Glad you like it. Thanks for that. Yeah, I love the music; the musician is really talented. I'll never, ever be as successful as those that simply like to "send it", but this means more to me. Thanks for that. Certainly are some beautiful places.2 points
-
Well after not liking the smaller 6s and giving up on Arrma this sweet deal came my way and I thought let’s give it one last go ! Out the box I have to say I’m super impressed unlike the smaller 6s which left me wanting more. This thing is a beastly suspension feels like it’s floating on air ! No nasty slop either super thick 6mm shock shafts and big old ends to hold them on. Super thick and beefy turnbuckles which at the end have some super big old wheels and tyres. Sway bars both front and rear are a nice extra over the rtr and a nice saving too as is the option of running different motors servos and Spurs all in the box 👍. No point waffling on let the pics do the talking Yep this really is as big as my kitchen table 😂👍 Checkout the size of these beauties Nice size shock shafts and silky smooth Going to stick this motor in for now All in all this one feels like a keeper but will see 😂1 point
-
 Features: 2250kV brushless motor Waterproof electronics 90+ km/hr top speeds Heavy duty aluminum shocks CNC machined bevel gears Hardened steel spur gear Low profile, high traction tires Upper body protection LED lighting Hardened steel driveshafts Aluminum ball ends Reinforced a-arms CNC machined aluminum slide style motor mount Source: BigsquidRC 🙂1 point
 -
I have many years experience in r/c racing, both 1/10th and 1/8th off-road buggies, but since heart issues 3 years ago I've stopped driving (full size that is!) so getting to tracks is a real issue, SO I have gone in for Crawlers instead..! Racing is great fun, but on your own? NAH. So setting myself some challenges in my local park with a couple of cheap FTC models (Kanyon & Ravine) keeps me motivated. However it would be great to find other people local to me here in Liverpool, so if anyone wants to get in touch just let me know!1 point
-
The house i was born in all the kids could sprint good as if you had to go to the toilet at night you would get back up the stairs in double quick time.1 point
-
Replaced a suspension arm on the Quantum + Flux XT after smacking it hard into a kerb. Installed a new motor to my daughter's Quantum MT. Big faff as I had to disassemble the whole rear end and then some fiddly screws kept jumping on to the motor as it was more magnetic than the screwdriver. Had a little blast on the front before rain stopped play1 point
-
Don't you just love getting old broken engines and makeing them shine agan got this hpi savage 3.5 on eBay in very bad shape slide carb locked the engine was completely seized and both bearings were completely seized thankfully iam a G and it's like new again 💪1 point
-
I believe the brace is running a rod between the 2 towers to stop it flexing so much. I might be wrong.1 point
-
Your motor may or may not run better with the shims removed. The shim removal will raise compression in the combustion chamber area, and reduce the squish clearance. Most likely you will get detonation. That can be quite damaging for an engine. Fewer shims will also make the 'sweet' area of tune narrower, and you may find it gets harder to hold a good tune. You might compensate a bit by using a cooler plug, but you may also find your motor just become very hard to find a stable tune with, and the motor spends most of its time choking on fuel, and not revving like it really ought. Fewer shims will give you more torque, but thats only a benefit if the motor runs cleanly. If you do remove them...do it one at a time, not all 3 together. Remove one...run it, retune it, see how you go. Keep a close eye on temps, as while higher compression will give more grunt...it's also going to make things get hotter. It will give you the chance to assess how the changes are affecting it and whether its worth going any further, or whether you just want to put the shims back as they were. If it was my engine, as it's not in the first flush of youth, I would leave the shims where they are. Run the motor and get used to it. If you haven;t fitted new piston, rod and liner, then the motor may not have wonderful pinch, and upping compression in the head will just bring more problems. And as it seems to run fine as it stands...... lt it be 🙂 That motor should run fine on 20% or 25% nitro,1 point
-
You won't get a drawing of any of their parts other wise other people would make them. You'd be best off looking online for a 3d model and then taking your measurements from that.1 point
-
I wish! I've not got a lurgy so working from home.1 point
-
Made it smaller it's sounds awesome can u tell me something there where 3 head shims on it so I just put them back on but iam running 20% nitro will it be better if a run no shims bro? 20210623_132945_001.mp41 point
-
Welcome! Yeah, you'll find some great advice on this forum. Walkbythesea is spot-on, a lower Kv motor will sort you out. The juddering you experienced is called cogging; almost all sensorless brushless systems suffer from it, but the better the system, the less it tends to cog. Higher torque helps, also. My 3500Kv Outlaw cogs a little, but not enough to ruin the experience and if you simply floor it, it goes!1 point
-
Do you mean the manual? If so just Google tamiya manuals and it will take to to their website and you'll be able to download pretty much all of them for free1 point
-
Did a great job on the clean, smart move! Bet it will sound and run much better for it!1 point
-
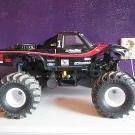
My recently restored Tamiya Super Hornet from 1993
1 point
-
talk about a squeeze fits like a glove! 😂1 point
-
I’ve just squeezed a 120A ESC and 3660 3200kv motor into mine - if it’s dry tomorrow I’ll let you know how it goes 🤘😎
1 point
-
OMG What a day have to say this is a BEAST ! Truck is OUTSTANDING ! some maybe upset but this one will be put in the X Maxx class of a non seller 😂 Now I only have 10 x 4s packs and I burned through 8 of them without a hiccup, more than enough power for me wheelies, backflips and burnouts galore. Temps where perfect Motor hit 170f max and esc was 80f probably leave the gearing where it is but if I do need to go down for the summer I’ll swap out the spur and go 24/39 instead of the 30/47 I’m running now. Now if I have one gripe it would be the servo I choose but it’s fine for now but could really do with a bit more the a 40KG Cant wait to get these lipos charge and get back out again 👍1 point
-
Got the VS4-10 ESC programmed up and running smooth, seems to have enough oomph on 2s, so ordered a 7200 2s 80C pack, should give me many hours of trailing time. Also rather annoying, picked the truck up this morning to find four small pools of oil on my mat, so need to replace the bottom seals in all four shocks... Then refill them, bit of a headache. Also got the lighting installed and right now working on the masking, interior is also done, just very basic black, since it won't have interior lighting and stuff, but I do want to add some flat clear to the outside. The grill also got some detailing.1 point
-
Making the most of my few last days off before back to the grind.1 point
-
Picking up from where I left off.. Next up were the front to rear horizontal braces, made with 3mm bar. These were fairly straightforward to make...once I got the shape of the first one right, I just used that as a template to make a another. A little tweak was needed on the right brace and that squared everything up nicely.. Next came the main braces that connect the front and rear hoops.. I was running low on silver solder, which was 0.7mm wire that was pretty awkward to use. I’d ordered 2m of 1.5mm rod in 250mm sections, that was at a good price, and postman had just delivered them. Result. This was my first joint using the new rods. They had a much higher melting point so took a little getting used to.. Once braced I took it off the chassis for the final pieces to brazed. I’m really happy with how it’s coming together. The horizontal cross bar went in without a hitch.. The diagonal cross brace wasn’t so easy because brazing on top of brazing is tricky. Not pretty but a good solid joint, and I used the Dremmel to grind back the access later on.. The finish line is in sight with just four small braces to go.. Much neater now I’m getting used to these rods.. The last brace.. And there it is, but still plenty of grinding and sanding to do before it’s ready for paint. Fast forward a couple of hours and it’s looking much better.. It was at this point that I decided to have another go at fitting the mounts for the towing shackles. For some reason I didn’t take any pics of this but if zoomed in you’ll see them on the bumper bar. I even fitted one bent sideways so it looks like it’s taken a good hit and was bent. Painted and fitted. I think it’s looks the dogs danglies, but I would, wouldn’t I 😃 Apologies for the pics, I was running out of day light 🙈 The tyres just clear at full flex 💪 So not much left to do on the body now - wipers need fitting and windows need dusting along with a coat or two of flat clear. I’ve got a fire extinguisher that I might fit to the bed or possibly the cage..dunno yet. And then of course I have to paint the interior, and that’s about it. I’m really looking forward to getting it out and seeing how it performs on the rocks 😃 Thats all for now folks 👍1 point
-
Next I moved onto wiring it all put while trying to keep everything neat and tidy. *note; I didn’t have any black cable ties at the time! I wasn’t sure how I’d sort this lot out though.. But I did hook it all up to see if it worked...half expecting the servo to go up in smoke...but it all worked and I took it on it’s first run around the garage and up the driveway! 👍 Getting the wiring tidy was a challenge.. Running the leads to the rear required some trimming of the rear brace.. But the leads needed covering somehow. The RC4WD diamond plate came in useful for this.. It’ll get painted and weathered when I get to the body work part of the build.. I ended up mounting the on/off button on the transmission because it’s easily accessible from underneath and out of harms way.. With the body on.. There’s a couple of small jobs that need doing before I get into the body work proper, but that’s where I’m up to. So until next time people 👍1 point
-
Been for a quick run/photo shoot in the garden.
1 point
-
Little more progress... Decals fitted, last LEDs in, clear red paint arrived and rear lights painted. Lighting circuits decided, 3d printing box tomorrow and just waiting for switches to arrive1 point
-
I have now changed from Velcro holding the body on to magnets. So far I am finding the magnets better, they have a more positive feel when taking the body off and putting it back on, they also 'auto-locate' the body to the exact same position everytime, which is a big benefit over Velcro. They also require no 'pressing' when you put the body on, just drop it on and it's secure. Currently using some 1kg pull on each post, feels like I could have used about 0.6-0.7kg, the full 1kg is a little much, so I have simply added some Gorilla tape over the magnets to create a little gap, it's worked well and feels perfect. Here's some photos from our most recent outing, was hoping it would be four trucks but my little nephew isn't too well so he gave it a miss. The new 1500mah 3s packs lasted really well though, I took four with me, only needed two of them, got about 1 1/2 hours from each just trailing, more than I expected. Some of you will also recognise the blue Jeep body, currently residing on my Dads SCX10ii, he borrowed it after selling his Deadbolt body, he's got a Power Wagon to do, but it wasn't finished in time for the run.1 point
-
Some more progress, more lighting added, more body details with fire extinguisher and jerry can, plus a rear license plate, she's now got a magazine, bottle of whisky, her gun and some smokes, she seems happy! Added the externally mounted battery, made the decision to lose a little bit of performance in order to mount the body and not have to remove it again, I think it's worked pretty good, as a faux toolbox, more details to do yet though. Small lightbar on top, four reasons for this, I prefer the look of a small one, anything bigger was a bit too wide for the curve of the body, it's less weight up top and it's ridiculously bright anyway. I've also made some head light guards, only for looks, I know if they take a hard hit they will probably break. Lemme know what you think so far!1 point
-
It depends on the size of the engine to be honest. Personally I would keep to 16% for any engine sizes from .12 .15 engines and possibly RTR grade 20% in a .18 engine. (depending if it tunes ok) I would use 25% in .21-.28 engines in a buggy/truggy and possibly 30% in .28 engines and above in something like a monster truck. (again depending if it likes it. A friend of mine pointed out the Losi XXL .28 loves 30% - which I now use instead of 25%. Other engines/MT's may not take to it as well) The basics on fuel/plugs: The more nitro content, the cooler the plug you will need. (thicker element to cope with the higher combustion temperatures from the higher % nitro). Colder plugs can be a bit ropey and harder to tune though. For fuels with nitro content 20%-25% I would use a medium or medum-hot plug, depending on how the engine is running. For fuels 16% and less I would use a hot plug. Generally higher nitro % means you will need a colder plug to get a consistent tune and the lower the nitro % fuel you will need a medium - hot plug. Also, check your engine manufacturer as some engines may need an additional head shim to cope with 30%+ fuels. Now for the technical part..... Big block engines (.21-.30+) running on 30% fuel can and will run cooler than the same engine running on 20% fuel if tuned properly. It varies by fuel brand and how much oil is in the mixture (and castor : synthetic ratios) but generally a higher % nitro means you can run a bit richer, but still get good power delivery because of the higher nitro content in the fuel by volume. Because you are running slightly richer your engine will run cooler as the oil in the engine (and to some extent the evaporation of the nitro/methanol in the fuel)can transfer heat out of the exhaust. However, running richer can foul up your glow plug if you havent got your tune spot on, so be aware of that. A lot depends on ratios and there are going to be a lot of engine /fuel / air mixture combinations so take what I am saying with a pinch of salt and experiment on your own set up specifically. However......Smaller engines cant retain heat as efficiently as a bigger engine and so generally need lower nitro/oil % in their fuel along with a hot plug to aid combustion (as the combustion chamber is smaller it cools down a lot quicker so a hot plug aids the fuel to combust as does the lesser cooling effect from less oil / nitro % in the fuel. Also a smaller engine on a lower fuel % will generally need to be tuned a bit leaner. Now if you introduced 30% fuel to a .12 engine you would not be able to run rich as the engine would not be able to retain enough heat for the fuel to keep combusting (I think you would struggle even if you tried using a cooler plug). It would just bog down and stall, but if you did manage to get it going, I doubt it would run very well at all. The other side of the coin is if you lean it out the higher nitro % would mean the combustion generates far too much heat, the result of which is your glow plug melts away (hotter plugs use thinner elements) and/or you cook your engine. If you used a colder plug and run lean, your engine may run, but it would run so hot it would cook itself after a tank of fuel. Either way 30% fuel in a small block engine is never a good idea. Hope this helps. Cheers1 point


-
Member Statistics