
Leaderboard


Popular Content
Showing content with the highest reputation on 14/10/20 in all areas
-
Printed new inner fenders for the front of the UMG10, plus a set for one of the members here.
 4 points
 -
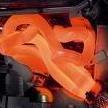
I'm going to change the transfer case, so I gain space and a lot more. I have screwed it to the battery tray, and it is perfect, now it is to cover the bottom, I will make a type plate to the A&M Garage hehehe Untitled by alberto espinosa, on Flickr Untitled by alberto espinosa, on Flickr Untitled by alberto espinosa, on Flickr Untitled by alberto espinosa, on Flickr Untitled by alberto espinosa, on Flickr Untitled by alberto espinosa, on Flickr3 points
-
Hi All, I posted some pics on the model thread recently that showed some progress of my workshop build. They seemed to be quite popular, so figured maybe I would do a thread of the progress. Hopefully I do a better job of this than my RC build threads 🤔 Anyhoo, some backstory. I tried to buy a house recently, but failed at the first hurdle through being a limited company contractor... good luck getting a mortgage in this economy, regardless of if your books are healthy or not. The house itself had a wonderful built in workshop... I missed out. Another one popped up, I missed out again. Feeling quite dejected, and having started building some RC parts and selling them quicker than I could make them, I was desperate for a space that wasn't limited by the weather.... I talked to a good friend of mine who has quite a lot of land, and a few outbuilding they don't use much, and asked if I could use some space to set up a small workshop. At first, they said I could use an old dog kennel which I was over the moon with, but then we started to look at it and realised it was going to take an enormous amount of work to make it so I could actually use it in the winter.... they instead offered me to use one of the old shipping containers they have on their land that are only really used for storage... perfect. An entire 20ft container for myself... they are very good friends of mine, just to add, this generosity is not uncommon for them. Awesome family. The problem, as you can probably see, is that the damn thing is a good 60 odd meters away from any electric. I talked to a friend of mine who does a lot of renovation/contruction etc... very much a "grand designs" type bloke if he could help me out... he was also happy to help whenever he could, inbetween other jobs. We had a few chats with people about how to move it to the new location... which is here: Basically opposite where it originally stood and much closer to anywhere i could wire up some leccy. It wasnt going to cost too much to get a crane in to do it, but the owner said her reletives could take care of it... their house, I'm not going to argue. Only problem is this took a long time, things being as they are, people have to take work where it is, so it took a few months... admittedly I was also busy with other things so it wasn't the end of the world but it has meant that i missed slots with other contractors and now have to work around the second wave of this damn virus.... anyway. In a hilariously Yorkshire farmer fashion they brought some machinery that was marginally well equipped to do the job and threw health and safety out the window... but got it into position. It was entertaining but the thing is level within a mm or 2. Next up I had to wait a little while for my buddy to become available so we could start framing and such. I decided I wanted a personell door, and a window as the normal doors are super heavy, super awkward, and I wanted to feel like I was working in a room, rather than a metal box. The window was easy, picked one up at a local Wickes... the door however proved to be a bit more tricky. The oens that were quickly available had terrible reviews, and calling around local places, the quotes were all a few weeks... which I didnt have. I found a place online that had some "steel garage security" doors that sounded spot on, and no more expensive than typical uPVC doors, even if the insulation would be quite reduced. They told me 3-5 days, which if it had been 3, it would have arrived on time... it was 5. It is what it is, so we cracked on with the window and framing anyway. And this was the end of the first proper work day. Window and most of the framing done. Task for me whilst we waited for the door was to tidy up the expanding foam, seal up the window, change some of the woodscrews for rubber washer screws, and paint it. First I sealed the thing up, but didnt get any pictures, then there was short isolation period inbetween jobs due to my daughters cough (wasn't COVID in the end) and then the weather turned. We've had a lot of rain up here unfortunately. The door did arrive on Monday and I got that assembled, along with attaching a handle to the window. Then I got the inside of the window all masked up and got the frame painted. I opted against masking the outside, and instead just did this for the funsies And then of course it immediately started raining after, so I left it covered up and will check on it again tomorrow, perhaps do another coat of paint if the weather is favourable overnight. .... and that's where I am to now!
2 points
-
There's a Spanish guy on RC scale Scotland of Facebook group who has converted an emaxx into a high altitude crawler - he takes it up steep snow covered peaks in the Pyrenees, his photos look pretty incredible what it gets up.2 points
-
Toyolien is selling his custom SSD Trail King which looks the absolute nuts. It really is a work of art. Someone needs to buy it quick to stop me staring at the damn thing and clearing shelf space.....................2 points
-
Ive no idea how much it’s worth, but I would love to see some pics of it tho 👍1 point
-
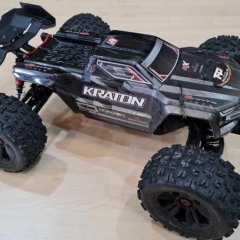
I am some what surprised at this one as did not expect it till weekend at best, or much later as it was ordered from an ebay seller, 60amp esc and 4300kv brushless motor combo for the carnage 2.0..................i am wondering if i might need a wheelie bar next
1 point
-
And the moral of this story is..... never try to be funny when you are drunk.1 point
-
Hi bit more progress to report... The hobbywing 1650kv motor is in, couple or small mods to accept it.. Mostly to the motor mount but also had to trim the rear lip of the chassis a little. Currently on 51/34 gearing but plan to change to 55/34. Also mounted a nice 12v fan, not the most premium fan on the market but for a few £'s it should be fine. Then.. Fitted the one off scale motor and cut and mounted the body ready for paint. Shock caps still not arrived, so no shocks fitted hence the slammed look. Next job.. Paint the body and sort out the electrics 😛
1 point
-
Nice cobra sport, mardave do some nice 5 spoke rims that are a straight swap but alternatives for the rear need a bit of modification because they don't have hexs and the axle is slightly larger than standard, the rims are 2.2 so can take any standard 1/10 buggy tyres iv got some schumacher honeycombs for ours mardave are releasing the cobra evo (slightly updated version of the old cobra) at the end of the month and are selling some update parts for the gearbox and axles but they are pretty much the same as you've got, These are mine and my partners cobras both have 17t brushed motors (which is enough for a car designed in the early 90s)
1 point
-
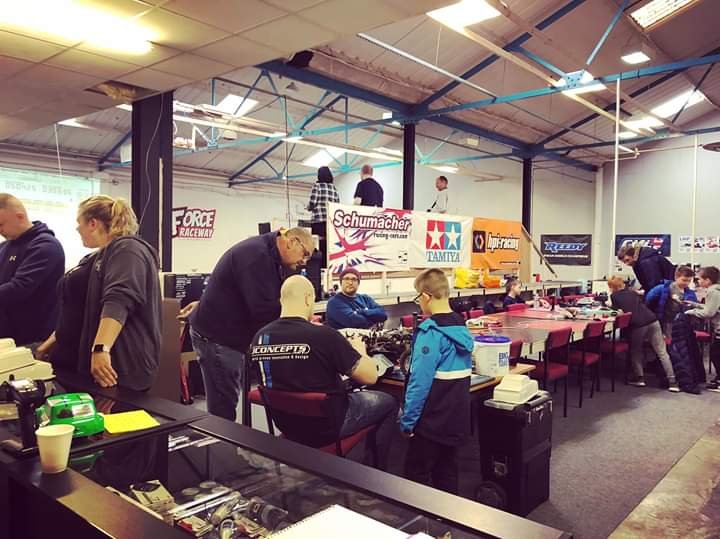
A good track and class for mid week racing would be force raceway at osset (it's an indoor circuit run by a great couple who both race) with either a mardave mini or hot rods (also called hot hatches as they are hatch back bodys) and are also made by a company called kamtec, they are 1/12 scale, they are very cheap on spares and its a good beginners class that's run on a Thursday night. Iv got one several 1/12 mardaves and they are easy to maintain. They also run these at the Yorkshire mardave club. There's a track at Halifax that's outdoor but I don't know if they do mid week racing and there's another track at Wakefield called northern race and drift that do racing on a Friday night that runs mainly tamiya classes.1 point
-
Thanks for the reply. The motor does get warm but I think you’re right about the esc, certainly the weak link in the chain. I did actually buy an Arrma BLX185 combo which I was keeping to put into a Kraton EXB when they come back into stock but might just have to use them in the 8ight instead. Did take a look at yours And looks good but don’t really need a third motor...! 🤣 I have a heat sink on the motor rather than a fan but might look at changing that too if it makes a big difference. thanks for your advice, very much appreciated!1 point
-
Hi @Gaz! thanks for the offer but just looking to get some of my money back on this one. It's such a good servo I'd keep it if it was likely to be any use to me but nearly all my cars are larger scale so it's no good even as an expensive spare. Happy to take offers on it though from MSUK members say around £35? odd. 👍1 point
-
Shame they broke, Looks like the kind that are easy to put rubber booties on to seal the sut and grit out so you can fill em with Corrosion-X grease so they never wear out... Until they actually break that is..... If your Hyper ST is brushless you can use any spare rear upper arm turnbuckles to make sweet extra chassis braces (with the longer plastic bit on both ends for the rear), from the little aluminum tube/space thing that the bolt that holds the rear chassis brace to the gearbox goes through.. To the Unused nitro Brake gubbins hole in the middle of the center diff plate... For connecting the turnbuckle to the center diff plate I use an M3 cap head Bolt through a Ball end like the ones that the turnbuckle is connected to the shocktower with. Then an M4 Nut underneath the ball end to fill in the ole of the center plate. then a thick wide washer, then an M3 Nylock nut from underneath to clamp it all together onto the plate.... I also do something similar for the front so the center diff mount can't be pushed over and forwards from an extreme rear impact. They work great, and have a little give in them to absorb energy rather than just transferring it on to the next part to break.... Might want to fill in the hollow bit of the longer plastic part of the turnbuckle with shoegoo or E6000 though to beef it up ( clean part with 99% alcohol so the goo sticks stronk, sellotape over one side of the hollow, then pour in shoegoo to fill it up)1 point
-
1 point
-
Latest video1 point
-
My V2 infraction1 point
-
Found another nice spot nearby so had to test the big rock out...time for a clean now though
1 point
-
Some parts for a very special TA-02 build. And a second set of VQS Hi Cap dampers, but still no VQS Why 2 sets of dampers for a buggy I don't own and you can't even buy yet? I don't know, this hobby makes no sense sometimes and that's just how it is1 point
-
Jeep body for my son, only it's supposed to be 313mm as advertised so I'm haggling for a good discount or send it back. Sent from my Pixel 3 using Tapatalk1 point
-
finish it as it was intended, sell it hold out for a fair price and then get a proper crawler, lots about , so spoilt for choice1 point
-
Could be a fun project certainly! But depends upon budget and actual final use. I think if you want to go to the woods and trail some then you could probably mix it up and put a slower motor in. But if you want a bit more performance trailing or crawling then you'll need a different model.... Good luck!1 point
-
Hi and welcome to the forum. I’m gonna say sell it and buy a dedicated crawler. The Emaxx is a monster truck, right? It may not even be possible to convert it and if it is, you’d be looking at an expensive build that still probably wouldn’t perform like a dedicated crawler would. Things like axles, a sensored BL system, or a brushed setup along with high CoG would all need addressing, plus a bunch of other things that would cause you headaches. Get yourself a TRX, SCX or whatever suites your budget and jump right into the slow lane, that’s my advice. Good luck!1 point
-
Picking up from where I left off.. Next up were the front to rear horizontal braces, made with 3mm bar. These were fairly straightforward to make...once I got the shape of the first one right, I just used that as a template to make a another. A little tweak was needed on the right brace and that squared everything up nicely.. Next came the main braces that connect the front and rear hoops.. I was running low on silver solder, which was 0.7mm wire that was pretty awkward to use. I’d ordered 2m of 1.5mm rod in 250mm sections, that was at a good price, and postman had just delivered them. Result. This was my first joint using the new rods. They had a much higher melting point so took a little getting used to.. Once braced I took it off the chassis for the final pieces to brazed. I’m really happy with how it’s coming together. The horizontal cross bar went in without a hitch.. The diagonal cross brace wasn’t so easy because brazing on top of brazing is tricky. Not pretty but a good solid joint, and I used the Dremmel to grind back the access later on.. The finish line is in sight with just four small braces to go.. Much neater now I’m getting used to these rods.. The last brace.. And there it is, but still plenty of grinding and sanding to do before it’s ready for paint. Fast forward a couple of hours and it’s looking much better.. It was at this point that I decided to have another go at fitting the mounts for the towing shackles. For some reason I didn’t take any pics of this but if zoomed in you’ll see them on the bumper bar. I even fitted one bent sideways so it looks like it’s taken a good hit and was bent. Painted and fitted. I think it’s looks the dogs danglies, but I would, wouldn’t I 😃 Apologies for the pics, I was running out of day light 🙈 The tyres just clear at full flex 💪 So not much left to do on the body now - wipers need fitting and windows need dusting along with a coat or two of flat clear. I’ve got a fire extinguisher that I might fit to the bed or possibly the cage..dunno yet. And then of course I have to paint the interior, and that’s about it. I’m really looking forward to getting it out and seeing how it performs on the rocks 😃 Thats all for now folks 👍1 point
-
I would stay with stock tyres, on a truck like this, especially on 3s, it's pointless spending out for expensive tyres, they don't handle very well anyway, more grip is going to equal more grip roll and you'll still just wear them out. Spend that £70+ on lipos for more run times = fun times.1 point


-
Member Statistics
