
Leaderboard


Popular Content
Showing content with the highest reputation on 03/03/18 in all areas
-
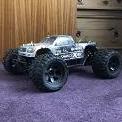
Hey guys. Had this up for sale not so long ago as a roller. Ive put my 4s setup into it, and its now up for sale. I purchased it in 2016 roughly as a roller from modelsport and since ive used it twice. Only on this 4s setup that comes installed. Ive had a few rc's and ive always defaulted to the others before this one. And as of late, my savage XL flux has come into action, again ive not paid any attention to this. Spends more time gathering dust, so would rather it be used by someone. These are rare to find and as such, ive no idea what to ask for it. But i have to put up a price. £350 posted. (Insured posted) Only thing its missing is a charger for the lipo battery. This is in near mint condition as youll be able to see by the pictures. Comes with - Hobao Hyper SSTE chassis (in original box) WP-SC8 4s 120a Hobbywing ESC (installed, on deans) Trackstar 2350kv 4pole brushless motor. (installed) 17/48 gearing (installed) (can change this to a 15t pinion at the buyers request) Turnigy HeavyDuty 4s 5000mah lipo (on deans) Radiolink RC3S 2.4G transmitter and R4EH-H receiver. (installed and configured end points etc) More pics can be found (HERE)4 points
-
Spent around 9 years looking for this - 35+ years of Tamiya History! Although it looks tired and well used, it's mechanically good and thankfully it does not have all the common wear and tear factors. There were a couple of bits missing which have since been purchased. Now it just needs a very long, careful and detailed restoration3 points
-
Took dirty dog on the white stuff.2 points
-
Got my buggy shell sprayed and cut out. Couldn't do much else because of a bent bolt!2 points
-
Tony's Tamiya Parts on eBay and Time Tunnel Models are two good UK-based sources of Tamiya parts. Both have direct links with Tamiya Japan, so anything they don't have in stock can be sourced quickly without having to wait for distributors.2 points
-
Scott Finlay [emoji106] Sent from my iPhone using Tapatalk2 points
-
**March 2010 Thread Update** General First of all, LiPo cells are no more dangerous than any other kind of cell (NiCD, NiMH etc). All cells will fail if mistreated or misused. LiPo packs come in two flavours, hardcased and softcased. Hardcased have a tough plastic box around the pack internals, and they are resistant to most impacts. They are usually more expensive than softcased packs, but they are vastly safer to use. Hardcased will have connectors either sunk into the pack itself, or on wire. Bear this in mind for what car you'll be fitting it into. Hardcased packs can be modified slightly though, to aid fitment. C-Rating is something else to consider. When looking at packs, you'll see a couple of numbers, such as '5000mah 30C'. This is the amount of current the pack can supply under load. You'll need to do a bit of maths to work it out. 3.8 x 30 = 114A 4.8 x 15 = 72A The resulting number is an indicator for how ''punchy'' the pack will feel when driven hard - the higher the number, the better. Do the maths and work out which will be better for you, as a lower capacity/high C pack is better for racing than a high capacity/lower C pack, but will be the other way around for bashing. C-ratings aren't the only thing to look at when buying a pack though. Some people will say ''A 30C pack is all you need''. This statement is very misleading and potentially dangerous. For example, say you have a car with a brushless system which is rated at 120A. That means, you need a pack which will supply 120A when asked. So, you should try a look for a pack which exceeds this requirement. This can be done with a combo of higher capacity/lower C-rating, or lower capacity/higher C-rating. However, don't automatically think that a high-C-rated pack wil always be enough. For example... If someone said you'd need a 30C pack to power the 120A system, it may sound like any 30C pack would do. Is a 1500mMAh is OK because its 30C? It definitely isn't OK. 5000MAh (5.0A) x 20C = 100A 5000MAh (5.0A) x 30C = 150A 4000MAh (4.0A) x 45C = 180A 1500MAh (1.5A) x 30C = 45A As with most stuff, the more you spend, the better the pack. Beware of packs with soft cases, and packs with suspiciously good numbers from the Far East through eBay (a lot are just made-up numbers). If you use a pack that can't supply enough current, then the pack will overheat and fail with spectacular consequences. Charging The method most LiPo chargers use, is the CC/CV method. This means that the user inputs the charge rate, cell count and/or capacity, and the charger will then charge the pack in the following way: - Charge to peak voltage (3.7v per cell) at max charge current (1C normally) - Holds the voltage at 3.7v per cell until the pack is approx 80%, lowering the amperage constantly - ''Fills up'' the remaining capacity while keeping the voltage the same For all packs and applications, charge at the rate of 1C. This means that 100mah = 0.1A. 3600mah = 3.6A 4000mah = 4.0A 5400mah = 5.4A etc. Expect the charging times in the 20 to 75min region. Some packs can be charged at 2C, 3C or even higher, but the overall useable life of the pack is drastically cut (from 500+ cycles to 100ish cycles), and there isn't any performance benefit to charging higher (just decreased charging times), so its not worth it You can balance charge packs too, where each individual cell in the pack is charged on its own. This requires a dedicated balance charger, or a separate balancer. You don't need to balance charge on every charge, but depending on the manufacturer, you should do so every 50 or so charges. Double and triple check all charger settings (cell type, capacity and voltage) before starting the charge. Discharging LiPo cells do not need manually discharging as they don't suffer from the memory effect that NiMH or NiCD's used to. They should never be allowed to drop below 3v per cell. When this happens, there is an irreversible chemical reaction inside the cell itself, the the cell expands. The cell will now be fit for the bin. For general driving/bashing, you should use a Low Voltage Cutoff (if your ESC doesn't have one built in). This is a device that is wired inline with the ESC and receiver, and alerts you to when you approach the 3v threshold (by LED or buzzer). If you are using LiPo cells for 5 minute races, you don't need an LVC. As the design of LiPo packs have such a flat discharge curve, its easy to see when the pack is low on capacity. If you are driving and the car starts to slow down, then stop immediately, and remove the pack from the car. If you are storing LiPo packs for up to a year, its best idea not to store them fully charged, but neither at 3v/per cell. Just charge them like normal, then have a quick 3-5min drive, then put into storage. When you come to use them again, check the pack voltage on a multimeter before charging. Disposal When a pack comes to the end of its useable life (or the pack fails and puffs up), there is a simple method to make the pack safe for disposal. This is tried and tested but both car and aero LiPo users. - Attach the pack to a low drain across the main terminals (like a fan, lighting kit etc), in an open area. This is to discharge the pack to 0.0v. - Fill a plastic container with tap water, then add salt to it. Lots of salt, around half a cup per gallon. Then, submerge the pack. This is to neutralise the chemicals as much as possible, and to dissolve the aluminium tabs that connect the cells in the pack. - Leave for 7 days to completely discharge, then wrap in newspaper, and throw away in the household rubbish bin. ------------------------------------------------------ Found this online. Its aimed at the Flight guys, but it can all be applied to car use. Use it in addition to the LiPo section in out Electric Guide. Click here. Feb 2008 update - BRCA Guidelines http://www.brca.org/BRCA/elecboard/news/20...r%20Website.htm To dispose of a LiPo, you need to discharge all the cells in a pack to 0.0v using a small load, something like a fan, an LED, a motor etc. Then place it in a salt bath to break the connections inside the pack and remove the last remnants of the energy. I've read about cutting the cells slightly at the edges of each cell, it lets water into the pack, but I don't know the effects of that.1 point
-
NiMH Rechargeable Batteries This guide, has been compiled from a few different guides and added to by me for the forum As some members, and also new members to come who are just entering the hobby are still making use of NiMH batteries, wether for the RC itself, or your transmitter, this brief guide may help answer some questions Links to other related guides are highlighted in orange! NiMH batteries If you’ve ever bought an RTR RC chances are you've used a NiMH battery at some point, maybe you also use NiMH AA and AAA devices in your life, you’ve probably at least considered investing in some rechargeable batteries. NiMH cells have soared in popularity as devices have become increasingly wire-free, and thus battery-dependent. Wether your using them for RC or for any other device, Rechargeable NiMH are a great idea all around: they save you the hassle and money of repeatedly buying throw-aways, and also keep those single-use cells out of the landfills. How NiMH batteries work A NiMH battery consists of two metal strips, which act as the positive and negative electrodes, and an insulating foil separator that goes between them. This delicious energy sandwich is coiled up and placed into a battery canister along with an electrolyte liquid. The positive electrode is typically made of nickle, the negative of a metal hydride, hence the name “NiMH” or “Nickle-Metal Hydride.” Put that dead battery into a charger, though, and the electrical current reverses the discharge process. Electrons are pulled out of the positive electrode, causing it to oxidize and release hydrogen. At the same time, electrons are put back into the negative electrode, and it absorbs hydrogen. In the case of an extreme overcharge, any excess hydrogen gets vented out the top of the battery—look closely at the cap on your rechargeables and you’ll see the vents. How to keep your batteries healthy-the facts and fiction In talking about rechargeable batteries, there are two terms that get debated endlessly: “memory effect” and “voltage depression.” With even a quick search, you’ll find all sorts of conflicting information on both phenomena, but few scientific tests to confirm them. Complicating the issue further, these two problems make for excellent scapegoats, and are often blamed when batteries suffer any kind of failure. So what are these issues, and do you need to worry about them? Some people don't know that NiMH batteries do not have a “memory effect” —it’s a issue only found in Nickle Cadmium batteries , and even then it’s difficult to replicate. “Voltage depression,” on the other hand, can happen to NiMH batteries, though it’s questionable how noticeable it is . When a battery is repeatedly overcharged, small crystals form on the electrodes, inhibiting their ability to complete that important chemical reaction. As a result, the battery’s voltage drops. And even though that drop shouldn’t affect the battery’s capacity, it can cause a device to think the battery is losing charge faster than it truly is. For both conditions, the standard advice is to discharge your batteries completely, then recharge them. And while that is a sound treatment for both “memory effect” (in nickle cadmium batteries) and “voltage depression,” it’s also an easy way to damage your NiMHs—over discharging can cause “ pole reversal ,” which permanently damages a battery. Some electronics are made to prevent this, shutting down before reversal can happen, but simpler devices like flashlights often don’t. So how should you actually handle your NiMH batteries? Past all the confusion, there is some very solid, consistent advice about getting the most out of your batteries. 1. Be prepared to replace them, eventually. NiMH batteries don’t last forever, and though time and use they will stop working. Thank them for saving you money, recycle them, and move on. 2. Buy the best charger you can afford. You don’t have to spend a fortune on the best charger available, but make sure you get a “smart” charger, one that electronically monitors the recharge process and prevents overcharging. Not only is it better for the batteries, it will use less power than cheap chargers, which often rely on a simple timer mechanism. 3. Don't overcharge, don't under (trickle) charge Nimh batteries should never be overcharged, the maximum capacity for any NiMH battery is 120% (which is what your NiMH charger SHOULD charge your NiMH batteries to before auto shut off, @Rudd looking at you) And in the same breath, NiMH batteries with a capacity above 900mah should never be charged below 0.5a ( referred to as trickle charging ) as this fails to enable the battery cells to absorb voltage in the same way as if a higher current of charge as applied, which can itself lead 'ghost' charging (when a battery appears full but is actually storing very little energy ) and capacity depletion on a more accelerated scale. 4. Remove the batteries when the recharge is complete. Unnecessary time on the charger means more “trickle” power is used to keep them charged—so more wear and tear and more wasted power, also heat starts to build in the cells, further damaging the electrolyte compound contained within. 5. Don’t regularly discharge your batteries completely in an attempt to make them last longer. Despite all the advice to the contrary, complete discharge can actually shorten their lifespan. 6. Store your NiMH batteries at room temperature in a dry location. Excessive heat can definitely damage your batteries and cause them to lose charge faster. 7. Consider using low self-discharge battery model for your transmitter. Eneloop is the best known brand of these batteries, which unlike most NiMH cells don’t lose power as quickly when sitting on a shelf. If your rechargeables are ready to go, you’re less likely to fall back on the throwaways. 8. Cell packing? Some may have heard of battery cell 'packing', a useful way to enable you to get the most out of your NiMH batteries everytime you charge them for use....basically put in an example here; Slow charge your NiMH battery the night before using on 1a current, charge until charger declares the battery full, then leave it to rest overnight....when you wake you should take the battery and charge it again, this time on 4a, for a brief period (around 20 minutes or until the battery gets hot) This, in essence, is 'packing' the cells with a truly full charge Now I'm off to recharge myself....with a coffee.. HOW DO I STORE MY Nimh BATTERIES?? well the answer to that question depends on a few factors, type of nimh batteries, storage timeframe etc etc.... So I'll do my best to break down the info so its easier to read First point to remember, not all NiMH batts are created equal! • Storage temperature and humidity Any type of NiMH cells need to be stored between 10-25°, if the temp is too high then self discharge will be accelerated, so no storing them in the shed or near a heat source!! And humidity should be roughly 40% , a great way to achieve this is too store multiple NiMH batts in a large Tupperware with a tobacco humidity disc popped in with them.....that's the fundamentals covered. • Storing standard NiMH cell packs (short term - under 8 weeks) If you plan to store your standard NiMH cells simply until the next weekends bash, then it couldn't be simpler, just ensure your batteries are roughly 60-% charged at time of storage and simply charge as usual the next time you use them. • Storing standard NiMH cells ( long term - 8 weeks to 10 years+) if you're planning on storing NiMH cells for a long time, simply ensuring their at 60% charge level is not the end of the job...... Why?... due to self discharge ...... So you're going to check your batts every 8 weeks to ensure the voltage doesn't drop below 20%, you'll probably see a small drop in voltage across the pack if you stick to checking every 8 weeks. • Why shouldn't I let the batteries go below 20%? Nimh batteries should not be left to drop a significant amount in voltage, known as under-voltage, as over time it causes a decrease in the cells capacity To better understand this technically, we can look at the reason why standard NiMH batteries self discharge when not in use The reasons for this self-discharge of Nickel-Metal Hydride batteries are as follows: The core of the NiMH cell contains a hydrogen atmosphere which is a at low pressure, this gradually reduces the active materials at the +ve electrode, resulting in a reduction of cell capacity. Accompanied by this, the -ve electrode which is thermo-dynamically unstable in its charged state gradually emits hydrogen gas, also reducing the cell capacity of the NiMH battery. The active materials contained at the +ve electrode whilst in its charged state self-decompose, causing the cell capacity to decrease. Impurities within the NiMH cell, especially the nitric ions, are reduced at the -ve electrode and are attracted to the +ve electrode where they are oxidized. This also contributes to the resultant reduction of cell capacity. • Cycling No need to worry...not the kind that involves lycra ....cycling is the process of slow charging at 0.5-1A until full, then slow discharging at 1c back down to 60% , then repeat three times. it will be necessary to cycle the battery in this way after prolonged storage to, amongst other things, restore capacity. *non standard NiMH cell batteries ( twicell, Low.Self.Discharge) As technology improves, more companies are offering LSD NiMH batteries (Panasonic,varta etc) Which does exactly what it says on the tin! Nominal self discharge enables the user to store the cell at virtually any voltage for extended periods of time, although they may take 7 cycles to recover capacity if stored at a greatly reduced voltage The following information on how to format a new NiMH battery only relates to formatting a NEW NiMH battery Why is my new NiMH battery giving depleted runtime and won't take charge??? This happens to most nickel based rechargeable batteries, and is caused by a settling of electrolytes within the internal composition. This can be rectified by formatting a battery. Below is advise in formatting a new battery from a well known manufacturer We advise to trickle charge a nickel-based battery for 16–24 hours when new and after a long storage. This allows the cells to adjust to each other and to bring them to an equal charge level. A slow charge also helps to redistribute the electrolyte to eliminate dry spots on the separator that might have developed by gravitation.Nickel-based batteries are not always fully formatted when leaving the factory. Applying several charge/discharge cycles through normal use or with a battery analyzer completes the formatting process. The number of cycles required to attain full capacity differs between cell manufacturers. Quality cells perform to specification after 5–7 cycles, while lower-cost alternatives may need 50 or more cycles to reach acceptable capacity levels.Lack of formatting causes a problem when the user expects a new battery to work at full capacity out of the box. Organizations using batteries for mission-critical applications should verify the performance through a discharge/charge cycle as part of quality control. The “prime” program of automated battery analyzers (Cadex) applies as many cycles as needed to attain full capacity.Cycling also restores lost capacity when a nickel-based battery has been stored for a few months. Storage time, state-of-charge and temperature under which the battery is stored govern the ease of recovery. The longer the storage and the warmer the temperature, the more cycles will be required to regain full capacity. Battery analyzers help in the priming functions and assure that the desired capacity has been achieved.1 point
-
Since the early days of comp crawling, I've always attended comps with my dad. We built identical Newbright Jeep JK's back in 2012 and since he's just finished a Tamiya Knight Hauler I suggested he should get rid of his SCX10, and get a D90. So that's what he did. He did all the work on the chassis, axles and transmission and then handed it over to me for a little body modification and a drop of steel work. So, this won't really be a 'build thread' per se, more of a plethora of photos showing what I've been up to. I'll probably just end the build with a few shots once he's completed the painting etc. Again, we're hoping to get this ready, as well as my Flatbed Hilux, for the G6 in May. He decided that he wanted a flat back truck cab. Not a fan of the usual rounded cab windows, so I got my razor saw out. Excuse the first set of pics. I only had my phone in the garage that night... I used a strip of the left over roof as a brace for the cab back as it perfectly matched the profile. Made up a simple rear cage. Not sure on battery placement yet, but it'll probably go in the rear bed behind the roll cage. And, tonight I finished off the front part of the cage and the roof supports. That's all for now folks. More coming soon...1 point
-
Like taxi drivers and Magic Trees1 point
-
Same here both my orders are still processing. One of my mates works for TNT and he wears shorts all year round, must be a delivery guy thing [emoji38] Sent from my SM-G950F using Tapatalk1 point
-
Had both Definitely a scotty Sent from my iPhone using Tapatalk1 point
-
Bit more done this evening Proper easy instructions. Well happy with that Fit that tomorrow and see if it works[emoji23] This for the throttle too. Not used 1 before so see how it goes Sent from my iPhone using Tapatalk1 point
-
That'd be telling [emoji4]1 point
-
Finished adding the new bits. Including some T-Bone bumpers and anti-roll bars. Just waiting on an ESC before running it.1 point
-
1 point
-
Can always start with the Carnage, build up your confidence and skills, then switch to a levant at a later date if you wanted. It’s only the Levant and a couple of other models that are a miss-mash of parts. Most Tamiyas are straight forwards. And very user friendly. I totally see where you are coming from, I sometimes forget that I speak fluent Tamiya, lol1 point
-
Dont fight the urge mate, go for the ftx (hopefully you get a decent one) and enjoy it, once you gain more confidence with your driving and service/repairing, look for something else to gain further experience. report back on a build thread of your own and I’m sure between us all we can keep you spending enjoying the hobby. its addictive as class a but at least you remain level headed. good set of ear defenders or headphones are a must too1 point
-
may get them myself since theyre so cheap.1 point
-
How about these chassis rails? https://www.ebay.co.uk/itm/2PCS-Carbon-Fiber-Chassis-Frame-Rails-set-For-Axial-SCX10-1-10-RC-Crawler-Car/192405001623?hash=item2ccc3b5597:g:GpwAAOSwc2FaO3rx1 point
-
What was wrong with my answer when you asked this question yesterday?1 point
-
Boxes like these with removable partitions are great for spares. This is just the first one I found, I paid about £5 for mine from Buyology. https://www.screwfix.com/p/stanley-sort-master-organiser/73900?tc=QT2&ds_kid=92700022885049840&ds_rl=1249796&ds_rl=1245250&ds_rl=1249481&gclid=CjwKCAiArOnUBRBJEiwAX0rG_frJZLEBUHHF7xjVgWPFfdIVIItzYIodg1ySssemu3ShX6p4jG57oxoCipoQAvD_BwE&gclsrc=aw.ds&dclid=CMD9truu0NkCFYa3GwodyVQA5A I use this bag for transporting my Firestorm, it's big enough for car, my spares box, tools, transmitter, Lipos and a temp gun with room to spare. I've had mine for over a year and there's no much as a loose stitch. https://hobbyking.com/en_us/trackstar-vehicle-hauler-backpack.html?___store=en_us Tools, I bought a set of Turnigy hex drivers and just replaced the tips with Arrowmax ones as they wore out. The handles are nice to hold. I'm on my way out the door so don't have time to find the link for them but it's these ones -1 point
-
Looking great so far mate, looking forward to having it in hand1 point
-
Cheers mate, might be worth having a spare. My trx4 is running one now, fantastic bit of kit for the full asking price, be rude not to really1 point
-
Its no harder to work with / on than any other RC. At the end of the day dude as you know... its entirely up to you which one you go for. Ive fought the corner for the Levant. Both have pros and cons. Personally as youd expect. I feel the Tamiya is the much better model out of the box. But do understand what your saying about being able to get spares from a local store.1 point
-
This is were things fall down a little. It will take a 2s lipo round pack without modification to the battery tray. It will take a square style pack if you cut the notches out of the bottom of the battery tray. I dont think a 3s battery will fit due to the design of the upper deck. I run mine on NiHM and get decent run times. 2s is more than fine for this IMO. But you will need a seperate LiPo alarm which are cheap enough as Tamiya dont believe in LiPo technology just yet but dont let that put you off. I run a 8.4v NiHM. Ive only ran it on buggy sized wheels. Im still waiting for a ser of tyres before i can run it on the proper wheels and tyres. I used to use a 3700mAh 2s pack These things are fairly quick due to the gearing of them. The normal TB01 has a 15t pinion gear for the crown wheel in the diff whereas the Levant is 13t. Giving more acceleration and bit more torque. The ONLY thing youd need to buy for a decent runner straight away IMO is a Titanium coated pinion gear for the motor or a steel one. Because the standard tamiya one is alloy and made of chocolate. This is a tamiya issue world wide across every model. The standard tamiya pinion gears are alright but they wont last long unlike a steel or Ti coated one.1 point
-
It reminds me of a Bruder model. J1 point
-
Gotta admit... thats pretty cool1 point
-
As above. Was gonna say Tonys Tamiya Parts on eBay and Tamico. The TB01 was abit out there when it was released. Its abit of a heavy weight. So it did recieve some hate. Perfect for rallying because it is solid. But a pretty awful touring car racer in its standard form. Ive only broke 1 thing since 2001. A shock tower - had a head on full speed crash with another car. And thats about it. And ive tried my best to break it at times. The Levant is made up from several vehicles. The main chassis is the TB01. The arms are off the TNS. The rear hubs carriers are the TA05. So people may not list spares as for the Levant. But other models will fit it. Out of the box youll be getting a 16t brushless tamiya motor with matching ESC, huge 110mm diameter offroad wheels/tyres. A chassis that can take a hit from a space rocket and survive. Dont worry about parts support. There will always be something around. The ONLY thing that are getting abit thin on the ground are official Tamiya Hop Ups for the TB01 and they are starting to command silly prices for some of them. But the Levant doesnt need them. Its fully ball raced and comes with a upgraded alloy motor mount, steel prop shaft and machine screws throughout rather than self tapping screws. The diffs are metal and fully bomb proof. Forgot to say... it also comes with full ball mounted shock absorbers and steering connections so there is next to no slop in an of the steering. The diffs are filled nicely with Tamiya Antiwear grease and shocks are nicely done with Tamiya shock oil.1 point
-
Yea you should be fine assuming you can tune out the osilations.1 point
-
Message this guy mate. I bought a new unused Honcho body and front bumper from him last week. I collected as I live nearby. He had a couple of bumpers left. Don't know if he has the metal plates and light buckets though. Nice genuine guy. https://www.ebay.co.uk/itm/1-10th-Axial-SCX10-RC-rock-crawler-parts-prices-are-for-each-individual-item/323085428397?ssPageName=STRK%3AMEBIDX%3AIT&var=512197893883&_trksid=p2055119.m1438.l26491 point
-
Excellent job Nikki. All your hard work and effort has really paid off. You have talent my friend. Well done. Big thumbs up1 point
-
That was a great advert. It just made you want to go.1 point
-
Wouldn't bother with the Blackout, my friend runs one and it breaks every single run, it's not even used hard, nowhere near what our Bajas and Losis take, it doesn't run long enough to take any kind of abuse1 point
-
Last thing I’ll say on this as you have loads of info already. I like the FTX and have no reservations about recommending it. But.... if I was in your position I’d buy that Tamiya. It’s a great price. Same/less money than the brushed Carnage and probably better performance being that the Levant is brushless.1 point
-
So, here's the last part of the original bodyshell's renovation saga. I finished it a few days ago but with the kids off this week due to snow I haven't spent much time online these last few days. I don't like to see overspray and a messy interior in my bodies, they don't need to be as good as the outside, just clean and tidy. It isn't much extra effort to finish the whole thing nicely Two views below, one with windows and jerrycan handle fitted, and one without, I have no idea why the green came out as different shades The jerrycan restoration was fiddly and tricky due to the complexity of the moulding and the material of the separate handle. It didn't take too well to the paint stripper that I used on the bodyshell and I had to work quickly to save it from melting. I noticed it was softening so I washed off the paint stripper and scraped it back with a craft knife until it was stable then sanded and filed it carefully a few days later once it was properly hard again. As it is now it's a little bit misshapen but still acceptable. It snaps into place. The rear window of the cab has nothing at all, I glued in some plastic net for the utilitarian lightweight style. Painting the details on the rear luggage boxes took a long time and they're also not perfect but look good from a distance. I just couldn't resist the hay bales when I was buying paint in the model shop! The sidelights and indicators were difficult to paint nicely as well. Too much paint would make the detail disappear and too little left green showing through. I rubbed a little silver paint onto the white sidelights to make them look a bit more greyish and realistic. Cute little stainless nuts and bolts with matching wheelnuts finish off the wheels. I really like the style of the tyres too, just like the real thing. I've fitted a nice springy type antenna just for looks, and cut out the windscreen wipers from the standard Tamiya decal sheet. I have plans to fit tiny scale wipers to the standard shell (when I find time to start on it) The headlights are green to match the Lunchboxes green headlights, and until I do a little photoshoot of them both together I'll reserve judgment on how I feel about the way they look. The John Deere style sticker on the bonnet is just a bit of fun, and if anybody asks, those two deer are just being playful, ok! I tried to paint the Mitsubishi lettering and the little triangular badge on the grille but I just wasn't able to paint such tiny things to a good enough standard. I decided to leave it and have a think, but it's grown on me since. I think a spare wheel would look the part and I'm on the lookout for a set, for this shell and the standard one. The shell is just sat on top of the chassis for these photos. I have big plans for the chassis renovation/modification, which is going to be the next job that I tackle. It's taken me about 20 hours and maybe more but I've learned a lot doing this renovation. It should stand me in good stead for when I do the standard shell. Nikki
 1 point
 -
Scott Finlay all day any day especially over an OBR or if you can flex your budget a Finlay Evo-341 point
-
I quite like it1 point
-
The problem is a lot of "decent" Rc's are not really any better.... There's a lot of people out there that end up upgrading various bits on much more expensive cars only to end up with nothing that's really any better than a fully upgraded cheapy but are on the hook for £500-600 or even up to a £1000 instead of £300. Overall design and construction matter as much as materials.1 point
-
Fair point. Whilst I would hardly describe Tamiya ownership as a state of misery, I don't want to be responsible for anyone's disappointment if they buy one and then decide it is not their cup of tea after all. I shall say no more on the matter.1 point
-
Managed to get out in the last of the snow yesterday. Obviously I aimed for that gap in the bench at the end of the vid1 point
-
Got a little done while the man cub was asleep Fitted the diff in the rear bulkhead Rear centre shaft attached to with tlr cup link Also just been informed my engine is ready ALX SUPER40 Sent from my iPhone using Tapatalk1 point
-
Just a little test run today. First time the Firestorm has seen snow. We're in for more tomorrow and I planned to take it somewhere I could have a proper play, unfortunately a stripped spur has put a stop to that idea1 point
-
Had a bit of a dusting overnight so had to get out!1 point
-
Isn't everything overpriced in the uk tho? There will be nothing left soon. God help our future generations.1 point
-
£120 vs £300. A bit like saying to people yes you can get a Ford but why would you when you could buy a Porsche. Are Fords cheap tat? It is all relative. If they were that bad why are they one of the best selling cars? Is a £300 3x better than a £100 car or is it a case of deminishing returns? I hear many ‘mowners’ of Traxxas cars calling them ‘money pits’ and agreived at their levels of durability. In fact I would probably take a FTX over a mini Revo at the same price. While FTX prices are a significant factor it can’t be ignored that if they were that bad, people simply wouldn’t buy them. If I had to spend £300 on a car I wouldn’t get into RC. The FTX range makes it an accessible hobby. They are easy to work on and parts are very cheap. Cheap ‘tat’ or not it’s unreasonable to dismiss them and not appreciate their place in the market.1 point
-
I'd still say get some spur gears, I've killed mine through a heavy nose landing causing the motor to slip and the gears to be out of mesh which slowly kills them over the run, a correctly mesh drive would take months to wear out even with HUGE power. It all depends on how you drive and where, I've broken the steering arm twice but never popped a shock cup or lost a dog bone (yet) Get them in some open space with few obstacles until they get used to controlling them, steering when the car is coming towards you is normally what catches newbys out ?. Nothing is indestructible, they are very strong though comparer to others. Drive them lick they're stolen, but you still want to get away and make it to the border! ?1 point
-
From yesterday From last week1 point
-
Well 1st play went about 90% fine (almost lost it in a hedge) but im chuffed to bits at 1st I was finding it hard to control hence the hedge incident. But got the hang of it quickly learnt to ease off the throttle. Took me a couple of times to work out how to reverse the thing lol. Dead impressed got half an hour out of the included battery but I was only doing a training session so getting used to turns and control had a few straight line full throttle runs and bloody hell this thing moves even did a few jump's and got quite a bit of air time. I'm 10 years old again [emoji16][emoji16][emoji16][emoji16] Sent from my G8141 using Tapatalk1 point
-
https://www.jazrider.com/steel-universal-drive-shaft-125mm158mm-for-tamiya-114-tractor-trucks-black-p-90068040.html These the ones? If so they certainly look the part and their cheaper than the stock plastic ones! I’ll do some measuring to make sure they will fit Oh and shell you like is his basher shell, even reinforced it with some shoe goo and gorilla tape... Its going to need another repair after yesterday tho
1 point


-
Member Statistics
