Leaderboard
Popular Content
Showing content with the highest reputation on 16/07/14 in all areas
-
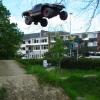
No one else think this looks fake? + articulated lorry trailer = 18.75M = 61 1/2 feet (ish) x 2 = 123 feet.... + the tractor unit + how much ramp it over flew... = new record if it isnt fake?5 points
-
the problem i've seen isn't with the shells, its with the guy that makes them, his attitude is aweful3 points
-
Just put a new one on and ignore Jony 'two nuts'....perhaps he's compensating for a cruel deal from mother nature.... Oh, and as it is such a gift TWSS!2 points
-
Could just be some crud in the pull starter. Try giving it a clean... If it's totally broken new ones are not expensive2 points
-
2 points
-
2 points
-
I think the nearly 50mph wheelie down my road confirms that mines running right!!2 points
-
2 points
-
My few week old HPI 4.6 TT w/ Proline Badlands on 1/2" offset Desperado wheel's. First few picture I took just before adding first fill up of fuel to idle a couple of break in tanks. http://www.msuk-forum.co.uk/gallery/image/29841-hpitt-003/ http://www.msuk-forum.co.uk/gallery/image/29840-/ http://www.msuk-forum.co.uk/gallery/image/29839-/1 point
-
1 point
-
Awesome! http://www.mcdonalds.co.uk/ukhome/promotions/thechickenlegend.html1 point
-
so after my initial excitement this is clearly fake lol watched it several times now, boo hoo. it's in the air that long the packs will be dead lol that and it's out of range! :D1 point
-
1 point
-
1 point
-
My brother has the older X1, its built like a tank. If it were me, i'd get the X3 over the hyper 7, much newer design and just as strong if not stronger. But i would get the kit as its much stronger with all the upgrades and race ready, plus i would want a good .21 engine and use my own servos rather than cheap RTR servos that likely need replacing anyway.1 point
-
if you cant touch the motor for more than 2sec you don't need a temp gun to tell its hot. Lol1 point
-
You need a temp gun really, before anyone can say yes or no. My motor is always pretty hot after a good run, and my LiPos can be warm as well, the ESC is usually cold due to the fan. Something that feels hot to you may feel cold to someone else, so you can't judge it on touch alone really. Grab an IR temp gun and see what they're actually running at.1 point
-
Just back from holiday so not had much to do with mine the past few weeks runs like a bag of nails at the moment and will not tune something like this with 50mph would be cool..1 point
-
Box stock on grass they still run a bit hot even on a NiMH. Losi clearly tested the M8T on packed dirt tracks, where the temps are probably OK on the NIMH pack.1 point
-
Springs are available in different strengths/thickness, they are normally, 0.8mm(very soft), 0.9mm (soft), 1.0mm (normal), 1.1mm (stiff) the different springs are used as a tuning option, with the softest springs usually used on a low traction surface and the stiffest (1.1mm) usually used on high traction surface such as grass/astro The softer the spring the lower the RPM when the clutch starts to engage and vice versa. As far as I'm aware, all 3 shoes springs are able to be used with any 3 shoe clutch set up, though i could be corrected as this is just my experience from running various 3 shoe set ups.1 point
-
did you look under the batteries hardcase section? http://www.hobbyking.com/hobbyking/store/__411__85__Batteries_Accessories-Car_Hardcase_Packs.html1 point
-
Yes mate! A big difference, lipo's produce more power and run-time and need less maintenance compared to a NimH/NiCad etc. personally I wouldn't go the lipo route just yet if your boy is just starting to learn, but if not, then whack away and be sure to read up on all the technical malarkey.1 point
-
Run times will be longer with lipos. Not sure if the brushed ESC on those cars are lipo compatible. Are you going brushed or brushless BTW? ps I found suicideneil's tutorial on lipos very useful.1 point
-
Yeah that is quite peculiar! Did you check to see if maybe the little black o-ring is missing? If that little part isn't inside the drive cup it may (and I stress may!) allow the shaft to wiggle around a bit too much causing it to pop out. Even then... that is still pretty crazy! Also just FYI I'm actually on my 3rd front center dogbone. Not due to them magically disappearing but from the pins getting worn out. Once you start running some massive power through the drivetrain (and you've upgraded to the HD drive cups) they become the weak link... I'm actually tempted to try out the Integy billet option parts next time I order a set. May latest dogbonE is actually holding up pretty well though so I don't know when that'll happen. Mike My WR8- CC MMP, CC 3800kv & 3s all the time1 point
-
hi sorry just seen your post heres the link http://www.rccarshop.co.uk/index.php/rtr-models/team-durango/team-durango-dex210-race-ready-rtr-red-5388.html1 point
-
Well checked everything over last night whilst installing new shaft and everything is as shud be. No cracks, bends or breaks any where...guess im just lucky like that! Really hope i never need it too but rather have one and not need it than need it and not have it and for just under a fiver each its not gonna break the bank ( but the upgrades list will soon take care of that1 point
-
Same has happened to me a couple of times. +1 on remove and clean the pull starter - easiest option. Al.1 point
-
Any standard metal pipe will be more hard wearing than plastic, they can normally be picked up for the price of postage from people on here, I have one lying around if you wanna pay the postage to try it? If you want better quality, the go-to pipes are/used to be JP pipes, 1-4 (might be a 5 now) all giving different power curves. Expect to pay minimum of1 point
-
Thanks for all your help guys I'm now out of questions Will order the last couple of bits and get to work!1 point
-
That explains why the burgers always look like they've been thrown together if that's what they do with them Cracking jump that, what truggy is that, D8T? Thanks AJ, I now know what it is lol.1 point
-
1 point
-
The rear section has been beefed up quite a bit. The flat plates are not flat...but are U section, with thick weld fillets to beef up the sides. They are welded into the centre and cross beams at the back. This is rock solid. The cage also bolts to the 2 upper mounts the standard chassis uses with brackets. What I noticed was the rear chassis plate flexes a lot, and really needs the extra top braces to the engine. The cross bar at the back is threaded through the tabs holding the upper brace brackets, and is lined up for a direct line to the engine mount point. When it's all bolted up, it would have the same level of support as a stock chassis. On a stock baja...remove the two bracing plates either side, and you'll see what I mean! I may add an extra centre brace from the lower chassis up to the rear cross brace though. Weight wise, it's not too bad. A lot less weight than a full cage...but will still weigh in a bit more than a stock Baja I would guess. Once it's all there, I will pop it on the scales and see. Ultimately....as far as strength goes, there is only one way to find out1 point
-
If the ESC is ok just get a new motor. Sensorless, 9T, UK stock,1 point
-
Brand new Axial 2.4ghz removed from a Honcho scaler. Transmitter,receiver and bind plug1 point
-
Kinky! Then without seeing it in the flesh, it's hard to say. Got anyone local that can have a go?1 point
-
1 point
-
damn this heat....I can't deal with it...and today, neither could my welder! I have a bit of grinding off to do after the power supply got too hot and started to pack up. Not the welding current...the secondary supply for the wire feed. Had to leave it to cool down. Still made some progress though Actually don;t have a lot more to do. Started by lining up where the rear section would sit. I wanted the cage to line up with the rear section of stock rollcage using the 10mm ID tubes from the rollcage mod already in place. Makes the back half easy to pop off, and means the engine can come out the back if I need to remove it. Gentle bends in two tubes, and they slotted in to the tubes nicely. Then I could tack them in place and remove all the melty plastic bits! I've also welded in the front bars and a cross section for show. I found some quite narrow tubing which looks a treat in there. The rollbar sections have been properly welded up, and the roof braces tacked in. I have also done one side of the floor bracing. The other is still to do. two braces support the rear section from either side. I didn't go mad here, as I wanted the pullstart unobstructed. There will be a cross brace across the two top rear bars where the plug sits, plus some extra tubes welded in to cross brace the sides. My fuel tank has arrived, along with a plug in closable filler cap for the fuel pump. Neat! Also here is a hyper ST radio box, battery tray and servo tray set for the princely sum of1 point
-
Had first half pack on Tarmac then felt motor and wasn't even warm as I could put my lip on it then second half tested on grass at side of my house and once lipo run flat tested again and again could put my bottom lip on the motor no problems Don't ask why I used my lip but it just seemed like it was a sensitive part to use no Noj I wasn't putting any other sticky out body part on it to test missus wants another baby1 point
-
The stock spur is a 62 ?? and traxxas pinions are 48dp not 0.5 so did you swap out the spur for a traxxas one ?? This is now becoming more tempting sorry Noj but i might get one and start moaning like a biatch!!!!!!!1 point
-
They might run a short course class at this club starting up. I reckon i might be up for that. http://www.msuk-forum.co.uk/topic/196540-new-indoor-carpet-track-cornwall/1 point
-
We used to have a cat that had 3 legs most of its life after someone ran it over, you'd be amazed at the heights and areas he could get to with 3 legs1 point
-
Topic Locked due to bad trading practices. If I hear of anymore ads going up or problems there will be restrictions placed upon your account1 point
-
Yeh you can lower the duel rate so you can't use the full range of the throttle or steering it is on the transmitter you get with the carnage1 point
-
I'm sure theres a sensitivity dial on the standard radio, so you can limit the throttle. (Next to the steering trim). HTH Dave Edit: As above, I wasn't quick enough haha1 point
-
No problem Guess I should post a pic of my new SCTE Just waiting on ordering a esc (should be next week) Practice/Bash shell I've also got another shell at the painters getting some proper paint1 point
-
I'm assuming if you've not done this before, it could be your first spray job? If so,i've wrote you a quick guide below! - Firstly cut out the shell carefully following the guide it'll have on there (faint marking).Once it's cut drill the required holes using a body reamer,not a cordless drill bit etc (The finish difference is massive,a reamer leaves a perfect finish). - From the outside of the shell mask the holes you just drilled ( saves the spray going through onto the surface you're painting on) - Wash the inside of the shell with warm soapy water and dry with a clean cloth - i cheat and use a hair dryer for about 30 seconds all round. - Put the spray can into a jar/container of pretty warm water (this makes the spray come out better).Leave it there for about 5 mins - In the mean time prepare the area you are going to spray in ( eg: outside on a brick,or inside in the garage or whatever). - When spraying ensure you're in a warm dust free enviroment.I've had the odd fly land in my paint - just my luck - Go back to the spray can,take it out the warm water and shake pretty hard for a few minutes.Now you're ready to spray! - Spray a tiny dab onto anything old (peice of paper,wood anything).As it's a new can sometimes you have the little run at the start,so spraying onto something old first hand gets your paint out the nozzle. - Then start spraying the shell,from a left to right,right to left motion.Only spray light coats covering all areas. - If the paint looks wet stop spraying.The lighter the coats the better it settles so the better finish you get - Between each coat,leave 5-10 minutes.Apply around 3-6 coats depending on how well the coverage is. - If some areas of the shell are light or darker then others,don't worry the next coat will heal this! - Once you've sprayed the shell,you can back it up with another colour to seal it,but that isnt essential. - Finally,give it a few hours to dry,and peel off the protective film on the outside. - Done Top tip of spray: Take your time!1 point
-
1 point
-
1 point
-
Member Statistics


