Lone-wolf Posted October 11, 2021 Share Posted October 11, 2021 Hobao meets carisma, well i guess its the carisma shell.........i have one of those Quote Link to comment Share on other sites More sharing options...
MrPeaski Posted October 11, 2021 Share Posted October 11, 2021 THIS is going to be interesting. And will make a big difference to its C O G. Will you be changing the bumpers? and doing something for the wheel arch inners Quote Link to comment Share on other sites More sharing options...
Dag Posted October 11, 2021 Share Posted October 11, 2021 5 minutes ago, Jack Reacher said: Hobao meets carisma, well i guess its the carisma shell.........i have one of those Yes thats the one 1 Quote Link to comment Share on other sites More sharing options...
Dag Posted October 11, 2021 Share Posted October 11, 2021 3 minutes ago, MrPeaski said: THIS is going to be interesting. And will make a big difference to its C O G. Will you be changing the bumpers? and doing something for the wheel arch inners I'll have to have a good lok at it to see how it may fit before deciding what to do about the bumpers. For looks, the chrome one included in the shell set would look better, but I'll lose protection. I'll get there though. I'd really like to use the wheel arch liners from the DC1 kit, so again, I'll have to have a good think about how I can fit them. Theres a possibility, that I may be able to fit them to the chassis, with a little remodelling. Think I'll try and move the DC1 shell on with all its parts, except the wheel arch liners. I won't use it. Reminds me too much of the real GWagon I had about 20 years ago. Sold it for peanuts. 1 Quote Link to comment Share on other sites More sharing options...
Dag Posted October 11, 2021 Share Posted October 11, 2021 there are a couple of upgrade parts i'd like for the DC1 but can't find any UK stock. I'd like the alloy front bumper mount and alloy servo mount bar. Found them in the states, but getting them here is likely to be very prohibitive cost wise. 1 Quote Link to comment Share on other sites More sharing options...
Stormbringer Posted October 11, 2021 Share Posted October 11, 2021 have you looked on amazon ? they do quite a few crawler/trail truck parts nowadays 1 Quote Link to comment Share on other sites More sharing options...
Dag Posted October 11, 2021 Share Posted October 11, 2021 3 minutes ago, Stormbringer said: have you looked on amazon ? they do quite a few crawler/trail truck parts nowadays Yeah thanks. Drawing a blank everywhere apart from the states Quote Link to comment Share on other sites More sharing options...
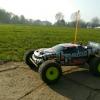
Dag Posted October 11, 2021 Share Posted October 11, 2021 Should I chop the G shell ? Quote Link to comment Share on other sites More sharing options...
Dag Posted October 12, 2021 Share Posted October 12, 2021 (edited) First rough cut and dry fit for the F150 shell. Wheelbase is spot on with the 313mm shell. Presently just slotted on with no body mount holes drilled, so the front mount is in the 2nd holes and the rear the first. The shell is slightly higher at the back, but sort of represents an unloaded pickup. The whole shell will drop evenly by around 6mm or so when the body post holes are drilled. The tyres do look out of scale but I'm stuck with them at the minute, but if I can get hold of some scale tyres (smaller OD) I reckon it would really look the part. Bumpers..... Not quite sure yet. I have easy clearance to run the kit rear bumper, so that's likely to stay. The front is a different kettle of fish, as the shell sits directly in front of the front bumper mount. I could cut out for the front bumper posts and it wouldn't ruin the scale look as I could cover that with the chromed shell item, but I'm concerned about bash protection if I leave the front bumper off. If I can get an alloy front bumper mount, I'd feel a little better. Really enjoying tinkering with this. Another delivery on the way from MS, which will give me the gear I need to finish the shell. Also got an extra battery tray on the way and some hook and loop straps to carry a second battery. Edited October 12, 2021 by Dag 1 Quote Link to comment Share on other sites More sharing options...
Dag Posted October 12, 2021 Share Posted October 12, 2021 (edited) Decided I need to keep the protection of the front bumper, so cut out the mid section of the shell to allow. I may have to ease the opening a little futher, when the body posts are drilled but I may raise the front end. I should still be able to mount the chrome shell bumper for a more scale look, with a little creativity. I’ve also mostly done the arches, which will need a little tidy up. just for tyre clearance I’ve eased the rear edge of the front arches The mid height of the shell should drop almost perfectly, down to the side skids For the eagle eyed amongst you, you will see the rear bumper has been fitted upside down for shell clearance, and will stay like this. Edited October 12, 2021 by Dag 2 Quote Link to comment Share on other sites More sharing options...
Dag Posted October 12, 2021 Share Posted October 12, 2021 (edited) An interesting (to me anyway) comparison of weights and shell proportions Bare kit G shell - 201g Bare F150 shell - 150g G shell with plastic accessories (excluding spare wheel and tyre) - 526g. Thats a lot of added weight in bolt on plastic. F150 shell with plastic accessories - 256g Heights shown. Top of cab on the G shell is approx 50mm higher than the F150 cab. Both shells on the same level surface Edited October 12, 2021 by Dag 2 Quote Link to comment Share on other sites More sharing options...
Shergar Posted October 12, 2021 Share Posted October 12, 2021 The angle of the bumper works well with the angle of the bonnet, sorry hood (!) on the Ford Shell. 1 Quote Link to comment Share on other sites More sharing options...
Dag Posted October 12, 2021 Share Posted October 12, 2021 4 hours ago, Shergar said: The angle of the bumper works well with the angle of the bonnet, sorry hood (!) on the Ford Shell. Yeah Its not too bad. Bad for approach angle though, but as I plan to be able to use the chrome bumper from the shell kit, at least I have options. Got to pluck the corage up to drill for the body posts, then I'll get a proper look at how the shell really sits. Paint is being delivered tomorrow too. Long time since I've painted a shell. 1 Quote Link to comment Share on other sites More sharing options...
Shergar Posted October 12, 2021 Share Posted October 12, 2021 Body holes? Drill then ream both by hand, I really like these no lexan chewing! https://www.modelsport.co.uk/product/tamiya-portable-tool-set-for-drilling-393349 1 Quote Link to comment Share on other sites More sharing options...
Dag Posted October 13, 2021 Share Posted October 13, 2021 8 hours ago, Shergar said: Body holes? Drill then ream both by hand, I really like these no lexan chewing! https://www.modelsport.co.uk/product/tamiya-portable-tool-set-for-drilling-393349 Yes, I dropped a bit of a goolie not ordering one with the paint. I'll try and pick one up locally over the weekend Cheers Quote Link to comment Share on other sites More sharing options...
m33bhardwaj Posted October 14, 2021 Share Posted October 14, 2021 I had ordered a injora metal bumper for my winch which arrived last week. Nice fit. came with led lights Link: INJORA RC Front Bumper Metal... https://www.amazon.co.uk/dp/B086X4DM5M?ref=ppx_pop_mob_ap_share 1 Quote Link to comment Share on other sites More sharing options...
Dag Posted October 14, 2021 Share Posted October 14, 2021 20 minutes ago, m33bhardwaj said: I had ordered a injora metal bumper for my winch which arrived last week. Nice fit. came with led lights Link: INJORA RC Front Bumper Metal... https://www.amazon.co.uk/dp/B086X4DM5M?ref=ppx_pop_mob_ap_share Nice Does that mean Axial bumpers have the same measurements in terms of fitting, to the DC1 bumper mount? 1 Quote Link to comment Share on other sites More sharing options...
Stormbringer Posted October 14, 2021 Share Posted October 14, 2021 Yes i think they do 2 Quote Link to comment Share on other sites More sharing options...
Dag Posted October 15, 2021 Share Posted October 15, 2021 7 hours ago, Stormbringer said: Yes i think they do Thanks THat opens up some choices then Quote Link to comment Share on other sites More sharing options...
Dag Posted October 15, 2021 Share Posted October 15, 2021 Thought I'd give this bumper a whirl. Its alloy and made for a scale Defender look. I reckon this will be strong enough for what I need, and keep the F150 shell looking more "scale". It will also have the added advantage of greatly reducing the approach angle https://www.ebay.co.uk/itm/114246347526 2 Quote Link to comment Share on other sites More sharing options...
Dag Posted October 15, 2021 Share Posted October 15, 2021 (edited) Very pleased with how this build is turning out. Shell now painted with Tamiya PS1 metallic orange and backed in black. Seems to be sitting really well, in fact better than I'd hoped Got some decals on, which may or may not stay (not decided yet) and aiming to leave it fully orange and not apply the cream side panel decals. There are still a few bits to do yet, namely the assembly of the Ford grille set and a bumper which I ordered today, so should be done pretty soon. For my first kit in 15 years, and taking the odd direction I have with this, I couldn't be happier Edited October 15, 2021 by Dag 3 Quote Link to comment Share on other sites More sharing options...
Stormbringer Posted October 15, 2021 Share Posted October 15, 2021 Glad your pleased with it mate Quote Link to comment Share on other sites More sharing options...
Dag Posted October 15, 2021 Share Posted October 15, 2021 (edited) 4 minutes ago, Stormbringer said: Glad your pleased with it mate Cheers, I feel it looks ok, at least. Had some machined shock pistons turn up for it yesterday, so I'll be having a tinker with those shortly and it could do with some lighter / shorter springs I think so thats something else to look into Edited October 15, 2021 by Dag Quote Link to comment Share on other sites More sharing options...
Yrkoon Posted October 15, 2021 Share Posted October 15, 2021 3 hours ago, Dag said: Very pleased with how this build is turning out. Shell now painted with Tamiya PS1 metallic orange and backed in black. Seems to be sitting really well, in fact better than I'd hoped Got some decals on, which may or may not stay (not decided yet) and aiming to leave it fully orange and not apply the cream side panel decals. There are still a few bits to do yet, namely the assembly of the Ford grille set and a bumper which I ordered today, so should be done pretty soon. For my first kit in 15 years, and taking the odd direction I have with this, I couldn't be happier that looks pretty sweet 🙂 1 Quote Link to comment Share on other sites More sharing options...
Popular Post Dag Posted October 15, 2021 Popular Post Share Posted October 15, 2021 (edited) 3 minutes ago, Yrkoon said: that looks pretty sweet 🙂 Bunged the grille on now so getting even sweeter Took the side stripes off though. Just a little too cheesy for me. Edited October 15, 2021 by Dag 4 Quote Link to comment Share on other sites More sharing options...


Recommended Posts
Join the conversation
You can post now and register later. If you have an account, sign in now to post with your account.