tomr Posted August 19, 2021 Share Posted August 19, 2021 (edited) 13 minutes ago, Jack Reacher said: I would say mine must be really bad, still think just replace them, interesting they have a very light oil in them, i emptied one shock thinking it was heavy oil and the lightest oil i have is way to heavy, dont want to spend on the stockers only to find not a lot of improvement Your Choice bud but as everclear mentioned id try filing/dremeling some material from the piston. The more you take away the easier the piston will move through the oil 👍 Edited August 19, 2021 by tomr 1 Quote Link to comment Share on other sites More sharing options...
Lone-wolf Posted August 19, 2021 Share Posted August 19, 2021 7 minutes ago, tomr said: Your Choice bud but as everclear mentioned id try filing/dremeling some material from the piston. The more you take away the easier the piston will move through the oil 👍 I guess you mean the white, nylon/PTFE small disk, could be worth a try 1 Quote Link to comment Share on other sites More sharing options...
tomr Posted August 19, 2021 Share Posted August 19, 2021 13 minutes ago, Jack Reacher said: I guess you mean the white, nylon/PTFE small disk, could be worth a try Yeah these things https://www.ebay.co.uk/itm/203503937322?epid=2256077939&hash=item2f61c7a72a:g:9vsAAOSwnj9g1MHT Worth doing mate and save ya a few quid for other goodies 👍 1 Quote Link to comment Share on other sites More sharing options...
Stormbringer Posted August 19, 2021 Share Posted August 19, 2021 Yeh give it a try Jack if it doesnt work you can get new shocks but if it does work you saved a few bob 1 Quote Link to comment Share on other sites More sharing options...
Lone-wolf Posted August 19, 2021 Share Posted August 19, 2021 19 minutes ago, tomr said: Yeah these things https://www.ebay.co.uk/itm/203503937322?epid=2256077939&hash=item2f61c7a72a:g:9vsAAOSwnj9g1MHT Worth doing mate and save ya a few quid for other goodies 👍 quick question on this, i would need to get a very light shock oil, but if its to light can i mix it with a heavier oil to get right consistancy Quote Link to comment Share on other sites More sharing options...
tomr Posted August 19, 2021 Share Posted August 19, 2021 19 minutes ago, Jack Reacher said: quick question on this, i would need to get a very light shock oil, but if its to light can i mix it with a heavier oil to get right consistancy Yep mix away mate 👍 1 Quote Link to comment Share on other sites More sharing options...
whitecitadel Posted August 19, 2021 Share Posted August 19, 2021 (edited) 1 hour ago, everclear1984 said: The dual rate springs to nothing to help, nor does the 4 link suspension kit. Filing an extra flat in the piston is the way to go 👍 Thanks, saw that on this thread and a review on EuroRC where they cut/filed another flat on the opposite side to factory one, going to give that a try. Need to solve my tight/binding diffs first 🙄 banggood have still not shipped my 1080 esc either… which is the last missing piece, impressed with injora though ordered last Thursday on their website direct and on my doorstep today a week later! Edited August 19, 2021 by whitecitadel Typo 1 Quote Link to comment Share on other sites More sharing options...
everclear1984 Posted August 19, 2021 Author Share Posted August 19, 2021 2 hours ago, Jack Reacher said: I would say mine must be really bad, still think just replace them, interesting they have a very light oil in them, i emptied one shock thinking it was heavy oil and the lightest oil i have is way to heavy, dont want to spend on the stockers only to find not a lot of improvement As others have said, you've got nothing to lose by sanding and filing the pistons before paying out for replacements. If they're anything like mine they'll need a light sand all the way around to free them up, then another flat spot filed to let the oil flow. I ended up 3d printing some pistons that another member on here was kind enough to send me the file for ( sorry, I can't remember who). They still needed a lot of sanding but shocks now work great. Btw, I think I went a bit too far with the sanding. Sorted that problem with a heavier oil 🙂 3 Quote Link to comment Share on other sites More sharing options...
MrPeaski Posted August 20, 2021 Share Posted August 20, 2021 @everclear1984 mentioned 3D printed pistons, it was me that created the files. In essence, it made the hole/cut-out in the piston bigger giving more oil flow from the supplied stock oil which appears to be 30wt or around 300cst. The pistons were an improvement over the stock ones making the suspension more supple over stutter bumps etc at faster speeds. Unfortunately, I couldn't just leave them alone and tried to mod the top cap to imitate the G-Made Aeration shocks by drilling a hole in the top and fitting a screw to bleed any air out. It wasn't successful as the screw wouldn't seal and oil seeped out and let air back in. Hence my decision to replace with the real thing! Reading @Jack Reacherpost a bit earlier, it seems the RTR shocks have different pistons to the kit version. He mentions them as being white nylon/PTFE where the kit versions are black and have to be cut from a parts sprue. If Jack could post a picture, we maybe able to advise a mod to these, as I'm sure they'd be smoother running than kit version 3 Quote Link to comment Share on other sites More sharing options...
Lone-wolf Posted August 20, 2021 Share Posted August 20, 2021 1 hour ago, MrPeaski said: @everclear1984 mentioned 3D printed pistons, it was me that created the files. In essence, it made the hole/cut-out in the piston bigger giving more oil flow from the supplied stock oil which appears to be 30wt or around 300cst. The pistons were an improvement over the stock ones making the suspension more supple over stutter bumps etc at faster speeds. Unfortunately, I couldn't just leave them alone and tried to mod the top cap to imitate the G-Made Aeration shocks by drilling a hole in the top and fitting a screw to bleed any air out. It wasn't successful as the screw wouldn't seal and oil seeped out and let air back in. Hence my decision to replace with the real thing! Reading @Jack Reacherpost a bit earlier, it seems the RTR shocks have different pistons to the kit version. He mentions them as being white nylon/PTFE where the kit versions are black and have to be cut from a parts sprue. If Jack could post a picture, we maybe able to advise a mod to these, as I'm sure they'd be smoother running than kit version Very helpful, when i strip the shocks i will post up some pics showing the insides , my plan at moment is to either drill a hole in the piston or file a notch, also maybe polish the edge of the pistons with white toothpaste as this is a very mild abrasive, but will only remove a micro amount of the diameter 1 Quote Link to comment Share on other sites More sharing options...
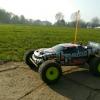
Popular Post Lone-wolf Posted August 21, 2021 Popular Post Share Posted August 21, 2021 Done a bit more to it, replaced the sticky out axle bolts with stainless button heads..........fitted the metal beadlocks and new (used) tyres..........put some stickers on, not all from Hobao and done XT60 conversion, slightly tempted to run a pair of 2s small lipo`s in parallel one on each slider running board to lower the centre of gravity. Still need to look at the shocks but waiting on shock oil 4 Quote Link to comment Share on other sites More sharing options...
whitecitadel Posted August 21, 2021 Share Posted August 21, 2021 (edited) On 18/08/2021 at 19:04, MrPeaski said: @whitecitadel Yes, I put a single thickness paper shim cut from a piece of 80gsm plain white printer paper, under the bearing carriers. It has basically spaced the gear wheels apart by 0.1mm and eliminated the slight binding mine had. It may over time, bed in and not need it, but I haven't had any problems with it and they're still in now. It could be just moulding tolerances are a little tight in either the carriers or diff case Thanks, I had to do the same in the end, even with very low torque on the diff cover bolts it was really tight and notchy and would have been load on motor and drivetrain. The bearing carriers had a moulding spur, placing this on pinion side helps but it was still way to tight. in the end I used 1.6-1.7mm plastic shims (on my eBay callipers) as that was the thickness of the most suitable plastic in the recycling bin. Feels smooth now, but not loose, and inserting solid driveshafts for rear I can feel no play so mesh seems ok. If its not perfect once run in I will go to plan b of taking some 1000 grit to the inside of the diff cover where it touches the bearing carriers. It’s acceptable right up until you tighten all the bolts fully. Edited August 21, 2021 by whitecitadel 2 Quote Link to comment Share on other sites More sharing options...
Stormbringer Posted August 21, 2021 Share Posted August 21, 2021 Jack when im not using my DC1 or the Wendigo i store them with the wheels of the ground on a stand but a box or something under the chassis will do as it stops flat spots forming on the tyres 2 Quote Link to comment Share on other sites More sharing options...
Lone-wolf Posted August 21, 2021 Share Posted August 21, 2021 4 minutes ago, Stormbringer said: Jack when im not using my DC1 or the Wendigo i store them with the wheels of the ground on a stand but a box or something under the chassis will do as it stops flat spots forming on the tyres I usually store mine with wheels of the ground, pics are just on kitchen counter 1 Quote Link to comment Share on other sites More sharing options...
Stormbringer Posted August 21, 2021 Share Posted August 21, 2021 Fair do's mate just mentioned it in case you didnt store em like that 1 Quote Link to comment Share on other sites More sharing options...
MrPeaski Posted August 21, 2021 Share Posted August 21, 2021 10 hours ago, Stormbringer said: Jack when im not using my DC1 or the Wendigo i store them with the wheels of the ground on a stand but a box or something under the chassis will do as it stops flat spots forming on the tyres Same here with a simple pair of 3D printed axle stands Quote Link to comment Share on other sites More sharing options...
MrPeaski Posted August 21, 2021 Share Posted August 21, 2021 10 hours ago, whitecitadel said: Thanks, I had to do the same in the end, even with very low torque on the diff cover bolts it was really tight and notchy and would have been load on motor and drivetrain. The bearing carriers had a moulding spur, placing this on pinion side helps but it was still way to tight. in the end I used 1.6-1.7mm plastic shims (on my eBay callipers) as that was the thickness of the most suitable plastic in the recycling bin. Feels smooth now, but not loose, and inserting solid driveshafts for rear I can feel no play so mesh seems ok. If its not perfect once run in I will go to plan b of taking some 1000 grit to the inside of the diff cover where it touches the bearing carriers. It’s acceptable right up until you tighten all the bolts fully. Much thicker than what I had to use, but whatever make things smooth. Also seems that you didn't get the issue I had with the bearing being tight on one end of one bearing carrier, which is good Quote Link to comment Share on other sites More sharing options...
whitecitadel Posted August 21, 2021 Share Posted August 21, 2021 27 minutes ago, MrPeaski said: Much thicker than what I had to use, but whatever make things smooth. Also seems that you didn't get the issue I had with the bearing being tight on one end of one bearing carrier, which is good Yes wondering if I need something thinner, but it was really bound up and notchy… built axles up now will see if I can find a thinner plastic shim and might still replace it to be sure I have a tight mesh. Quote Link to comment Share on other sites More sharing options...
Stormbringer Posted August 21, 2021 Share Posted August 21, 2021 Dont have to tight a mesh tho Quote Link to comment Share on other sites More sharing options...
Lone-wolf Posted August 22, 2021 Share Posted August 22, 2021 On 20/08/2021 at 14:00, MrPeaski said: @everclear1984 mentioned 3D printed pistons, it was me that created the files. In essence, it made the hole/cut-out in the piston bigger giving more oil flow from the supplied stock oil which appears to be 30wt or around 300cst. The pistons were an improvement over the stock ones making the suspension more supple over stutter bumps etc at faster speeds. Unfortunately, I couldn't just leave them alone and tried to mod the top cap to imitate the G-Made Aeration shocks by drilling a hole in the top and fitting a screw to bleed any air out. It wasn't successful as the screw wouldn't seal and oil seeped out and let air back in. Hence my decision to replace with the real thing! Reading @Jack Reacherpost a bit earlier, it seems the RTR shocks have different pistons to the kit version. He mentions them as being white nylon/PTFE where the kit versions are black and have to be cut from a parts sprue. If Jack could post a picture, we maybe able to advise a mod to these, as I'm sure they'd be smoother running than kit version I have had a shock apart again, my bad the pistons are black hard plastic, cant seem to improve on them with limited gear, so i have cleaned up the best pair that was on my FS racing and fitted them to the rear, its better, now need a pair for front 2 Quote Link to comment Share on other sites More sharing options...
whitecitadel Posted August 22, 2021 Share Posted August 22, 2021 18 hours ago, Stormbringer said: Dont have to tight a mesh tho I know! Too tight, too loose! Paranoia took over and I 3D printed some 0.6mm shims this morning and opened the front axle from drove side, but when removing my plastic recycling shims and checking they measure 0.25mm… checked several times not sure what I did yesterday?! Carefully checked no play again and put it all back together and will leave it all alone now. Was definitely too tight and binding without any remedial solution. Printer always super reliable but now I want to just print some new shock pistons can’t seem to get anything at all to stick to the bed. 2 Quote Link to comment Share on other sites More sharing options...
everclear1984 Posted August 22, 2021 Author Share Posted August 22, 2021 30 minutes ago, whitecitadel said: Printer always super reliable but now I want to just print some new shock pistons can’t seem to get anything at all to stick to the bed. I feel your pain, my printer just this minute crapped out on me. 100% reliable up to now. 1 Quote Link to comment Share on other sites More sharing options...
MrPeaski Posted August 22, 2021 Share Posted August 22, 2021 (edited) Here is the STL file for the pistons that I created v4-piston.stl Google Drive link in case the above doesn't work https://drive.google.com/open?id=1fALKOG5gd_7vdFFxBHuc2na2oC8b67sY And in Cura theses are the settings I used to print them, it is a forcibly slow print due to the tiny size of the piston. QUALITY layer height = 0.08 initial layer height = 0.2 SHELL Wall line count = 8 outer wall wipe distance = 0.4 top layers = 5 bottom layers = 5 top/bottom pattern = concentric Z seam alignment = sharpest corner seam corner preference = hide seam INFILL Infill density = 100% MATERIAL printing temp = 200 (raise or lower to suit your best print with the filament you're using) Bed temp = 60 SPEED .... set these individually as listed and ignore the defaults that it tries to set Print speed = default (it should get greyed out with the next changes) Infill speed = 15mm/s wall speed = 15mm/s top/bottom speed = 15mm/s Travel speed speed = 15mm/s initial layer speed = 15mm/s initial layer print speed = 15mm/s initial layer travel speed = 100mm/s skirt/brim speed = 15mm/s TRAVEL Enable retraction = ticked Retraction Distance = 6mm Retraction Speed - 25mm/s combing mode = not in skin BUILD PLATE ADHESION Build plate adhesion - skirt Ignore any other settings and leave them as they are A single piston takes around 4 minutes. You may need to sand them to after printing to adjust the thickness so they are tight between the circlips on the shaft. The idea is to line the cutout with the openings in the clips to maximise flow. Edited August 22, 2021 by MrPeaski G-Drive link added 2 Quote Link to comment Share on other sites More sharing options...
Lone-wolf Posted August 22, 2021 Share Posted August 22, 2021 @MrPeaski good of you to put the files up but i wont be using it myself, i dont have 3D printer hence i am going with replacement shocks, back end is sorted and ordered a pair for front 1 Quote Link to comment Share on other sites More sharing options...
MrPeaski Posted August 22, 2021 Share Posted August 22, 2021 @Jack Reacher No probs, I should have put it up when I mentioned them a bit further up so they're available for anyone to use. 1 Quote Link to comment Share on other sites More sharing options...


Recommended Posts
Join the conversation
You can post now and register later. If you have an account, sign in now to post with your account.