bigoggy Posted June 5, 2020 Share Posted June 5, 2020 I've decided this is coming off the shelf, and will be a runner. 3 Quote Link to comment Share on other sites More sharing options...
QRC Posted June 5, 2020 Share Posted June 5, 2020 done... 2 1 Quote Link to comment Share on other sites More sharing options...
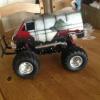
QRC Posted June 6, 2020 Share Posted June 6, 2020 servo upgrade... Quote Link to comment Share on other sites More sharing options...
Aron1 Posted July 4, 2020 Share Posted July 4, 2020 Hi. I put my lunch box and wild willy 2 away about 4 months ago. The other day I started to try my wild willy 2 it took about 1 hour and now it’s running fine. The lunchbox however turns on the lights come on but not connecting to the controller yet it was working fine before i packed it away. It’s the original 1987 model but all I get on power up is 2 short bleeps and then a continuous flashing red light. Can anyone help please otherwise better to take it to the shop for repair. Regards RCers Quote Link to comment Share on other sites More sharing options...
Stormbringer Posted July 4, 2020 Share Posted July 4, 2020 throttle trim centred ? have you rebound it if 2.4ghz if 27mhz right crystal ? Quote Link to comment Share on other sites More sharing options...
Aron1 Posted July 4, 2020 Share Posted July 4, 2020 Yes it’s always worked with the same crystals. Throttle trim centred? It’s done it before due to lack of use but always worked. Regards Quote Link to comment Share on other sites More sharing options...
Yrkoon Posted July 5, 2020 Share Posted July 5, 2020 (edited) nice models im considering a lunch box or pumpkin, are they decent out the box or are there any drive train weaknesses like the black foot? if i bought one i would run it stockish in the garden Edited July 5, 2020 by Yrkoon Quote Link to comment Share on other sites More sharing options...
luminova11 Posted July 5, 2020 Share Posted July 5, 2020 nice models [emoji4] im considering a lunch box or pumpkin, are they decent out the box or are there any drive train weaknesses like the black foot? if i bought one i would run it stockish in the garden [emoji4]My son has a Midnight Pumpkin running a 15t motor. No problems mechanically, he's broken the body a few times which is easily repaired using poly cement. The body posts and the little springs on the suspension (not the shocks) are the only weak points we've found. There is a number of easy mods for the springs and Hot Racing have started making aluminium body posts again. I will say that my son drives hard so you may not have any problem with the body posts, but the springs will break at some point. Other than that fit bearings and they're pretty tough. Sent from my SM-T725 using Tapatalk 1 Quote Link to comment Share on other sites More sharing options...
RibTickler Posted July 5, 2020 Share Posted July 5, 2020 1 Quote Link to comment Share on other sites More sharing options...
Yrkoon Posted July 5, 2020 Share Posted July 5, 2020 2 hours ago, luminova11 said: My son has a Midnight Pumpkin running a 15t motor. No problems mechanically, he's broken the body a few times which is easily repaired using poly cement. The body posts and the little springs on the suspension (not the shocks) are the only weak points we've found. There is a number of easy mods for the springs and Hot Racing have started making aluminium body posts again. I will say that my son drives hard so you may not have any problem with the body posts, but the springs will break at some point. Other than that fit bearings and they're pretty tough. Sent from my SM-T725 using Tapatalk cheers for the info, sounds good Quote Link to comment Share on other sites More sharing options...
Yrkoon Posted July 16, 2020 Share Posted July 16, 2020 (edited) just ordered one of these with the 9 quid bearings https://www.modelsport.co.uk/tamiya-lunch-box-black-edition/rc-car-products/370624 would a sandviper kit shock work for the 5th shock mod? Edited July 17, 2020 by Yrkoon Quote Link to comment Share on other sites More sharing options...
Yrkoon Posted July 22, 2020 Share Posted July 22, 2020 (edited) well it is done and i used a ftx surge shock for the 5th shock. i ran it all stock but broke off both the springs lol in the back ground there you can see rc cars in their natural habitat, note how the tamiya sand viper is humping the bandit which in turn humps the xxb and the nitro hyper 7 just says no and stays hidden had to move my esc as the mounting screw for the new shock was gonna come out from under it then i used a pc motherboard stand off thingy to make sure that screw that was getting wobbly cannot go anywhere now for the easy mods Edited July 22, 2020 by Yrkoon Quote Link to comment Share on other sites More sharing options...
Yrkoon Posted July 23, 2020 Share Posted July 23, 2020 does any one know how to reduce the rattle sound when its on rough terrain? i tried putting very thin slips of fuel tubing on the body mounts and the body is on a lot tighter now, i think it is the stock suspension and the gear box has slight movement from left to right, i have put on a turnbuckle under the front suspension screws and a bit of fuel tubing as well to reinforce the front and remove some camber also done the wheelie bar reinforcement and foams in the tyres before glueing them really enjoying the lunchie and all the tinkering that can be had, awesome fun truck Quote Link to comment Share on other sites More sharing options...
Stormbringer Posted August 1, 2020 Share Posted August 1, 2020 (edited) Just finished building and modding the Pumpkin Mods are 5th shock , oil filled dampers , wheely bar reinforced , chassis flex at front shocks and front lights of course as you see i had to test it 😁 Its not as noisey or rattly as sons Lunchbox tho Edited August 1, 2020 by Stormbringer 3 Quote Link to comment Share on other sites More sharing options...
Yrkoon Posted August 2, 2020 Share Posted August 2, 2020 well added oil shocks to my lunchie earlier and a cheapo pair of front leds, been running in the garden half the day with dads pumpkin little 24 scale losi with a 2s lipo on top, yep i launched it off the lunchie a few times lol also got a vid of dads pumpkin running in back garden 1 Quote Link to comment Share on other sites More sharing options...
Cleon73 Posted August 26, 2020 Share Posted August 26, 2020 Hi all. Just opened the box for my new Midnight Pumpkin, very excited to get building, wasn't going to start until Saturday, but couldn't wait. This is going to be long build for me, I'm stupoed straight out of the box, can't find the screw for attaching P2/P4 to the servo, are the screws all mixed through out the bags and you just have to find one that fits? Don't want to just rip all the bags open incase they're not Quote Link to comment Share on other sites More sharing options...
Stormbringer Posted August 26, 2020 Share Posted August 26, 2020 (edited) no the bags have letters on them , the instructions refer to them as say PBA meening parts bag A and the parts are pictured in the instructions on left side usually so just match the parts in the bag to little drawing can be an idea to have small dishes mark them as A etc and put that parts bag in that dish and same for next bag in another dish etc Edited August 26, 2020 by Stormbringer 1 Quote Link to comment Share on other sites More sharing options...
Cleon73 Posted August 26, 2020 Share Posted August 26, 2020 Ahhhhh, got ya, so so BC2 is bag C screw 2? The screw for the servo thing doesn't have any letters, just says 'match part with servo' Quote Link to comment Share on other sites More sharing options...
Stormbringer Posted August 26, 2020 Share Posted August 26, 2020 i think so cant quite remember theres 4 or so screws that are for the diferent makes of servo 1 Quote Link to comment Share on other sites More sharing options...
Cleon73 Posted August 26, 2020 Share Posted August 26, 2020 1 minute ago, Stormbringer said: i think so cant quite remember theres 4 or so screws that are for the diferent makes of servo Cheers mate, you've been a big help 👍 I appreciate it 1 Quote Link to comment Share on other sites More sharing options...
Stormbringer Posted August 26, 2020 Share Posted August 26, 2020 no probs mate 🍻 1 Quote Link to comment Share on other sites More sharing options...
Yrkoon Posted August 26, 2020 Share Posted August 26, 2020 (edited) i think when it says something like bc or the like it means the screw could be in bags b or c, not sure if i seen bc2 i would look for 2 of the screws in bags b or c edit: how you getting on with the build? Edited August 26, 2020 by Yrkoon 1 Quote Link to comment Share on other sites More sharing options...
Cleon73 Posted August 27, 2020 Share Posted August 27, 2020 6 hours ago, Yrkoon said: i think when it says something like bc or the like it means the screw could be in bags b or c, not sure if i seen bc2 i would look for 2 of the screws in bags b or c edit: how you getting on with the build? Yeah, that makes sense! 2 screws, not screw 2! 👍. Didn't get very far, I'm going to crack on tonight when I get home from work 1 Quote Link to comment Share on other sites More sharing options...
Yrkoon Posted August 27, 2020 Share Posted August 27, 2020 1 hour ago, Cleon73 said: Yeah, that makes sense! 2 screws, not screw 2! 👍. Didn't get very far, I'm going to crack on tonight when I get home from work sounds good and heres a wee bit extra incentive, a vid of dads one going about last evening, stock motor but 2s lipo 1 1 Quote Link to comment Share on other sites More sharing options...
Cleon73 Posted August 28, 2020 Share Posted August 28, 2020 (edited) Hey Guys Builds going well so far, infact almost done, just got to build the front suspension, then put wheels on and I'll be good to go! 😁 Edited August 28, 2020 by Cleon73 2 Quote Link to comment Share on other sites More sharing options...


Recommended Posts
Join the conversation
You can post now and register later. If you have an account, sign in now to post with your account.