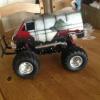
jason3249 Posted November 17, 2012 Author Share Posted November 17, 2012 Hi all hes a night pic Quote Link to comment Share on other sites More sharing options...
jason3249 Posted November 20, 2012 Author Share Posted November 20, 2012 The motor come this morning so did afew other bits.... Gon brake the motor in when i get home from work..... And fit the other stuff then put some pics on... Quote Link to comment Share on other sites More sharing options...
flash22 Posted November 20, 2012 Share Posted November 20, 2012 im having issues with my custom bumpers, so i put the standard chrome on the pick up shell, i would take some pics but i have no front end on the chassis as im wait on a pair of turnbuckles ho hum just sorting out my spares box and i will have loads of bits for sale (just waiting for my cam battery to charge) Quote Link to comment Share on other sites More sharing options...
jason3249 Posted November 20, 2012 Author Share Posted November 20, 2012 Sounds good...... Let me no on the parts as are take the lot... Quote Link to comment Share on other sites More sharing options...
PraetoR Posted November 20, 2012 Share Posted November 20, 2012 Stunning work Jason, but it's a shame you're going to be using this as a shelf queen, especially since it should now go, turn and jump better than every other LunchBox out there! Quote Link to comment Share on other sites More sharing options...
jason3249 Posted November 20, 2012 Author Share Posted November 20, 2012 (edited) Thanks m8 Right i dont no why i brought them but i did just to look good i suspose iv got 2 power caps fitted one for the reciever and one for the esc..... Iv broke the motor in but put it back in its case as not gon fit it as no need at mo..... What you all think... And heres the water i broke it in with looks like a good black coffee lol Edited November 20, 2012 by jason3249 Quote Link to comment Share on other sites More sharing options...
jason3249 Posted November 20, 2012 Author Share Posted November 20, 2012 (edited) im having issues with my custom bumpers, so i put the standard chrome on the pick up shell, i would take some pics but i have no front end on the chassis as im wait on a pair of turnbuckles ho hum just sorting out my spares box and i will have loads of bits for sale (just waiting for my cam battery to charge) Pm you.... Edited November 20, 2012 by jason3249 Quote Link to comment Share on other sites More sharing options...
jason3249 Posted November 20, 2012 Author Share Posted November 20, 2012 (edited) Im gon go down to ordered another LB then just got to wait for it to come into the shop then can bash that Instead of useing the other one wil post the Build on this topic and got to start moding my boys one well its got the 5th shock mod so far got loads of spare parts coming so that wil help Thanks to flash... Edited November 20, 2012 by jason3249 Quote Link to comment Share on other sites More sharing options...
n_d_fox Posted November 21, 2012 Share Posted November 21, 2012 Sounds good mate... PM me about your method of breaking the motor in will you... not seen this before. Thanks, Nige Quote Link to comment Share on other sites More sharing options...
simonclarke2000 Posted November 21, 2012 Share Posted November 21, 2012 how do you break in the motor? Quote Link to comment Share on other sites More sharing options...
jason3249 Posted November 21, 2012 Author Share Posted November 21, 2012 (edited) how do you break in the motor? Sounds good mate... PM me about your method of breaking the motor in will you... not seen this before. Thanks, Nige all you do is pop the motor in a cup of water i do mine for 20 mins can do longer the water will go black as you all no thats a good thing turn the controller up not to much just so you can see the water circulating/current the water is a coolent so it keeps it cool as you no....... it brakes in the brushes alot better on the motor b4 you start to rag it or use it... and the motor willl last longer....... i use old radio gear and esc just in case but not had a problem yet been doing it for years or you can wire a AA batt to the motor and do it that way my way is just easier....... Edited November 21, 2012 by jason3249 Quote Link to comment Share on other sites More sharing options...
flash22 Posted November 21, 2012 Share Posted November 21, 2012 dont do it with a brushless motor tho and be carefull with a motor with a turbo fan in it as the water will go everywhere Quote Link to comment Share on other sites More sharing options...
jason3249 Posted November 21, 2012 Author Share Posted November 21, 2012 (edited) dont do it with a brushless motor tho and be carefull with a motor with a turbo fan in it as the water will go everywhere lol...... did say a page back dont do it on a brushless motor like to see what happens lol Edited November 21, 2012 by jason3249 Quote Link to comment Share on other sites More sharing options...
jason3249 Posted November 21, 2012 Author Share Posted November 21, 2012 Well im dun with my build on to the next lb build got loads of lb bits coming so instead of buying one im gon make one out of bits iv got coming and what iv got left over see how far i get... .. Will post afew pics of all the stuff iv got to build with when all turns up Quote Link to comment Share on other sites More sharing options...
preppeller Posted November 22, 2012 Share Posted November 22, 2012 (edited) I've always wondered how effective your front bracing is... real strut braces have solid ends/fixing points as it prevents warping, but you have the plastic ball eye type things on the end which would allow movement. Wouldn't it be better to have solid fixings? Edited November 22, 2012 by preppeller Quote Link to comment Share on other sites More sharing options...
jason3249 Posted November 22, 2012 Author Share Posted November 22, 2012 (edited) I've always wondered how effective your front bracing is... real strut braces have solid ends/fixing points as it prevents warping, but you have the plastic ball eye type things on the end which would allow movement. Wouldn't it be better to have solid fixings? Works fine m8 theres no play in it Edited November 22, 2012 by jason3249 Quote Link to comment Share on other sites More sharing options...
flash22 Posted November 22, 2012 Share Posted November 22, 2012 there min flex with the plastic rod ends i went with alloy rod ends and m3 stainless rod on mine, the rod ends arnt cheap tho Quote Link to comment Share on other sites More sharing options...
jason3249 Posted November 22, 2012 Author Share Posted November 22, 2012 (edited) Just got aload of lb parts just been Delivered.... Theres loads so gon start a new build..... Flash have you got a stabilizing kit on your lb.... Edited November 22, 2012 by jason3249 Quote Link to comment Share on other sites More sharing options...
flash22 Posted November 22, 2012 Share Posted November 22, 2012 no arb or rarb on mine i may put a panhard rod on the back tho but i have parts for this new winter project turning up so may have to go on the back burner for a bit, hence why i had a clear out needed funds to buy new parts Quote Link to comment Share on other sites More sharing options...
jason3249 Posted November 23, 2012 Author Share Posted November 23, 2012 (edited) New lb build under way just had to buy bag A got every thing else....... was missing one part a differential shaft.... Crack on with abit more in a bit... Edited November 23, 2012 by jason3249 Quote Link to comment Share on other sites More sharing options...
flash22 Posted November 23, 2012 Share Posted November 23, 2012 there was a full diff set in there and a shafts for it in a little bag inc the middle diff pin - but you may of lost it done the upper links on the arms after getting my second set of turnbuckels this morning hurrm a nice set of tamiya hard turnbuckles part number OP-943 Quote Link to comment Share on other sites More sharing options...
jason3249 Posted November 23, 2012 Author Share Posted November 23, 2012 Looked through it all 10 times then got the wife looking lol its not there its only Quote Link to comment Share on other sites More sharing options...
flash22 Posted November 23, 2012 Share Posted November 23, 2012 im using losi 8b long rod ends 3mm but the ball ends have a 3mm and thay are dead on 3.000mm hole where a as a normal EU spec 3mm bolt is actually 3.25 so im having to re drill them good news is i have 1 left todo its nearly done i was waiting on a bit for the shell what come this morning with the turnbuckles, a bit more wiring and its done Quote Link to comment Share on other sites More sharing options...
jason3249 Posted November 23, 2012 Author Share Posted November 23, 2012 Sounds good flash cant wait to see some pics... Iv dun abit more cant resist lol There crap shocks lol but there do for the time being... Quote Link to comment Share on other sites More sharing options...
flash22 Posted November 23, 2012 Share Posted November 23, 2012 that ballend is in the wrong way in that arm there a set of steering linkages in that stuff too all made up to the correct stock lenght and checked with a vernier gauge fastrax do the right size ball ends with a long thread on them so you can nut them up early night for me as its been a long day again Quote Link to comment Share on other sites More sharing options...


Recommended Posts
Join the conversation
You can post now and register later. If you have an account, sign in now to post with your account.