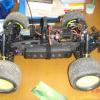
smeghead28 Posted April 1, 2015 Author Share Posted April 1, 2015 If you set the preload right down, the front wheels should come right up... If that's what you're wanting lol. Nope,just noting that there seems to be a power increase with the new pipe as it never did it at all with the stock SS one. Handles the bumps quite nicely as it stands at the moment but I have only tried it in the one area so far. Quote Link to comment Share on other sites More sharing options...
smeghead28 Posted April 6, 2015 Author Share Posted April 6, 2015 Had another run tody but with a few small issues. Exhaust is still a bit leaky but nothing like it was. Steering been playing up again,the supplied servo horn has basically worn all the splines off it and most of the splines on the servo itself are worn as well I think I have had the servo saver done up too tight and it wasn't saving anything I have ordered this to replace both bits with http://www.hpiracing.com/en/part/80598 and loosened the servo saver right out,hopefully between the two that will do the trick. Quote Link to comment Share on other sites More sharing options...
madmo Posted April 6, 2015 Share Posted April 6, 2015 Had another run tody but with a few small issues. Exhaust is still a bit leaky but nothing like it was. Steering been playing up again,the supplied servo horn has basically worn all the splines off it and most of the splines on the servo itself are worn as well I think I have had the servo saver done up too tight and it wasn't saving anything I have ordered this to replace both bits with http://www.hpiracing.com/en/part/80598 and loosened the servo saver right out,hopefully between the two that will do the trick. Hi did you buy the baja ss kit? If so did you find it any cheaper than modelsport? If only the ss kit was Quote Link to comment Share on other sites More sharing options...
smeghead28 Posted April 6, 2015 Author Share Posted April 6, 2015 I did find somewhere that was cheaper than MS and they price matched it, Quote Link to comment Share on other sites More sharing options...
Leo Posted April 6, 2015 Share Posted April 6, 2015 Had another run tody but with a few small issues. Exhaust is still a bit leaky but nothing like it was. Steering been playing up again,the supplied servo horn has basically worn all the splines off it and most of the splines on the servo itself are worn as well I think I have had the servo saver done up too tight and it wasn't saving anything I have ordered this to replace both bits with http://www.hpiracing.com/en/part/80598 and loosened the servo saver right out,hopefully between the two that will do the trick. I wouldn't bother with that servo arm, get one of these instead. http://www.freeprawnracing.co.uk/fastrax-jumbo-servo-3-in-1-horns-fast32x.html http://www.freeprawnracing.co.uk/alloy-servo-horn-silver-for-multiplex-rhino-digi-4-hitec-5755mg-savox-235-and-236.html Quote Link to comment Share on other sites More sharing options...
smeghead28 Posted April 6, 2015 Author Share Posted April 6, 2015 Wanted the servo output shaft itself to be metal as well as the horn. Couldn't see much point in one part being metal and the other plastic in case it might strip again. Quote Link to comment Share on other sites More sharing options...
Leo Posted April 6, 2015 Share Posted April 6, 2015 I didn't notice that it came with the output gear. Those arms are not very strong though, I managed to strip one on my 1st run. Quote Link to comment Share on other sites More sharing options...
smeghead28 Posted April 10, 2015 Author Share Posted April 10, 2015 I didn't notice that it came with the output gear. Those arms are not very strong though, I managed to strip one on my 1st run. Mine has held up okay on it's maiden run. Finally got a full run in without any real issue Didn't realise till I got back home that I had no preload on a couple of the shocks,would explain the bad handling I had. Quote Link to comment Share on other sites More sharing options...
smeghead28 Posted April 12, 2015 Author Share Posted April 12, 2015 Thinking of doing a few bits to this Looking to fit the bits that will enable me to fit either the 5T or 5SC body. Then getting the Team Chase Cage that will go under the shell. The idea is to cut off the back end of the shell just behind what would be the doors leaving the rear of the cage exposed. Along the lines of this but there would be much more cage visible at the back end. Quote Link to comment Share on other sites More sharing options...
Scoobie007 Posted April 12, 2015 Share Posted April 12, 2015 (edited) 5t conversion, teamchase cage and the barndog panels......expensive tho http://www.freeprawnracing.co.uk/barndog-lexan-panels-for-team-chase-roll-cage.html Edited April 12, 2015 by Scoobie007 Quote Link to comment Share on other sites More sharing options...
Oh How Original Posted April 13, 2015 Share Posted April 13, 2015 Hmmm, well that looks... Different lol. Can't say I'm a huge fan of it but whatever floats your boat Definitely get a good amount of dry wall tape and shoe goo if you do do it. The shell won't take many roll overs if you chop it. Quote Link to comment Share on other sites More sharing options...
smeghead28 Posted April 13, 2015 Author Share Posted April 13, 2015 Hmmm, well that looks... Different lol. Can't say I'm a huge fan of it but whatever floats your boat Definitely get a good amount of dry wall tape and shoe goo if you do do it. The shell won't take many roll overs if you chop it. The KM shells are about Quote Link to comment Share on other sites More sharing options...
smeghead28 Posted April 13, 2015 Author Share Posted April 13, 2015 Right,got the Team Chase cage along with the HPI mounts etc needed to fit. Made it even bigger now which wasn't part of the original plan when I first chose the Baja. Reminds me of the Bat mobile with how it stands at the moment Quote Link to comment Share on other sites More sharing options...
smeghead28 Posted April 21, 2015 Author Share Posted April 21, 2015 First off it's not pea green as the picture would suggest,it is darker and more florescent in real life I ended up keeping the cage after a fight nearly broke out when I was going to sell it,luckily the buyer understood. The body is a KM one,suffice to say the quality was pretty bad. There were stickers all ready applied for the windscreen,side windows and some others. They must have been slapped on by someone without a clue as half of them were upside down and they were all peeling off with creases galore. Took a while to peel them off and then had to clean all the sticky residue off after. Cutting the back end off was a bit tough as some of the angles on the body made for very thick plastic in places. Cause of the stickers already on there was no film so I had to mask off the whole outside before spraying. There were no window masks either but my masking effort turned out alright but wouldn't stand up to close examination Wing is only plopped on for now but gives a rough idea of what I am aiming for. Quote Link to comment Share on other sites More sharing options...
andyknight Posted April 21, 2015 Share Posted April 21, 2015 I really like that. Might give me a few ideas.... Quote Link to comment Share on other sites More sharing options...
coolas4k Posted April 26, 2015 Share Posted April 26, 2015 Got a chrome snail going on Got the silenced version,hopefully it will be quieter than the stock SS exhaust. Only slight issue was the washer supplied to go onto the bottom bracket was small enought to drop through the slot,luckily had a repair washer that was the right size,other than that fitting it was no problem. Nice exhaust! What pipe is it? And where you get it from? I'm looking for one at the moment. Don't suppose you have a vid to share so I can hear the roar (or purr since it has a silencer haha)? Quote Link to comment Share on other sites More sharing options...
smeghead28 Posted April 26, 2015 Author Share Posted April 26, 2015 Nice exhaust! What pipe is it? And where you get it from? I'm looking for one at the moment. Don't suppose you have a vid to share so I can hear the roar (or purr since it has a silencer haha)? It's a Dominator V2 silenced,it is still quite loud even though it is silenced! The stock SS pipe is even louder and not nice at all https://www.youtube.com/watch?v=goV_vGkM6N0&feature=youtu.be Quote Link to comment Share on other sites More sharing options...
coolas4k Posted April 26, 2015 Share Posted April 26, 2015 Sounds nice but does the silencer make any difference to the performance? Quote Link to comment Share on other sites More sharing options...
smeghead28 Posted April 26, 2015 Author Share Posted April 26, 2015 Sounds nice but does the silencer make any difference to the performance? No idea. It is fitted on and not a seperate piece although you could remove the baffle insert and try it that way. There isn't much in the silencer section,it's not stuffed full of wadding. Certainly not slow if that helps Quote Link to comment Share on other sites More sharing options...
Oh How Original Posted April 26, 2015 Share Posted April 26, 2015 (edited) The more I look at TC cages the more I want one. Do you still have access for carb needles and such? Edited April 26, 2015 by Oh How Original Quote Link to comment Share on other sites More sharing options...
flatout! Posted April 26, 2015 Share Posted April 26, 2015 First off it's not pea green as the picture would suggest,it is darker and more florescent in real life I ended up keeping the cage after a fight nearly broke out when I was going to sell it,luckily the buyer understood. The body is a KM one,suffice to say the quality was pretty bad. There were stickers all ready applied for the windscreen,side windows and some others. They must have been slapped on by someone without a clue as half of them were upside down and they were all peeling off with creases galore. Took a while to peel them off and then had to clean all the sticky residue off after. Cutting the back end off was a bit tough as some of the angles on the body made for very thick plastic in places. Cause of the stickers already on there was no film so I had to mask off the whole outside before spraying. There were no window masks either but my masking effort turned out alright but wouldn't stand up to close examination Wing is only plopped on for now but gives a rough idea of what I am aiming for. get some hostiles on it all round and it'll look a beast mate,very nice,get the shell covered in tidy stickers, cool man Quote Link to comment Share on other sites More sharing options...
smeghead28 Posted April 26, 2015 Author Share Posted April 26, 2015 The more I look at TC cages the more I want one. Do you still have access for carb needles and such? If you have a screwdriver with a long enough shaft then yes it's not a problem. The fuel filler is another matter though. You can unscrew the fuel cap okay but the cage gets in the way of filling the tank. I spent the grand total of Quote Link to comment Share on other sites More sharing options...
smeghead28 Posted April 29, 2015 Author Share Posted April 29, 2015 The Baja has now sold and been collected,this could be closed now,thanks. Quote Link to comment Share on other sites More sharing options...
andyknight Posted April 29, 2015 Share Posted April 29, 2015 First off it's not pea green as the picture would suggest,it is darker and more florescent in real life I ended up keeping the cage after a fight nearly broke out when I was going to sell it,luckily the buyer understood. The body is a KM one,suffice to say the quality was pretty bad. There were stickers all ready applied for the windscreen,side windows and some others. They must have been slapped on by someone without a clue as half of them were upside down and they were all peeling off with creases galore. Took a while to peel them off and then had to clean all the sticky residue off after. Cutting the back end off was a bit tough as some of the angles on the body made for very thick plastic in places. Cause of the stickers already on there was no film so I had to mask off the whole outside before spraying. There were no window masks either but my masking effort turned out alright but wouldn't stand up to close examination Wing is only plopped on for now but gives a rough idea of what I am aiming for. Is this forsale on ebay? I swear I saw it the other day. Quote Link to comment Share on other sites More sharing options...
smeghead28 Posted April 29, 2015 Author Share Posted April 29, 2015 Is this forsale on ebay? I swear I saw it the other day. It was. Someone here then bought the cage so I converted it back to the buggy and then that has since sold. Quote Link to comment Share on other sites More sharing options...


Recommended Posts
Join the conversation
You can post now and register later. If you have an account, sign in now to post with your account.