Leaderboard
Popular Content
Showing content with the highest reputation on 03/06/14 in all areas
-
So I just took it out for another run got through another 3/5th's of a quart, I leaned it up a little man does this thing rock the torque is silly it'll pop a wheelie from what seems like around 14,000-15,000 rpm. Very cool, well happy thanks. This thing drinks like it's from Ireland.3 points
-
2 points
-
2 points
-
I'm thinking about a 1/5 half track and building a steel tubular sandrail chassis for the Baja. Possibly, as I found some 6mm tube, I might have a go at a 1/8 scale cage instead. Half track would be probably based on the German WW2 layout, which used longer tracks and an unpowered front axle. Steering begins with the front wheels...but then uses axle braking for tighter steering. I might swap to the US M3 layout, though, as it would be easier to build scale looking. If I use Baja/KM parts for the driveline, though, it still would have an unpowered front axle. Cheap FTX/Blackout donor vehicle anyone2 points
-
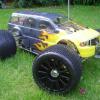
Been doing some work on the Wraith, thought I would carbon wrap the HH BRXL while I was at it2 points
-
There's a woman at work who travels in from the 80s everyday. Power suit, shoulder pads, etc. Stop lying about your shoulders!2 points
-
2 points
-
2 points
-
2 points
-
Well seeing as these are so cheap and in the past when I was much younger I did try and fail at painting these types of models I thought I would join in a give them a go. Hopefully being older means I have more patience for it and if it all goes well I would really like to make up a collection of these skylines as they are my favourite car by far (so much I am currently trying to buy a 1/1 R33 GTR) Starting off the kit was purchased a few months ago by the wife for me at complete random so I have had this kit for about 5 months now, however seeing you guys put together your own with varying degrees of success has given me the motivation to give it a go. So yesterday I got the manual out, went to hobby craft and started buying! I didn't buy EVERY paint the manual told me too however I got everything I thought would allow me to make a nice looking first 1/24 static. I got a few detailing brushes from a pound shop but for the really small stuff I got myself some fine detail brush's. The paint is all Tamiya Acrylic and I got some plastic cement and Tamiya Thinner. The first thing I noticed is just how little paint it takes to paint a part and how long it takes if you are trying to do it perfectly. So thankfully it looks like a fair bit of this paint will be fine to use on quite a few models to come. Anyway for now here are some pictures. One is for scale, its the rear suspension set-up next to a staple.1 point
-
Nitro guys correct me if I'm wrong but as far as I know yes you can keep the stock spur gear. I also just ordered a new front diff housing as the old one cracked from a very bent screw.... And also went fr the alluminium front brace from asiatees much cheaper than the hpi one and I haven't had any problems with GPM quality in terms of parts yet1 point
-
1 point
-
1 point
-
maybe a dumb suggestion, but if I had a heavy big truck powered by a relatively small motor, the first thing I would do, would be a wheel/tire combo change. I would try to reduce the rotational mass by replacing the stock tires for something lighter and even smaller. That will bring the temps down and allow you to push the 1717 harder. Just my 2 cents1 point
-
Don't worry if it's a noob Q, this is MSUK Forum, were fine with it!! Bogging can be a sign of your car being too rich, or being very lean, or you could have an engine leak. Try to tune your HSN first (ask if you don't know where the needles are on your carb). If factory doesn't help, try flush settings, where the needles are in line with the housing. Ok, for HSN go WOT (wide open throttle) and look at the performance and smoke. --Slow, lots of smoke=TOO RICH --Revving very high, no smoke, very hot engine=TOO LEAN- dangerous Next is the LSN, let your car idle and pay attention to how it quits- if it does --Quits by bogging down, car slowly stalls=TOO RICH --Quits by revving up, or suddenly cuts=TOO LEAN When you can get it to idle for a long time, let the car stand, and gun the throttle, observe- --Car stalls straight off=TOO LEAN --Car bogs and accels slowly=TOO RICH Remember you can always fiddle around with the idle screw and throttle trim too.1 point
-
1 point
-
Dream car is a BL 5ive. In reality it'll probably be one of these new truggy's that are about to be released. A long way off though.1 point
-
Welcome, I'm sure you'll equally enjoy your wr8.. I use Giantshark for my lipos and have a Gens Ace 3s 50c 5000mAh which cost1 point
-
1 point
-
Are connections clean on esc?clean up and retry..if no worky ..then ,swap esc and steering plugs from the tx around. trigger should operate steering, wheel should operate motor. if trigger operates steering at least u know handset is ok.etc...etc. now unless your esc has visual signal of operation(led) you wont know if fault is with the esc or motor. easy method is to test with esc motor output with a multi meter.1 point
-
Try working on the eurofighter. Cool plane. Not so much at component level.1 point
-
1 point
-
Awesome! I think you'll really enjoy it. I'm running a Duratrax 5000mah 35c 3s. You can get them off eBay for $89 (US) shipped most of the time. I also run a SkyLipo 5000mah 40c 3s from HobbyPartz http://www.hobbypartz.com/77p-sl5000-3s1p-40c-3333.html for @ $60 US shipped it was a good deal. I've had them both for about a year and so far they are both running strong. I wish I had some people to run mine with but even running on my own I'm usually pretty damned excited with it.1 point
-
Just got me one of these, im looking forward to having a good 3s blast with it :-) i got the original ken block one unused hehe, seems quite well put together to. ive had a drx before so im intrested to see how this compare's to that, i think this will be quicker but the drx was so much fun. Im havin trouble locating a reasonable 3s lipo though, at a reasonable price, hobby king seem to be out of stock of most lipos at the min, is there any of you chaps have a northwest meet up? Im in wigan by the way, i can imagine racing a few of these will be a right giggle.1 point
-
Mesh looks alright to me fella, should have about 1mm of play between the two1 point
-
1 point
-
1 point
-
its a simple weedeater engine ( way back yonder times we modded weed eaters to fit in airplanes ) here is my guestimate on problem. during the re-build you somehow got distracted, you think you put the gasket on right but what you have done its flipside it. its rotated 90 degree and now covers the inlet/outlet port. more find the inlet if it wont fire up. take of the carb, just from the barrel unit and have a peek down, roll engine down to BDC ( bottom dead center ) and slowly rotate upto TDC (top dead center ) you should if you crank around into a funny pos be able to see the glint of the piston ring/postion as it passes and closes the inlet port, if not just whip of the head n barrel ( i advise carb and exhaust is removed on re-builds, it allows you to seat the head and barrel correct ) and make sure the gasket is seated correct, has not been split or damaged, then replace barrel and head, pop exhaust and carb back on. check for spark, rest plug against engine head and pull it over you should have a nice bright blue sparker. tic tic tic tic tic. pop a very small drop of fuel into the head ( twostoke oil cap, pop juice in untill it just covers bottom of lid, tip this into engine head) replace sparkie and kick the engine over, that small amount of fuel should help kick the engine suck the carb and blow the exhaust and fire up1 point
-
if you look a Boarevo's second image, APM board notice that bright orange light well just below that is a silver rectangle like box. it looks more like a crystal ossilator with a hole /two holes in it. this is the baro, its a very small electronic version of what gandad used to have hanging on his wall the dial had sunny / rain / cloud and the liquid would rise and fall according to weather. this is atmosperic pressure, the air pushing down on us from gravity. now this pressure changes the lower to the center of earth we get the more pressure pushes down on us. now inside you little silver can is a diaphram like thing, as the air pushes down it makes the reading via electric pulses and stuffz. so we set this baro so when its at sea level it reads 0. remeber pressure is always changing so this number may go up and down because we measure in very fine detail very small changes. now our foam comes in here, so if we blow in the baro it will go crazy wild -7000 to +20,000, and if our propwash is blowing our baro is going to be going looney like if we blew on it. so we can cover it with foam that will help disperse all that breeze and help the baro read those fine measurements but not also read the external errors from the propwash. in the summer time we have high pressure and in the winter we have low pressure, so atmosperic pressure is also affected by heat from the sun so our foam will also help a little to blocking out any sunlight that may just enter the baro and make it a tad warmer and change the pressure it reads. this is how the baro measures hight/ altitude, we can tell how high something is by the atmospheric pressure.1 point
-
1 point
-
The Shorty was out getting some air time at the weekend, sorry about the quality, taken on a mate's phone https://www.youtube.com/watch?v=tCSUCtpyX6Q1 point
-
I do like to build the D110, and getting my head round to doing more detail so not rushing in to it, don't want to do something that would look out of place on one1 point
-
I used bluetak (the sticky blue thingy you use on your poster) I balance the wheel by spinning the wheel until it came to complete stop. then i put putty on in oppersite direction, bit by bit until it spin without vibration.1 point
-
That's a fair comment, would be better to focus on just one or two though and actually finish them, rather than have 47389472938 on the go and get none finished lol. Personal choice though.1 point
-
Only started filming towards the end but here's a short vid. Paul was driving my CRT.1 point
-
1 point
-
Looks mint, had mine for around 3 years, best RC i've ever bought! Hit a bench leg around 30mph, did a couple off spins and drove off, bulletproof little buggers! Wait till you brushless it1 point
-
1 point
-
die Deutschen bekommen all die guten Sachen, ich liebe brockwursts1 point
-
The heat range of a plug is VERY important. In simple terms, they control the ignition timing. Your engine is basically a 2 stroke layout, so the port timing is fixed. The inlet/exhaust always open at the same point on the stroke of the piston or rotation of the crank. What the plug varies is how quickly the mixture gets ignited. A hotter plug will ignite the mix sooner than a cooler one. If the coil in the glowplug is too hot, you can get pre-ignition, where the mix is burning before the piston gets past top dead centre. Bad news. Too cool, and the piston is past TDC and you lose power. Your fuel mixture will also affect how well the mixture burns....so if you are way too rich, a hot plug may get it started....but once things get up to temperature...it will not be happy. Using hte correct grade plug for your engine is actually a very important thing. A lot of people opt for a 'middle of the road' plug, which will give reasonable performance in most conditions... but racers will take a range of plugs and vary it for optimal performance. Now...as far as setup goes.... I always start with the idle gap. Set to 1mm, and adjust the linkage so it has a bit of slack at fully closed and no trim on the transmitter. The stop screw should ensure it does not close when you brake. No point in going further without that correct. Next thing...I can't see if you mentioned the car you have...but that is important. Mainly so we know what engine you are running. Big block and small block engines run best with different plugs and fuel. If you have LSN and HSN at factory settings, you should have a stable idle....if all is well. Otherwise you potentially have an air leak somewhere. The factory setting for hSN is very rich....so once you have a stable idle...you would then look to tune that to the best setting. Listen to the motor ( it should never sound 'frantic' or sound stuttery on the over-run ) . Then you can tweak the LSN if it needs it. The idle may creep up as you lean off the HSN, or you may have poor pickup. Keep the adjustments small and run between changes long enough to clean through any surplus fuel. Very important if you are leaning off an engine.... you don;t want to find out that it was only running rich due to a build up fuel in the crankcases....1 point
-
Yes. As you have found some fuels can be smokey and the engine can be too lean....and also some fuels can give off little/no smoke but still be on the rich side. Try to listen to the sound of the engine (albeit hard if you do not know what you are listening for). Whilst it obviously makes sense to only turn the needle (say HSN) a small amount at a time to fine tune it, it can also be beneficial to make larger turns to distinguish the sound of lean/rich and to build a knowledge of where the point of correct will be. So if we start the engine (with rich settings) and get it warmed up for a minute or two then do one full throttle/high rpm run we know it is rich, then lean the HSN 1/4 of a turn and another flat out run...Repeat the process until you have gone too far and each time listen to the different sound. (Notes- Of course do not persist with full throttle if the engine is struggling, no need to do runs a mile long, you may need to be gentle opening the throttle to get to high rpm if LSN is very rich). Now you should know both what lean/rich can sound like and know that the correct mixture will be within X turns of the needle. Always warm the engine before trying to tune, keep an eye on the fuel level, always richen up a bit from the optimum performance. In response to your above post (that came whilst typing)- If the plug is not correct then you will struggle. The idle screw should always control the minimum idle speed so when applying brakes the throttle should not close to a point of stalling the engine. If the LSN is lean then the engine will rev high. Set everything rich with a throttle gap of 1mm. Start-warm-set HSN first and then LSN....when adjusting LSN you may have to adjust the idle speed. Stick with it...it should all come together in the end.1 point
-
1 point
-
I done it with 16v head on the car, madza 323f, and mr2 turbo. You need a piece of long rope that goes in spark plug and turn the crank up so piston can compress the rope, thus holding in valves. you can remove those seals, very easy to do it, but quite fiddling job. You can use piler or something to remove the valve stem seal. You need to remove the camshaft to access the valve stem seals. So you need to be comfortable doing cam timing. they are simple once you figure it out. it is VERY EASY to loose the 'valve collets', it pings off somewhere or down the engine. so use rags around the valve springs. you need a special tool, you can make it yourself. 1ft aluminium tube with r/c brushless motor magnets on the end. so you use this tool to compress the valve spring, so the magnet will catch the collet inside the tube. On other end of same tool will help you install the collet by placing collet on valve stem first and then use tool to compress the valve spring. it should pop back in. this is most hardest part of job of doing this.... sorry if I waffle with bad English1 point
-
I guess my wife and I are too then. We have 22 functioning RCs between us, 20 of which are Tamiyas. And there are enough parts under our bed to build at least another 2 more...1 point
-
The wands have a habit of breaking internally which then doesnt power up the glow plug. I used a separate ignitor with the wand on the ezstart.1 point
-
check the wiring on the ezstarts first take glow plug out so no compression and connect a battery to the ezstart motors see if they turn (the wand has protection built in to prevent frying the ezstart motor if the engine is locked). If they do then re wire first and check the wands again, the contacts can get corroded so try cleaning them up. I would say its unlikely both wands are broken but if it does end up being that just get one second hand one to start both models. One thing to do is not use the wand for the glowstart, use a seperate glowstart. the traxxas pullstarts are rubbish in my experience (i managed to break a brand new one within 20 pulls on a tmax 2.5) so if you go down that route get a different make.1 point
-
I just tap the flywheel from behind and keep turning it so It slowly works its way off Rob1 point
-
8s 12t 7s 14t 6s 16t is what i would go with with the 54t gear on a 5sc, due to the larger wheels... with mine i'm using 8s 14t 7s 16t 6s 18t and getting good temperatures throughout the range, it is really trial and error tho mate, I'd reccomend running it on the stock 14t to begin with, check temperatures at the end of your run's and work from there... hot motor cool esc cool batteries = undergeared Cool motor hot esc hot batteries = overgeared Batterys will always be warm in these high draw systems, so its the esc and motor you wanna keep a close eye on... Max temp for motor is 70*C, esc 60*c and batteries 40*C... or at least thats what i keep them under at all times get a reliable temp gauge, keep an eye on them and you'll be golden1 point
-
Member Statistics


