Jump to content
  • Join our community

    Sign-up for free and join our friendly community to chat and share all things R/C!

You say you want a Revo - lution....


Nitroholic

Recommended Posts

Weeelll..I can help.

Or, to put it another way....when you buy a Revo with a horrid shell what do you do? Just buy a new shell...well..I could. But that wouldn't be any fun at all! It had stock wheels, a Picco .26 and the short 2.5 chassis. I wanted something a little bit different to the rest of my collection, so I knew from the outrset that just making another monster truck was a waste. I also wanted something that would show off the things that make a Revo a Revo....so I put on my thinking cap.

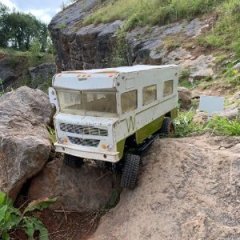
And I found this:

Was a bit of a no-brainer from then on. Throw away the tatty shell in horrid green, and put on a cut down jeep shell with a scratch built rollcage. Easy.

Step 1: Ebay the stock sheels. They looked all wrong and I didn't like them anyway with their tiny old-school 14mm hexes. In the spares pile I dug out a surplus set of 23mm hexes I had bought along with some wheels. I had only wanted the wheels....so these were just lying around. On went my spare set of wheels which looked the part. Sand paddles will be sought later...but these will do for now.

Step 2: The rollcage. Bought some 8mm nylon rod that will be bent, cut and beaten into shape once the shell is ready.

Step 3: The shell.... hmm. Wanted a Jeep look, as all the best FOFF seem to be based on a Jeep. Refuse to pay £30 for a new HPI shell, as I would be hacking it to bits, so I looked for a good used one. Sadly, HPI make them out of glass, and used ones are about as common as rocking horse manure...so I thought about another option....

Then I had a flash of inspiration ( or was it Newcastle Brown..... ) and this is the result:

foff2.jpg

foff1.jpg

No...I don;t plan on making a cardboard disposable shell ... that's just the pattern :)

The real one will now be knocked up out of fibreglass, with sole reinforcement in key places. The plan ius to have the bonnet removable. The front plate will be 4mm ally plate, hooked up to the front body mounts. The rear part of the shell will have a glassed in front ally bulkhead too. This will join to the front with some ally bar. The rear of the chassis will attach to the rear body mounts, plus the rollcage mounts to keep that firm. The rollcage will then fix to glassed in tubes so it can be removed if need be.

The bonnet will thin fit over the front aqnd attach to some body posts on the ally bars. I want to be able to remove that easily so I can get to the power on switch, radio box and charging point for the battery etc.

The dodgy rearmount pipe that stuck out too far now works in my favour...as it pokes out through the rear wheelarch, and the tube sits clear of the bodywork. A problem has just become an asset :)

Building it in card first allows me to make sure it all fits and to be sure the suspension/wheels don;t foul and so on. Next job will be to make up a simple box mould, use filler to make the curves and lay down the rear fibreglass. After a few layers go in, the front ally bulkhead will get added and glassed in.

This looks like fun :)

Link to comment
Share on other sites

Busy day in teh shed, and have knocked up the wooden pattern to lay the fibreglass in for the rear body section. Need to get some resin hardener...as I can't find mine....bit annoying! But once I sort that I can start work on the fibreglass. The rear section is nice and simple, being mostly just a perimeter with some filled in sections. I will fibreglass hte front bulkhead to start with, then put in an ally plate and glass that in too. In will tie the parts together, so I want it strong there.

Not much to show for a days work...but it's progress :)

Link to comment
Share on other sites

there's not many threads/builds that deserve this but...

1233928590_citizenkaneclapping.gif

Bravo Sir. Icelandic loony hill climbers have always been missing from RC imo, one thing though, you either need to steal the airfilter from 'Zilla or get another ;)

  • Like 1
Link to comment
Share on other sites

Would be nice...see how things go :) At £15 a pop they aren't cheap...but they do havbe that wow factor.

Anyways...stage one of the body has popped out of the well oiled mould sweet as you like. Needs a few more layers of fibreglass before I start cutting away the surplus as well as a bit of sanding...but I always dread that mould-sticking sensation! I used melamine covered MDF for the sides, so when I oiled that, there was a good non stick surface. Once it's hardened I can de-grease it with some white spirit. Need to make the ally bulkhead next and get some more resin and hardener so I can layer it up some more.

Will get some pics up tomorrow when it's set hard and shaped a bit. At the moment, the fillets I put in for the curved top edges and rear corners are still firmly attached to the shell...so they need sanding off. I used car body filler to make them, so sanding is easy :)

Link to comment
Share on other sites

excellent stuff! I've just about finished the cardboard mock-up of my hot rod body for my savage build- may need some advice on fibre glassing- I need to buy a kit- any suggestions of what to go for? can't wait to see your body (oh er!) have you any pics of the fibre glassing process you did, would be interested to see the mould etc..

Link to comment
Share on other sites

Been getting some more work done on this today, and it';s coming along a treat.

The shell came out of the mould in need of some cleaning up, but it wasn;t too bad. I used a square box of melamine covered MDF, so the finish was quite smooth. Few bubbles and issues, but nothing that can't be sorted with body filler, sandpaper and elbow grease.

Also knocked up a rollcage out of 8mm nylon rod. Has come out OK, but needs a bit of cleaning. Hit one slight snag meaning I will have to make my own rear body mount... the stock one isn;t long enough to go through the fibreglass shell. No biggy...new mounts won;t take long to make.

Trying to put some pics up, but the internet says no.....

Link to comment
Share on other sites

Nearly finished the fibreglassing on the shell...will get some pics up when it's done. Need to leave a gap for the servo box which I will have to cut out, but that's no big deal. Then I just need to sort a few details for the mounts and I can think about spraying it.

Work has been a bit of a pain eating up a lot of my spare time and energy, but things ar emoving along slowly. Main issue I now need to sort is the handling as the truck seems to be set up with the worst possible setup for hwat I want. Soft springs and long travel rockers. Want to do that before I run it too much.

Also want to sort out a wheelie-bar arrangement that works but isn;t to obvious.

Link to comment
Share on other sites

Well....progress has been slow and stately...but it's progress all the same!

I wanted to sort out a neat way of mounting the shell which would leave a lot of access open, but would also allow me to easily get at the front with the power switch and brake arm etc. Logic dictated a 2-part shell. I hate logic :)

upd1.jpg

So, what we have done is to attach a front ally subframe to the shell and key that in to the front body mounts. This is currently bolted through the front bulkhead of the rear shell. A bracing plate will be added at the back also anchored to the front bulkhead. The front grill section ties it together there, so the whole thing is pretty solid. Will be more solid once that bracing goes in tomorrow.

Then the bonnet fits over the top.

upd2.jpg

I used some old discarded plastic signs as a former for the front fibreglass....and hte print has come off! Paint will cover that up :)

Still needs sanding and cleaqning up before I can properly paint the whole thing. I also need to mount the hinge...

Yes...I want the bonnet to hinge open from the back like a proper bonnet! I will attach 2 body mounts to the 2 rails to clip down the front of the bonnet...but the rear will be hinged. Pop out the two front body clips and open the bonnet to access the on/off switch, adjust the front shocks or play with the brake linkage. It'sw a neat little touch that I hope will be fun and not get in the way.

Now I just need to sort the overly soft suspension and give some thought to a discreet wheelie bar.....

Link to comment
Share on other sites

+1 on leaving the bonnet as is, paint the rear in a fork lift type yellow and slap on a few sponsor decals and you've got one of the best looking* Revo's on the forum.

Regarding wheelie bars, I reckon a man of your talents should be able to knock up something similar to these

INTT3277BLUE-2T.jpg?1319203079

vxs133h01pic1021308413930.jpg

*well, you know it's never as going to be as pretty as mine ;)

Link to comment
Share on other sites

Join the conversation

You can post now and register later. If you have an account, sign in now to post with your account.

Guest
Reply to this topic...

×   Pasted as rich text.   Paste as plain text instead

  Only 75 emoji are allowed.

×   Your link has been automatically embedded.   Display as a link instead

×   Your previous content has been restored.   Clear editor

×   You cannot paste images directly. Upload or insert images from URL.

Loading...
×
×
  • Create New...