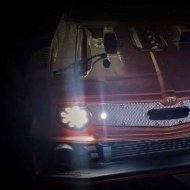
Popular Post JonnyUK Posted April 3, 2022 Popular Post Share Posted April 3, 2022 (edited) Thought I'd started a thread for this but seems that I hadn't 🤨 Anyways, never owned anything Hpi so figured I'd go for this one... First little run out with it today and this thing is immense, the power delivery is something else. Its a handful and next time I will find a larger area of tarmac to run it. Well this is todays resulting road rash to the chassis from 'clean' tarmac One crash into my little lads pushbike ended up snapping a front body post off at the bumper mounting, the zip ties came in handy or it would have been a short outing. Also, I realised that I'd forgotten to take the tarmac tyres with us so had to use the off road/gravel tyres instead, here's the result after running 2x 3s lipos through it 😁 I'll make them last at least another 3 or 4 battery packs...maybe... Managed to split the shell at the top of each front wheel arch so I need to do some gluing and re-enforcing before use it again. No idea why Hpi decided to fit the bumper foam about 2 inches away from the shell, by the time contact is made with the foam the body has flexed loads and splits at its weakest point. I doubt theres a warranty claim possible ☹️ I will be fitting some foam which sits closer to the shell at the front and also at the rear and maybe make a strengthening plate for where the body posts screw to their mounts. Edited April 3, 2022 by JonnyUK 5 Quote Link to comment Share on other sites More sharing options...
JonnyUK Posted April 7, 2022 Author Share Posted April 7, 2022 (edited) Awaiting the delivery of the replacement front post mount and some extra bumper foams to modify, I decided to fit some alloy parts. I know I'll get disapprovement for fitting metal arms but I plan to not hit any curbs. Plus both gearboxes have metal braces so it should handle the odd knock. I did keep a plastic end on each of the steering arms as a safety margin. I fit some bearing into the steering setup to make things smoother and also fitted the arm droop grub screws to lower the chassis slightly, I might lower it some more seen as this car will mainly be run on tarmac. Added a couple of titanium dome head screws underneath to see if we can make some sparks! 😁 Just need to get the new road tyres glued onto the rims and then try it all out. I was flicking through the manual today and noticed that Hpi provides you with the paper for setting the gear spacing, its at the bottom of one of the pages. You cut one of them off whenever the motor is disturbed, the pages are thicker than the usual A4 type paper that I saw people using. Edited April 7, 2022 by JonnyUK 2 1 Quote Link to comment Share on other sites More sharing options...
Stormbringer Posted April 7, 2022 Share Posted April 7, 2022 Sparks lol mind you will look good tho Quote Link to comment Share on other sites More sharing options...
Douge one Posted April 8, 2022 Share Posted April 8, 2022 On 03/04/2022 at 23:25, JonnyUK said: Thought I'd started a thread for this but seems that I hadn't 🤨 Anyways, never owned anything Hpi so figured I'd go for this one... First little run out with it today and this thing is immense, the power delivery is something else. Its a handful and next time I will find a larger area of tarmac to run it. Well this is todays resulting road rash to the chassis from 'clean' tarmac One crash into my little lads pushbike ended up snapping a front body post off at the bumper mounting, the zip ties came in handy or it would have been a short outing. Also, I realised that I'd forgotten to take the tarmac tyres with us so had to use the off road/gravel tyres instead, here's the result after running 2x 3s lipos through it 😁 I'll make them last at least another 3 or 4 battery packs...maybe... Managed to split the shell at the top of each front wheel arch so I need to do some gluing and re-enforcing before use it again. No idea why Hpi decided to fit the bumper foam about 2 inches away from the shell, by the time contact is made with the foam the body has flexed loads and splits at its weakest point. I doubt theres a warranty claim possible ☹️ I will be fitting some foam which sits closer to the shell at the front and also at the rear and maybe make a strengthening plate for where the body posts screw to their mounts. You know there's a WR8 thread in Rallying section? Or this tread is only for those that run bugeye body? Wr8 was developed with Ford fiesta body that's why bumper is to short for Impreza. Front body posts plate is known weakness you can reinforce yourself or get those https://www.shapeways.com/product/6VZTW75ED/hpi-wr8-front-body-post-reinforcement-v1 Or this https://www.shapeways.com/product/GN58E22SC/hpi-wr8-front-body-post-reinforcement-v4-low Quote Link to comment Share on other sites More sharing options...
JonnyUK Posted April 8, 2022 Author Share Posted April 8, 2022 1 hour ago, Douge one said: You know there's a WR8 thread in Rallying section? Or this tread is only for those that run bugeye body? Wr8 was developed with Ford fiesta body that's why bumper is to short for Impreza. Front body posts plate is known weakness you can reinforce yourself or get those https://www.shapeways.com/product/6VZTW75ED/hpi-wr8-front-body-post-reinforcement-v1 Or this https://www.shapeways.com/product/GN58E22SC/hpi-wr8-front-body-post-reinforcement-v4-low Thanks, I'll probably strengthen the post mount myself with some alloy plate. You are correct but that other WR8 thread is for the collective, this thread would be mine 😁 to document progress, try things and for future reference etc. 1 1 Quote Link to comment Share on other sites More sharing options...
JonnyUK Posted April 8, 2022 Author Share Posted April 8, 2022 Added some spare brushless fans and heatsink which I had left over from the crawlers. Added a switch into the wiring and fit into the receiver box lid so I can use them when the temperature gets high, I might just end up leaving them running all the time if the battery drain is bearable. During use, the battery leads end up settling a little bit close to the spur gear for my liking so made a quick simple shield. Quote Link to comment Share on other sites More sharing options...
JonnyUK Posted April 10, 2022 Author Share Posted April 10, 2022 A bit of strengthening to the shell and try to stop the splits spreading. 1 Quote Link to comment Share on other sites More sharing options...
stimpy Posted April 13, 2022 Share Posted April 13, 2022 This looks good mate and some sensible mods 👍. The only Hpi I ever owned was a Vorza. It was incredible but the rear upright/hub kept breaking and metal units weren't available at the time. Was very very agile. Still toy with building a rally rc but not so many places to run a fast one round here. Goodluck with the Scoob!. 1 Quote Link to comment Share on other sites More sharing options...
JonnyUK Posted May 26, 2022 Author Share Posted May 26, 2022 Used some scrap aluminium plate to make a couple of strengtheners for the front body post mounts. Should do the trick. I still need to do the same to the rear body posts. 2 Quote Link to comment Share on other sites More sharing options...
Stormbringer Posted May 26, 2022 Share Posted May 26, 2022 (edited) Youve been reading Yrkoons posts aint ya lol Good idea tho Edited May 26, 2022 by Stormbringer Quote Link to comment Share on other sites More sharing options...
JonnyUK Posted May 26, 2022 Author Share Posted May 26, 2022 10 minutes ago, Stormbringer said: Youve been reading Yrkoons posts aint ya lol Good idea tho Who is Yrkoon?? I've not read up much on the Hpi rally really. Quote Link to comment Share on other sites More sharing options...
Stormbringer Posted May 26, 2022 Share Posted May 26, 2022 Yrkoons the laddie and he has been using a couple of old alloy chassis to reinforce things but not as neat a job as your doing Quote Link to comment Share on other sites More sharing options...
JonnyUK Posted May 26, 2022 Author Share Posted May 26, 2022 10 minutes ago, Stormbringer said: Yrkoons the laddie and he has been using a couple of old alloy chassis to reinforce things but not as neat a job as your doing Nice one, I'll have to have a nosey 👍 1 Quote Link to comment Share on other sites More sharing options...
JonnyUK Posted May 30, 2022 Author Share Posted May 30, 2022 Brace hacksawed and filed for the rear post mounts. And it fits in the plastics recess here. 2 Quote Link to comment Share on other sites More sharing options...
Stormbringer Posted May 30, 2022 Share Posted May 30, 2022 Wow thats a really good fit mate 1 Quote Link to comment Share on other sites More sharing options...
Popular Post JonnyUK Posted May 30, 2022 Author Popular Post Share Posted May 30, 2022 Additional foams fitted at the front and rear to stop the bodyshell splitting again. Luckily the broken front two brackets also fit at the rear end with slightly longer screws to keep it all solid. The foams are Tamiya items but fit with some cutting. Front end. Rear end. Ready to get out and do some tarmac rallying again! 5 Quote Link to comment Share on other sites More sharing options...
Stormbringer Posted May 30, 2022 Share Posted May 30, 2022 Very nice job mate Quote Link to comment Share on other sites More sharing options...
JonnyUK Posted May 30, 2022 Author Share Posted May 30, 2022 3 minutes ago, Stormbringer said: Very nice job mate 👍 cheers pal. 1 Quote Link to comment Share on other sites More sharing options...
Acidsnow Posted May 31, 2022 Share Posted May 31, 2022 16 hours ago, JonnyUK said: Brace hacksawed and filed for the rear post mounts. And it fits in the plastics recess here. Nice work! 1 Quote Link to comment Share on other sites More sharing options...
JonnyUK Posted July 17, 2022 Author Share Posted July 17, 2022 (edited) Well maybe going out today with the Impreza wasn't a good idea. In these current high ambient temperatures I could get about 10-15 mins running until the esc thermal cut out would activate. At first I thought it was lipo low voltage cut out but no, checking the cells showed plenty of charge left. Couldn't feel any binding and the mesh is slack enough. I did seem to loose the reverse function too for some reason, not that I tried it much. Temp gun on the motor was about 50 deg C just after cut out (but I believe its not monitored by the esc) and the esc temp was about 42 deg C. I though it seemed wrong but checking the manual once home shows the esc thermal cut out to be 105 degress F, so 40.5 C The hot sun, hot wind, hot tarmac obviously wasn't ideal. It was still fun driving it in short bursts. Running 3s lipo, stock gearing and I think the punch setting and motor timing are still stock, I think I will turn the punch down a bit and also adjust the motor timing down so it runs cooler and I don't wear out another brand new set of tarmac tyres after 2 battery packs! I need to lower the breaking force too because it tries to stand on its nose. I did a little video which I'll stick on here after I clip it. *edit - no video sorry, file corrupted. Edited July 18, 2022 by JonnyUK 2 Quote Link to comment Share on other sites More sharing options...
Douge one Posted July 18, 2022 Share Posted July 18, 2022 21 hours ago, JonnyUK said: Well maybe going out today with the Impreza wasn't a good idea. In these current high ambient temperatures I could get about 10-15 mins running until the esc thermal cut out would activate. At first I thought it was lipo low voltage cut out but no, checking the cells showed plenty of charge left. Couldn't feel any binding and the mesh is slack enough. I did seem to loose the reverse function too for some reason, not that I tried it much. Temp gun on the motor was about 50 deg C just after cut out (but I believe its not monitored by the esc) and the esc temp was about 42 deg C. I though it seemed wrong but checking the manual once home shows the esc thermal cut out to be 105 degress F, so 40.5 C The hot sun, hot wind, hot tarmac obviously wasn't ideal. It was still fun driving it in short bursts. Running 3s lipo, stock gearing and I think the punch setting and motor timing are still stock, I think I will turn the punch down a bit and also adjust the motor timing down so it runs cooler and I don't wear out another brand new set of tarmac tyres after 2 battery packs! I need to lower the breaking force too because it tries to stand on its nose. I did a little video which I'll stick on here after I clip it. *edit - no video sorry, file corrupted. I don't know specs for new hobbywing combo that HPI uses in wr8 but older version with castle system manual was saying 3s for occasional use only, and yes it will overheat on 3s even in colder days. 1 Quote Link to comment Share on other sites More sharing options...
JonnyUK Posted July 18, 2022 Author Share Posted July 18, 2022 1 hour ago, Douge one said: I don't know specs for new hobbywing combo that HPI uses in wr8 but older version with castle system manual was saying 3s for occasional use only, and yes it will overheat on 3s even in colder days. I think it might say something like that in the manual with this one too, I'll have to check later. The last run out though, cooler weather because it was about 2 months ago, I ran two 3s packs through it and it didn't cut out once. And that was before fitting the two cooling fans on the motor. I'll check if the 2s lipos I use in the Tamiyas will fit and have an adequate C rating. I did buy four of the 3s lipos solely to use in this wr8 though 😐 Quote Link to comment Share on other sites More sharing options...
Douge one Posted July 20, 2022 Share Posted July 20, 2022 I know what you mean I still got one 3s pack I rarely use. After I started to improvise simple tracks with cones or found places I can go around 3s would overheat after 10 max15 min of throttle, braking, steering, but premature drive train wear was worst. I aslo find only on few tracks I'm running out of revs on long straights so I finally stopped using 3s 1 Quote Link to comment Share on other sites More sharing options...
tomekk33 Posted February 3 Share Posted February 3 On 07/04/2022 at 21:55, JonnyUK said: Awaiting the delivery of the replacement front post mount and some extra bumper foams to modify, I decided to fit some alloy parts. I know I'll get disapprovement for fitting metal arms but I plan to not hit any curbs. Plus both gearboxes have metal braces so it should handle the odd knock. I did keep a plastic end on each of the steering arms as a safety margin. I fit some bearing into the steering setup to make things smoother and also fitted the arm droop grub screws to lower the chassis slightly, I might lower it some more seen as this car will mainly be run on tarmac. Added a couple of titanium dome head screws underneath to see if we can make some sparks! 😁 Just need to get the new road tyres glued onto the rims and then try it all out. I was flicking through the manual today and noticed that Hpi provides you with the paper for setting the gear spacing, its at the bottom of one of the pages. You cut one of them off whenever the motor is disturbed, the pages are thicker than the usual A4 type paper that I saw people using. "also fitted the arm droop grub screws to lower the chassis slightly" What grub screw do you mean? Where are they located? Quote Link to comment Share on other sites More sharing options...
JonnyUK Posted February 3 Author Share Posted February 3 2 hours ago, tomekk33 said: "also fitted the arm droop grub screws to lower the chassis slightly" What grub screw do you mean? Where are they located? On the arms, where the sticking out parts are on the chassis. Not sure if the stock plastic arms have the hole for the grub screws but the aftermarket arms did. 1 Quote Link to comment Share on other sites More sharing options...


Recommended Posts
Join the conversation
You can post now and register later. If you have an account, sign in now to post with your account.