Jump to content
  • Join our community

    Sign-up for free and join our friendly community to chat and share all things R/C!

Badcrumble’s 1st Scaler - Basic GCM JK Jeep


Recommended Posts

Hmm, good point. I've compressed the suspension with the wheels straight ahead but not tried on the turn.

There won't be much in it - tons of space when the suspensions was one hole lower. These tyres sit at 106mm, Growlers would be 103mm and they appear to be the GCM tyre of choice.

Will test when I get a chance and take some pics.

Link to comment
Share on other sites

At one point I was considering having two body / tyre combos for this rig - one full fender and small diameter, the second big tyre and chopped arches.

That may happen in the long run but only if I can get it running properly first!

  • Like 1
Link to comment
Share on other sites

  • 2 weeks later...

Not much to report on the JK front. I have tried to re-fit the previous rear dampers but can't get a mounting point high enough using the existing mounts, the 3rd party 'key' mounts or a combination thereof to maintain the current ride height and provide more travel.


That means making a custom mount.  I have zero metal working skills but I do have some ABS sheet. Might have to give it a go...


  • Like 1
Link to comment
Share on other sites

1 hour ago, Badcrumble said:

Thanks @Andy-Roo. Thinking ahead (which I like to do when I can’t actually get my hands on the truck) what metal and cutting tools do you suggest. I warned you I was a noob...

Dremel @Badcrumble. I'd be totally lost without mine now; so many attachments - you can even turn into a router!

Snips aren't great - they tend to bend the material but a cheap sometime useful tool for small / quick applications.

Decent saw(s) - I use a fine tooth Zona saw but this would likely struggle on steel.

Model specific files are great too; nice and small for fine work.

Selection of fine sandpaper - i've got down to 2000 grit (possibly more) which doesn't feel like there's any grit on it at all!

  • Thanks 1
Link to comment
Share on other sites

8 hours ago, Badcrumble said:

Thanks @Andy-Roo. Thinking ahead (which I like to do when I can’t actually get my hands on the truck) what metal and cutting tools do you suggest. I warned you I was a noob...

It sounds like you’ve got the cutting side of things pretty much covered...but what material to use?  

It depends on the shape of what you’re trying to make, and if it’ll need any bends or curves built into it, and also how strong it needs to be.  
For me, there are three materials that are my ‘go to’ for making ‘stuff’; steel, alloy or Delrin/Acetal.  All have their uses and I keep all three in ‘stock’ for this kind of thing - only last week I made a mount for the ESC in my VS build out of Acetal. 
3D printing is another great option to consider.  
I use card for making templates, and if you don’t already have them a caliper (non digital) and a set square are very useful tools to own.  
I love making stuff like this - keeps me occupied for hours!
 

Don’t forget to keep us all posted on progress 👍
 

Link to comment
Share on other sites

Thanks @Andy-Roo, much appreciated. Had another read of your SCX10.2 build for some inspiration.
My only experience of making home brew parts was my Tamiya M03/M04 chassis plates

C3714CB0-3F04-4B2C-BF0B-8F422A073E2E.jpg
Laminated ABS sheets carved by hand! Not pretty but it worked - though never run in anger!

I’m hoping to get into 3D printing one day - probably when the boy is old enough and I can justify it as ‘educational’!

  • Like 1
Link to comment
Share on other sites

  • 4 weeks later...

I spent the last month thinking about rear body mounts. Thinking, planning but with no real time to myself I couldn’t do much more.

Home alone for my lunch hour, I dived back into the garage and removed one of the existing rear mounts and one for the long dampers from the front.

I brought the chassis inside so I could start doing some measurements and had a realisation...

84C57B66-322A-42BB-BE75-E3BA4A68D212.jpg


FED1B7B7-21C1-47E2-A5DD-6CEB68D9151D.jpg


61469A4D-21E6-4AA0-8FE7-BDAD4D79B05B.jpg


...with the axle level and the dampers at full extension, the driveshaft is rubbing against the base of the transmission. Brilliant.


Just as I think I have sorted ride height, tyre choice, etc... This could be a reason why my first run round the garden wasn’t brilliant!


So back to the drawing board. Next steps are...

- Drop the front dampers a hole back down to the previous level (not a fun task unless I remove the motor too).

- Re-fit rear dampers - may not need longer rears now and original rear mounts may come back into play

- stick the body on and remind myself how ****  it looks with a huge gap between the tyre and arch
- decide whether I need new wheels / tyres or throw on the big ones I have and start hacking at the body again 

Link to comment
Share on other sites

Some good news - 

5AF62B9C-B9DE-461D-A966-508D9BE0522B.jpg

My battery and a chrome pen for some interior decoration.

I have been collecting lolly sticks for a battery cover - either a crate or a flat bed.

As soon as I get a handle on the revised ride height / tyre choice I can put in my order for the ESC and a ton of other bits

Link to comment
Share on other sites

Hey up!!..


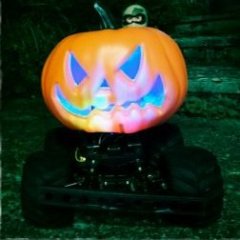
So, looking at your drive line that diff looks to be pointed up some - which can be beneficial but..... You could just extend your upper link a little which will clock the pumpkin back down some and the driveshaft angle down also.... then hey presto no more contact!! You then just need to re adjust the caster at the C hubs by moving them back a few splines....

Link to comment
Share on other sites

I’ve not tried the chrome pen yet. It is a Molotow, 2mm, I saw one used on a JK interior and thought it was about time I gave one a go. I got it from Amazon - as cheap as anywhere else I could find.

  • Thanks 1
Link to comment
Share on other sites

A little progress today, put the GCM mounts back on the rear, located my ABS sheet from my stock. Unfortunately,  it is way too thin to use for damper mounts. 

I'm going to have one last go at putting the 62mm dampers back on the rear and see if I can continue to use them - perhaps with the big Pro-Line tyres. 

If it doesn't work, I'll be ordering some Acetal and another set of 75mm dampers.

I also dug out the rear cage and had a look at the new battery.  Really pleased that I can still access the battery with the cage in place.

EDIT: had another look at the front driveshaft - compressed the shock and no contact made this time. Another issue though - steering arm rubbing on the servo case at full compression instead! Going to move the damper down and throw on the bigger tyres.


Edited by Badcrumble
  • Like 2
Link to comment
Share on other sites

Small update:

62mm dampers back on the rear. 
120mm Pro-lines installed.

Body screwed on.

OK at the back but a lot of rubbing at the front. Then I realised, I haven’t dropped the front dampers far enough. Grr.

Popped on the 103mm MT109 tyres - way too much space between tyre and arch.

Feels like I’m back where I was two pages ago in this thread!

Still not that happy about the lack of travel from the 62mm dampers but probably fine for light trail use.

So I need to bring the front dampers down and have another look with the 120mm rubber.

Where I trimmed the body could do with some tidying up too - I’d cut at a slight angle so the body isn’t quite flush to the sliders.

Then on to the rear - something to put that battery in and something to cover it!


Link to comment
Share on other sites

Hehe.. You are having fun man!!.. Getting bigger tyres on is always hard work and calls for lots of trimming dependant upon ride height.. 2 points here; firstly, don't forget that if you are happy with your shocks useable shock travel then you can always put a longer rod end on the top or bottom to extend its mounting positions without travel, secondly, there may be a chance that in order to fit 120mm tyres you may have to just widen the track a wee bit... Wider hexes or offset wheels....


Take a look at my trucks, most are pretty low but run decent sized tyres.......  and offset rims or bigger hexes/ hubs...


As for your rear dilemma ( oooer), you could lay a longer shock down a little more (towards middle of truck) to achieve the same ride height but with more drop out 👍  ( this does tend to soften the spring rate so dependant upon how you want it to ride that will sometime require the next spring up in terms of hardness... All lots of fun suspension!!

Link to comment
Share on other sites

Thanks for the tips @stimpy. I’ve got some 9mm hexes I could test out.

I lost momentum for a bit but it is coming back to me. I could do with more tinkering time!

Close to placing an order for the ESC but the dampers aren’t in stock until early October.

If the 120mm tyres don’t work out when I drop the front dampers down then I think it will be time to look at something between them and the the MT109s - such as Pit Bull Rock Beasts. Probably stick them on my GMade wheels initially to keep costs down.


Link to comment
Share on other sites

9 hours ago, Badcrumble said:

Thanks for the tips @stimpy. I’ve got some 9mm hexes I could test out.

I lost momentum for a bit but it is coming back to me. I could do with more tinkering time!

Close to placing an order for the ESC but the dampers aren’t in stock until early October.

If the 120mm tyres don’t work out when I drop the front dampers down then I think it will be time to look at something between them and the the MT109s - such as Pit Bull Rock Beasts. Probably stick them on my GMade wheels initially to keep costs down.


+1 for the Rock Beasts @Badcrumble; they perform really well for us on rock and mud👍

  • Thanks 1
Link to comment
Share on other sites

Join the conversation

You can post now and register later. If you have an account, sign in now to post with your account.

Guest
Reply to this topic...

×   Pasted as rich text.   Paste as plain text instead

  Only 75 emoji are allowed.

×   Your link has been automatically embedded.   Display as a link instead

×   Your previous content has been restored.   Clear editor

×   You cannot paste images directly. Upload or insert images from URL.

Loading...
×
×
  • Create New...