Jump to content
  • Join our community

    Sign-up for free and join our friendly community to chat and share all things R/C!

Badcrumble’s 1st Scaler - Basic GCM JK Jeep


Recommended Posts

After lurking here a little while, I thought it about time I posted something and got building.


I have a few RCs, mainly Tamiya but suffer from a lack of spare time and a seeming inability to finish a project. I seem to get stuck when it comes to body prepping and painting.


So after browsing on here and other fora, I stumbled across the ‘China JK’ Jeep shell. That looks neat, I thought. I could start from the opposite end of the process...


Then I browsed on a certain auction site and came across this...


5ED53111-8793-4823-9748-370B79AA3DC8.jpg


And these


CF724558-4962-4F4A-B7ED-E11800A28799.png


Little did I know that these were actually being sold by @toyolien of this parish!


So the accumulation of bits and bobs began...

Edited by Badcrumble
  • Like 1
Link to comment
Share on other sites

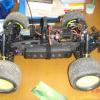
So, what is that chassis? I’m sure you have seen it here before but for completeness...


GCM Skeleton chassis with all metal transmission inside a Vanquish case with a Lockeduprc ‘Slipper Eliminator’ installed.


A punisher shaft connecting the transmission to the GCM transfer case. 


90mm King shocks front and 70mm rear.


The front has a GCM dual servo mount and an electrics tray (which has been narrowed) and the rear has GCM shock mounts.


That’s all good but it needs something to sit on top.


6328343D-6B91-486E-BF03-A3D480E14C2F.jpg

Edited by Badcrumble
Link to comment
Share on other sites

Before I got into this JK, my plan had been a scratch build (don’t ask, long story).


With that in mind I had purchased some axles from @Oh How Original


3E35FC5D-843D-4BF1-B066-B25CE42E7D3A.jpg


It turned out that they weren’t quite what I wanted for the scratch build but those lovely people in Canada who put this kit together had updated the kit for the the SCX10ii...


2ED6B0B4-0AA1-41EE-823E-397FCBCA2F82.jpg


Edited by Badcrumble
Link to comment
Share on other sites

  • 1 month later...

It has taken me a while to get the axles on to the chassis.


1B353FC5-FE80-4127-8220-E64335066C54.jpg


I wasn’t that happy with the level of articulation from the top links on the axles, the rear in particular.


The GCM instructions suggest building the axles as per the previous post and then attaching them to the frame. There was no way the links wanted to meet the frame this way.


I was so concerned, I switched out a GCM link for an SSD one to see if different rod ends made any difference - no joy.


After a bit of head scratching and a ‘this doesn’t normally happen, loads of people have successfully built this truck’ email from GCM (don’t get me wrong - it was polite!) I took the links off and attached them to the frame first. The stars then aligned and it came together, even if didn’t appear as flexible on the YouTube videos I have watched.


Since the photo I have attached the lower end of the dampers. Now it behaves properly and I’m a lot happier!


Having put it all together, I realised that the Panhard mount is on the wrong side of the chassis for this axle. @toyolien, did you threadlock this in or use an imperial hex screw? It does not want to come off!!!

  • Like 2
Link to comment
Share on other sites

One of the reasons it took so long to get the axles on the frame was that I got distracted by wheels and tyres. Which I then forgot to post in my update.


A62F6239-A0E2-4AE1-B0DA-9846EF6357C3.jpg


One tyre  was particularly tricky  to get on without pinching but perseverance paid off. 

Link to comment
Share on other sites

  • 3 weeks later...

Sloooow progress on the JK.


F485B463-EA14-4D92-88AA-7C56038EEABC.jpg


A448351B-B985-4B14-8FA5-A11390082730.jpg


It looks a lot better for being up on its wheels. Sorting the Panhard mount will allow me to finish the steering.


I’m not sure whether it looks a little under tyred with the body on but I’ll have another look once I have the steering sorted. Then I can also sort out the electronics and battery.

  • Like 1
Link to comment
Share on other sites

  • 3 weeks later...

Attempted to make some progress with the JK Jeep today. I made some progress, not all of it in the right direction. Yesterday I took the motor off and undid the top damper mounts. So today I...


Went to fit the new Panhard mount and the Panhard link to it. Got the mount on no problem, had to remove the steering servo tray to fit the link.

Fitted link, re-fitted servo tray.


I put the motor back on and tried to refit the dampers in their new top hole position, reversing the screw direction to make it easier to change in future (so so thought).

Failed miserably to get a grip on the little lock nut using the spanner from my XV-01 kit.


Took the motor back off. Attached the dampers with new spacers. Hmm, something isn’t right - chassis twisted to one side. Panhard link too short?

Re-fitted the motor.


Decided to press on and fit the steering servo. Hmm, can’t seem to get it in place. Removed the servo tray again. Fitted servo.


Tried to re- fit the tray with the servo on it. Hmm, this doesn’t feel right, why isn’t it sitting right?  


Removed servo, moved it to on top of the tray, re-fitted tray to chassis. That’s better.

Screwed steering link to horn.


Ah, that’s no good - there’s no way this truck is turning left - the horn won’t clear the Panhard link. Must have put the servo in wrong.


F62594DA-6A0E-443F-A468-0AAB7A44C9CE.jpg


Ok, I’m tired and hungry. Time to go home and have a late lunch. Then some googling and YouTube to see where I screwed up.

At least I’ll have something to do in the New Year...


UPDATE:  starting position for the servo horn needs to be moved 90 degrees - should provide sufficient travel. 


Next up, disconnect the Panhard link and see if the chassis twist disappears.

Link to comment
Share on other sites

  • 2 weeks later...

Having run into issues in my last playtime session, I took some thinking time.

I thought about the chassis twist and decided to remove my SSD panhard link.

I had a slimmer one from GCM and using this meant two things

  1. The link was the length specified by GCM
  2. It wouldn’t interfere with the steering servo

I was still struggling with the steering link though. Some Googling and referencing back to the SCX10ii manual made it obvious that my SCX10ii link was never going to work.

My steering servo is in a totally different position on the chassis and requires a much shorter link.

So I have measured up and ordered a Yeah Racing threaded rod, I already have plenty of rod ends.

It is easier than attempting my own rod given my lack of garage access time at the moment.


Of course, I then realised that I could reverse the servo and use the SCX10ii link. It means that the link runs in the opposite direction to the panhard link but I can see no obvious reason to not use this set-up.

At least until I receive the shorter link and go for the more aesthetically pleasing option.


The Skeleton is very tight for space. The steering servo is very tight to the motor.

The motor is pushed back by 1mm on spacers to allow the Axial pinion the mesh properly with the spur.

The motor wires are up against the steering servo.

I’m planning to get a RW pinion to see if it allows me to mount the motor without the spacers – 1mm might just make all the difference.


Whilst using the GCM panhard link has improved things, it makes contact with the steering servo horn at full compression. I plan to get a horn with less rear overhang (an RC4WD one looks smaller).


As for the chassis twist, I can see some sag from the right front damper.I think a damper rebuild is in order.

Fortunately, I have an RC4WD King rebuild kit in my spares stash. I might need to get some oil though.


Sorting the panhard link meant sorting the steering servo which allowed me to add the GCM electrics tray.

This in turn allowed me to mount the winch I purchased from @.AJ.


Last but not least I added a 3D printed GCM front bumper / body mount.


It feels like the JK is coming together!


C21E917E-109F-45DD-A985-4E742F61397B.jpg


76FB458A-A973-41C3-8E46-0EAE13EEB1C6.jpg

Edited by Badcrumble
Broken photo links
  • Like 2
Link to comment
Share on other sites

  • 4 weeks later...

I finally swapped  the Axial pinion for an RW Racing version. 


The slightly shorter pinion meant I no longer needed spacers and removing them stopped the pressure on the steering servo.


And I didn't need to buy a soldering iron so that I could re-route the motor wires.


Still waiting on a new servo horn to resolve the other clearance issues.

Link to comment
Share on other sites

  • 2 weeks later...

Having changed the orientation of the the original rectangular rear damper mounts on my trail truck so that I could mount the dampers higher (the top line of holes had been removed so the mounts would fit under a lower body Than the JK), I wasn’t happy with the amount of mount below the chassis line.


Even though there was no contact with the axle at full compression, it wasn’t pretty.

363B8031-753B-4ECD-86B5-4F7E626BF3BC.jpg

So, not having access to metal cutting and drilling facilities, I bought some eBay specials

F7B789AF-B900-42DD-A2FE-2803F271FE4C.jpg

Sligtly angled, they allow the body to fit on the mounts. In the end, I may have to start cutting up the hard body to make a battery fit anyway.


I would prefer mounts more like the originals to allow for two screws into the chassis rails but we’ll see how we get on. A little threadlock will help.


Small progress as I’m still waiting on my new servo horn to try and resolve the clearance issues at the front end.

  • Like 1
Link to comment
Share on other sites

  • 1 month later...

No movement on this as I'd been waiting for a servo horn which was on back order from Modelsport.

It has arrived but it is in the office with the truck and I am working from home.

Hoping I might get to retrieve them one day.

Link to comment
Share on other sites

  • 1 month later...

Got the truck back!


Fitted the new RC4WD horn today - much better! Before -
ABD7397B-B105-4856-9E66-DEAA0C8809BB.jpg


After - 

6372293F-F64A-4086-8A33-38E96035DEE6.jpg
 

Went to test run the chassis and realised I don’t have the ESC and BEC - must have left them in the office. D’oh!


I also moved the servo winch to attach  below the mount plate as it had been stopping the body from sitting properly. Of course, this meant that I couldn’t refit the nice and chunky front cross-member / bumper mount! To do so will mean taking a Dremel to the mount.


I have decisions to make now - 

Do I fit the GCM 3D printed sliders? To do so means cutting the body. But I’ll have somewhere to mount the ESC and rx.


Do I go LiPo? To stay with NiMH means cutting the body and making a battery box. But I won’t have the added cost of new batteries / chargers (both will be out of my reach for a while).


So it looks like I’ll be attacking the body...

Link to comment
Share on other sites

Good to see a GCM mate!!... Looks like a body trim is in order!!... 


I’ve never seen this chassis in the flesh but I can’t help but wonder if the motor and gearbox assembly could be flipped so the motor is below? Would help the C.O.G.


links and panhards  are a PITA, have a Toyzuki chassis on the bench (another one been here 2 to 3 years!) and had a right polavah sorting links etc.... That said, I am running it Uber low and setting all the links and geo myself so serves me right! Ha... 


Keep up the good work!


Oh, and lipo every time mate 👍

Edited by stimpy
  • Like 1
Link to comment
Share on other sites

Thanks @stimpy. The motor mount clips into  the chassis, you can have it on the left or the right of the chassis and...

A448351B-B985-4B14-8FA5-A11390082730.jpg

...there looks to be an equivalent mounting point on the lower chassis rail so you could flip it. Hmmm...


OHO has already been trying to convince me to go LiPo! It would mean I could get the truck running now with minimal further work - I could probably get the ESC and rx in without the skid plates. Unfortunately, the budget is a bit tight just now.

Link to comment
Share on other sites

Be worth seeing if you can get the motor at the bottom. But then all I think about is performance gains! So if you’re not into that then just drive it as is!! Hehe


So have you got Lipos? What are you missing - just side plates / sliders? 

Link to comment
Share on other sites

I’m all Nimh up to now so it would mean buying a new charger, batteries and storage. Mrs BC might be so keen on the potential for puffiness and I don’t have the spare funds just now.


I have  the floor plates  and LiPo  battery hangers but the plates require part of the body below the door to be removed. Out would come Mr Tamiya Modelling Razor Saw! The plates are neat - they allow two screws to fix the body to the plates using existing mounting tubes under the body.


I also have angel eye headlight lenses and a rear cage from moments of Shapeways madness plus a fair lead for the winch. What I don’t have are aftermarket bumpers.


It was pointed out to me that a good half of my tyres extends beyond my fenders. I’ll try a different set of wheels to see if it the deep dish wheels or the axle width are the cause (not that I intend competing with this truck!). If I stick with the 1.55s and these tyres then I would like some shorter shocks when funds allow / they are back in stock. I might try the 1.9s I have in the garage and see if they look OK and tuck in a bit more.


With the heavy JK body, any performance gains are welcome! The truck isn’t likely to be running any time soon so I might as well try flipping the transmission....

Link to comment
Share on other sites

So you could just run your nimh for now? 
 

Then put sliders on, cut body and run the included model bumpers?. 
 

Then you could enjoy it 🤓😎


As to the wheels poking out, they look like high offset wheels so that may be contributing. But ..... even if they do stick out, is it a problem? Or you just don’t like them like that?. Depends really upon what your goal is I guess!... 


Then pick some Lipos up later... 

Link to comment
Share on other sites

Thanks for helping me sort out a plan!

I’m going to take off the rear hard top and see what is underneath. Maybe make a small hole for a battery cable and run a pack from the rear bed, have the ESC*and rx between the chassis rails under the rear bed. Then I could at least get it running!

Then I can see what I do / don’t like and might want to change.

Link to comment
Share on other sites

Took the lid off the JK to see if I could fit a stick pack in there. Turns out the interior is all one piece.

6640B3E4-D973-4EB2-92FC-68884182F3AB.jpg

Fitting a pack in crossways behind the seats might mean trimming the body a bit unless I can fit it lengthways.
E78A2AB4-DE92-483D-8FD1-D897EDFF3806.jpg

I do like the look of the 3D printed cage I got for it while back.
222F1C53-24A2-4A4D-AA73-8D3E3481BBFF.jpg

That row of rear seats has got to go...

  • Like 2
Link to comment
Share on other sites

Join the conversation

You can post now and register later. If you have an account, sign in now to post with your account.

Guest
Reply to this topic...

×   Pasted as rich text.   Paste as plain text instead

  Only 75 emoji are allowed.

×   Your link has been automatically embedded.   Display as a link instead

×   Your previous content has been restored.   Clear editor

×   You cannot paste images directly. Upload or insert images from URL.

Loading...
×
×
  • Create New...