Jump to content
  • Join our community

    Sign-up for free and join our friendly community to chat and share all things R/C!

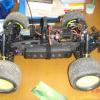
4WheelRC's SCX10 build thread: 'Project Lighting'.


4WheelRC

Recommended Posts

oooh what system you got going into that mate?


OrangeRx R615 Spektrum & JR DSM2 Compatible 6Ch 2.4Ghz Receiver.

Novak Timbuk2 w/13.5T brushless.

Savox SC-1256TG High Torque Titanium Gear Digital Servo.

+ Lots of lights! Muhahahaha :yahoo:

Link to comment
Share on other sites

13.5t wont that be a bit of a handful? hows the low down torque on those?


Dunno tbh. It was a recommended ESC & motor combo by Modelsport. I have done a quick test run using the stock 20T pinion (87T spur) and it sure goes. If I brake too hard when going forward even slowly it can roll the rig! It can also crawl real slow with almost no cogging (approx. 1 wheel rotation every 4 seconds), but as the top speed is way higher than I need for trailing/climbing I will be trying it with smaller pinions (e.g. 15T to 13T). Don't want to run it too much outside until the body is done and that will be ages.

Link to comment
Share on other sites

Axial SCX10 Rubicon Build Pt3: Resistance... Strider & his evil minions continue their forced construction of the SCX10. But Katness, Peeta & their good minions are working on a plan to retrieve the SCX10! Hope you enjoy it :)


FYI front mounted battery instructions at: http://www.axialracing.com/blog_posts/1073904225


My eyes are sore and need a break :dribble:  Now what shall I do for Pt4? Hmmm...

Edited by 4WheelRC
  • Like 1
Link to comment
Share on other sites

Haha brilliant mate! Very entertaining!  :thumbsup:


Did you have to cut that front chassis cross member in order for it to clear the axial servo horn or just for it to clear the tip of the steering link? Just wondering as my fastrax servo horn clears the plastic bit it at all angles but it does manage to hit the tip of the steering link by about 1-2mm, resulting in about 10mm of lost suspension travel.


I might have to try bolting the steering link on behind the horn instead and see if that clears it. Bit annoying though, as it will then surely sit at a rather odd angle?


Anyway, nice video and looking forward to the next installment! :)

Link to comment
Share on other sites

Did you have to cut that front chassis cross member in order for it to clear the axial servo horn or just for it to clear the tip of the steering link? Just wondering as my fastrax servo horn clears the plastic bit it at all angles but it does manage to hit the tip of the steering link by about 1-2mm, resulting in about 10mm of lost suspension travel.


Kinda both: Initially the Axial servo horn was hitting that chassis cross member (probably because where the horn fits onto the servo it is quite a large diameter due to the side clamping screws, coupled with the layout of the Savox servo making the output spline sit further forwards than perhaps it does on your servo).


Once I dremelled the cross member the whole servo horn cleared nicely, allowing more compression of the suspension & good flex, although not quite to the bump stops on the shocks - it compressed up to the point where the 'tie rod end' of the drag link (that screws into the servo horn) was hitting the chassis cross member. I want to be able to get to the bump stops! So to make clearance would have required removing the whole cross member (I read that some folks run fine without it), but I needed it to provide the front fixing point of the battery tray (as I front mounted my battery).


Thus I mounted the 'tie rod end' of the drag link on the 'back' of the servo horn instead - There is plenty of clearance before the diff casing and it works fine - angles look okay. Try pausing my build video (Pt3) during the 'Encrypted Transmission' section and you should be able to see what I mean (or drop by :) ).

Link to comment
Share on other sites

Posting this from [email protected] to help anyone with an SCX10 Rubicon and the problem where the front upper suspension (3-link) plastic 'v' touches the front transmission shaft (from the centre gearbox) if you articulate the front right wheel...


Thank you for your recent email. I checked with our Axial rep about this, below is his response. If you want the truss and links please respond with your address.
 

 The driveshaft does rub ever so slightly on the link. It will not affect the performance. All new SCX10s will come 4-linked in the front and back.


Might want to send the customer a truss and links. AX80043 includes the truss and links.


Thank You,

Scott Kerkes

Dealer Representative


Looks like Axial are saying that you need to 4-link the front of your SCX10 to prevent this (tbh I was planning on this upgrade anyway, to remove torque flex, the pivot ball popping out etc.).


Good to hear that new SCX10 kits will be 4-link as standard, but I'm a bit surprised that it has taken Axial so long to switch, as I have seen folks posting in various forums with this problem for well over a year. Hey ho, as least there is light at the end of my 'clearance tunnel'. Contact them if this problem affects you!

Edited by 4WheelRC
Link to comment
Share on other sites

Axial SCX10 Rubicon Build Pt4: Track & Rescue... Having taken over 4WheelRC's facilities & staff, Strider takes the Axial SCX10 Rubicon back to his lair. But Katness, Peeta and their good minions are at this very moment tracking Strider and have a plan to retrieve the SCX10!


Note: This one is just 'story', no progression on the SCX10 build, but I hope you find it amusing  ;)


Back to the build in part 5: 4-link front, floor pan, electronics, bodyshell and those darn leaking shocks to mention just a few things I need to do next :rc_car:


  • Like 1
Link to comment
Share on other sites

hahah amazing mate


oh i have one of these, thought you may be interested too.. http://www.hobbyking.com/hobbyking/store/uh_viewItem.asp?idProduct=12615


Hi Bonez. Many thanks for that link, that remote controller could be very useful in the future  :yes:  FYI have gone for a 6 channel radio and separate controllers (for winch and several lighting circuits), so I will be able to control main headlights lights, fogs or roof lights on independently)... I will be making a video on this when I get time.

Edited by 4WheelRC
Link to comment
Share on other sites

sweet mate. what have you used? relay switches? i brought one from HK to test to see how good it is but not had chance to yet!


Checkout HeyOKPerformance (guy in Canada named Al, really good service), I came across his LED & winch controllers while on RCCrawler.com and now have a bunch of them:

You an control a winch with either a spare proportional channel on the Rx/one of the sticks on the Tx. Or you could use a switch on the Tx (2 or 3 position) e.g. for gear up/down, using this: Winch Controller for three position channel.

Also checkout his LED controllers: Remote Switch for LED lighting he does this in several variants, so you can either control 2 sets of lights (on/off) from one channel, or one sets of, but be able to set them to high/medium/low brightness +off (other LED controller are available e.g. Control two accessories from one radio channel & http://www.rc-lights.com/categories/...trol-Switches/).

Link to comment
Share on other sites

Really like the videos mate, keep up the good work! So cool to see DjMedic has featured you on his channel & website! Now you've got to spit out a video every week at least! Haha ;)


Those parts look MUCH better anodised black! The raw silver was definitely a bit of an eye sore!


Looking forward to the next installment!  :thumbsup:


which video bud? i'm so behind on his videos lol

Link to comment
Share on other sites

Go on DjMedic's channel & you'll see that 4WheelRC is under the "Other Cool Channels" list on the right now. He also commented on one of his videos (Pt.4) about how much he liked it and what not. Really cool to receive praise from the man himself! :)


Now the pressure is on! Haha


Yeah I am honoured that Medic liked the 'alternative' SCX10 build videos enough to put them on the front of www.rcsparks.com! I was planning on doing the next few videos (which will cover first fit electrics & first run, 4-link front, chassis mounted servo and floor pan) as conventional build recordings, but now I feel I need to spice them up a bit. Thing is all the stop-frame stuff, video editing to overlay sounds etc. takes ****ing ages and I really want to crack on and finish the build.


Think I might 'take it easy' on a few videos, then spice some up after that :yes:

Link to comment
Share on other sites

@Leaking Axial shocks: I have made progress on this and following some suggestions in forums have tried replacing the stock O-rings in the dampers on my SCX10 Rubicon with the Tamiya red O-rings part number 50597 (used on the TA05, F350, CC, DB01, TT01 etc.)...


The red Tamiya O-rings are a fairly hard compound, so should last well (you can get other colours which are softer compounds so maybe smoother but leakier, the reds feel smooth enough to me): They are 3mm internal diameter, so fit the Axial shock shafts fine. However, their external diameter is a little larger - This means that you have to squeeze them into the shock body. I achieved this by not using the small black plastic spacer that Axial put between the two O-rings and then you need to be really careful pushing the Tamiya O-rings in (I'll post a YouTube video on this soon):


gallery_30889_2994_6976.jpg


5 days in and my shocks bump stops are now dry as a bone and their action feels fine. When the truck has been sat on axle stands for a few days, there is little bit of 'sticking' from the shock the first time you push a wheel up, but this goes immediately (not sure if they were like this before) :thumbsup:


Link to comment
Share on other sites

try a chassis stand bud see if that makes a difference? i stand my scx10 on its chassis taking all the weight off the shocks and mine are standard axial and they haven't leaked at all :D ........ yet haha


Thanks for the suggestion but I think this is more to do with the O-rings than how you 'store' your SCX10: I had 3 out of 4 shocks leaking. A friend has 2 out of 4... It seems that there are tolerance/quality control issues with the Axial O-rings and you either get lucky, or not (Axial support said as much to me over e-mail).

Link to comment
Share on other sites

Join the conversation

You can post now and register later. If you have an account, sign in now to post with your account.

Guest
Reply to this topic...

×   Pasted as rich text.   Paste as plain text instead

  Only 75 emoji are allowed.

×   Your link has been automatically embedded.   Display as a link instead

×   Your previous content has been restored.   Clear editor

×   You cannot paste images directly. Upload or insert images from URL.

Loading...
×
×
  • Create New...