Brett92 Posted June 19, 2013 Author Share Posted June 19, 2013 oh itll still be a bit of a beast, my mates gonna lend me his velineon gear (hopefully) to chuck in it for a bit Quote Link to comment Share on other sites More sharing options...
wangerman69 Posted June 19, 2013 Share Posted June 19, 2013 Nice work banana man Quote Link to comment Share on other sites More sharing options...
Brett92 Posted June 19, 2013 Author Share Posted June 19, 2013 thanks, am having fun building this to be honest, currently building the rear end and plonking it onto the chassis, where the frick did banana man come from? lol Quote Link to comment Share on other sites More sharing options...
wangerman69 Posted June 19, 2013 Share Posted June 19, 2013 Its a term of endearment It's just me everyone is bud pal chummy matey banana man etc, never call people by their real of forum name Quote Link to comment Share on other sites More sharing options...
HATZY Posted June 19, 2013 Share Posted June 19, 2013 banana man was in dandy comics lol Quote Link to comment Share on other sites More sharing options...
Brett92 Posted June 19, 2013 Author Share Posted June 19, 2013 dandy and beano life is not complete without them Quote Link to comment Share on other sites More sharing options...
wangerman69 Posted June 19, 2013 Share Posted June 19, 2013 http://www.youtube.com/watch?v=Hq2KXudEjkI Quote Link to comment Share on other sites More sharing options...
Oh How Original Posted June 19, 2013 Share Posted June 19, 2013 leaving it untill i manage to get in the bath ha what a tease! Now now boys.. Quote Link to comment Share on other sites More sharing options...
The Dark Knight Posted June 19, 2013 Share Posted June 19, 2013 ha funny guy Quote Link to comment Share on other sites More sharing options...
Brett92 Posted June 19, 2013 Author Share Posted June 19, 2013 lol dirty dirty sod Quote Link to comment Share on other sites More sharing options...
ghazghul Posted June 19, 2013 Share Posted June 19, 2013 Got a roller one of these sat in a box. Rear shocks emptied themselves of oil in transit. Working my way through a full alloy rebuild of a maverick strada sct (just used some moly CV grease on its diffs too) before I have a proper look at the Turnigy. I only have a 4.5t sensored motor for it atm too, which I think is not going to end well. Enjoying the thread, should be useful when I feel confident to look at mine. Quote Link to comment Share on other sites More sharing options...
Brett92 Posted June 19, 2013 Author Share Posted June 19, 2013 a friend of mine is in need of a rear axle if ur willing to sell the one off ur turnigy since ur bothering with the maverick atm? or maybe even the whole truck? Quote Link to comment Share on other sites More sharing options...
ghazghul Posted June 19, 2013 Share Posted June 19, 2013 Think I'd like to keep it ta, maverick is a project for me to get the hang of things as hsp parts from China are silly cheap before I approach the turnigy. Will let you know if change my mind tho. Quote Link to comment Share on other sites More sharing options...
ghazghul Posted June 19, 2013 Share Posted June 19, 2013 oh and I think the spur is 32dp (or 0.8m) as my Strada pinions and a Schumacher 32dp mesh nicely. Quote Link to comment Share on other sites More sharing options...
Brett92 Posted June 19, 2013 Author Share Posted June 19, 2013 ta, stock gearings on these are pretty crap unless ur on a track, but too slow for bashing Quote Link to comment Share on other sites More sharing options...
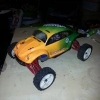
Brett92 Posted June 19, 2013 Author Share Posted June 19, 2013 cars finally built, shell hasnt been cut out cause i have no paint yet, i just have to set up the camber and toe, and tape and glue the tyres but its pretty much done Quote Link to comment Share on other sites More sharing options...
Brett92 Posted June 20, 2013 Author Share Posted June 20, 2013 update stage 5: contents- chassis side guards servo mount & random bits n bobs the servo i bought from hobbyking, a hextronik hx12k.. 10kg torque and .16sec/60deg ratings, not sure how accurate, but for a rwd 1/10 its plenty strong and plenty fast servo mounted onto chassis with side guards, antenna mount, and battery cover posts in place crappy closeup of servo mounted, alloy servo mounts too which is a random upgrade from the artr kit stage 6: contents- front shock tower front bumper bits and bobs to start getting the car together front bulkhead and arms mounted and front the front front shock tower and bumper all bolted on, fair bit of flex in these bumpers too, shock towers also look like they support an anti roll bar but not sure on where i would find one for this car also with the shock tower comes a plastic (dust?) cover which i suppose keeps rocks and crap from jumping into the steering assembly, shock tower bolts onto the cover but still feels quite sturdy stage 7: contents- rear shock tower rear body posts + mount rear camber links wasnt really anything interesting here but the finished product, shock tower and body posts mounted, the body posts seem to be adjustable in height too which looks to be quite a bonus.. again it looks like the rear shock tower too supports a sway bar, might have a browse on hobbyking sometime see if they sell them and a photo from the rear stage 8: contents- rear bumper and mudflaps dogbones rear hubs + axles etc rear bulkhead (arm and gearbox mount) arms, camber links and half of rear bumper mounted gearbox bolted on rear hub terrible close up shot, theres a spacer between the hex and the hub (which i dont really like) hubs mounted and dogbones fitted (i know my cambers off, im sorting this last) rear view of the bumper fitted with the mudflaps (i love this things dont ask why lol) front(ish) view of rear bumper will update again soon, any feedback or questions are welcome Quote Link to comment Share on other sites More sharing options...
PurcyP Posted June 20, 2013 Share Posted June 20, 2013 clear your ash tray! lol good build so far Quote Link to comment Share on other sites More sharing options...
Brett92 Posted June 20, 2013 Author Share Posted June 20, 2013 its the missus she smokes a fair bit more than me, i told her to clear it i was busy building, and thanks Quote Link to comment Share on other sites More sharing options...
HATZY Posted June 20, 2013 Share Posted June 20, 2013 clear your ash tray! lol good build so far you think that ashtray is bad. Quote Link to comment Share on other sites More sharing options...
Brett92 Posted June 20, 2013 Author Share Posted June 20, 2013 stage 9: contents- shock bodies, shafts, springs, u get the idea half way built, these have metal bodies and caps, also theyre threaded which is a bonus shocks built, oiled, ready to go onto the car, spring rate and oil is fine right outta the box to be honest, not sure what weight oil it is though stage 10: contents- front body posts / mount battery tray cover battery tray foam spacers minor bits and bobs front shocks mounted, they sit at a nice angle and feel good as is, no adjustment other than winding them down a bit really rear shocks mounted, same again, good outta the box, no need for adjustment really, springs and oils are all good and the marvelous carbon fibre battery tray cover which actually stops the whole chassis looking so dull ^^ car is practically built, sorry for the last few pics camera is rubbish especially in low light, just need to belt and glue the tyres on the rims, buy some paint and cut out the bodyshell.. but for now im using my friends clear shell since its already trimmed etc i also have temporary running gear im borrowing off a friend velineon vxl-3s with genuine motor to suit i still need to tape and glue the tires on, set up the linkages for the camber and steering, but its all together and near enough ready the shell im borrowing too bit scuffed and scraped but its a shell! lol shot just for size comparison against a mini revo you think that ashtray is bad. not sure if that looks worse than mine because its a bigger ashtray or if mine looks worse cause theres a smaller car in ur shot lol Quote Link to comment Share on other sites More sharing options...
HATZY Posted June 20, 2013 Share Posted June 20, 2013 pmsl, count the dog ends lol Quote Link to comment Share on other sites More sharing options...
Brett92 Posted June 20, 2013 Author Share Posted June 20, 2013 thats effort lol, i know this thread aint much but expected a few more comments than this Quote Link to comment Share on other sites More sharing options...
Zardoz Posted June 20, 2013 Share Posted June 20, 2013 Coming along a treat! My mate has the buggy version of this, think I like the SCT more though. Must be the mud flaps Quote Link to comment Share on other sites More sharing options...
Brett92 Posted June 20, 2013 Author Share Posted June 20, 2013 thanks, i dont know what it is about the mud flaps, theyre just... cool lol id choose the sct over the buggy all day long, + its a bonus getting to build it Coming along a treat! My mate has the buggy version of this, think I like the SCT more though. Must be the mud flaps Quote Link to comment Share on other sites More sharing options...


Recommended Posts
Join the conversation
You can post now and register later. If you have an account, sign in now to post with your account.