gavinc Posted April 19, 2013 Share Posted April 19, 2013 I went for the ARF option in the end. Also I am new to planes, so my thinking....I can always swap out components later if they are poor quality or break but at least I will know how to fit the part! I am also a little lazy. Planning on ordering a Bixler 2.0 kit next so I can compare and contrast the two models. Quote Link to comment Share on other sites More sharing options...
gavinc Posted April 19, 2013 Share Posted April 19, 2013 Oh why oh why do these things always happen to me! Ahhhh Looks like whoever packed my plane left out the rear linkeage piece for the rudder and the elevator :-( It is quite late but I am pretty sure I have checked all packets..... Anyone know how I tackle this with hobbyking? I just want them to send me the linkeage don't want to send the entire plan back. Gutted. Quote Link to comment Share on other sites More sharing options...
aidensere07 Posted April 20, 2013 Share Posted April 20, 2013 what parts missing mate, the whole pushrod or just the clevice that goes on end of rod? Oh why oh why do these things always happen to me! Ahhhh Looks like whoever packed my plane left out the rear linkeage piece for the rudder and the elevator :-( It is quite late but I am pretty sure I have checked all packets..... Anyone know how I tackle this with hobbyking? I just want them to send me the linkeage don't want to send the entire plan back. Gutted. Quote Link to comment Share on other sites More sharing options...
gavinc Posted April 20, 2013 Share Posted April 20, 2013 It is item 10 in my manual. Looks like an l shaped rod. They list it as a linkeage rod. Bit confused tbh on where that part would fit anyway. The rods that run the length of the fuselage are fitted and I have the plastic bits to screw to the foam etc. so I think I am good. Any idea what part 10 in the manual is for? The l shaped linkeage rod? The instructions are crap! Quote Link to comment Share on other sites More sharing options...
aidensere07 Posted April 20, 2013 Share Posted April 20, 2013 (edited) Would it be this part?? or if you look on this video at 44min 12sec it might be that kind If its like the picture i might be able to help you out but if its like the video, sorry i cant It is item 10 in my manual. Looks like an l shaped rod. They list it as a linkeage rod. Bit confused tbh on where that part would fit anyway. The rods that run the length of the fuselage are fitted and I have the plastic bits to screw to the foam etc. so I think I am good. Any idea what part 10 in the manual is for? The l shaped linkeage rod? The instructions are crap! Edited April 20, 2013 by aidensere07 Quote Link to comment Share on other sites More sharing options...
gavinc Posted April 20, 2013 Share Posted April 20, 2013 I have that part. Have two of those. According to the manual it is a L shaped linkage Shows as being one of the required components to build on the parts in the box summary page of he manual. The item number is number 10. Of course the manual does show where it is required and therefore I am not sure it even is. I will get a photo of the manual. Quote Link to comment Share on other sites More sharing options...
aidensere07 Posted April 20, 2013 Share Posted April 20, 2013 yea try and get a picture mate, i looked at the manual on hobyking but it doesn't show a item 10 so manual must be different to the one you have. I have that part. Have two of those. According to the manual it is a L shaped linkage Shows as being one of the required components to build on the parts in the box summary page of he manual. The item number is number 10. Of course the manual does show where it is required and therefore I am not sure it even is. I will get a photo of the manual. Quote Link to comment Share on other sites More sharing options...
stebro Posted April 20, 2013 Author Share Posted April 20, 2013 I have that part. Have two of those. According to the manual it is a L shaped linkage Shows as being one of the required components to build on the parts in the box summary page of he manual. The item number is number 10. Of course the manual does show where it is required and therefore I am not sure it even is. I will get a photo of the manual. If it what i am thinking of there should be 4 L shaped plastic brackets and a bag of screws with the some plastic flat brackets too. The L shape brackets screw on the wings, rudder and Aileron and the flat plate goes the other side of the wing , Aileron or rudder to hold the screws in Quote Link to comment Share on other sites More sharing options...
gavinc Posted April 20, 2013 Share Posted April 20, 2013 http://s746.photobucket.com/user/gavinc_photos/media/Manual2.jpg.html]http://i746.photobucket.com/albums/xx108/gavinc_photos/Manual2.jpg Here we go, see item 10 on the left! Manual doesn't refer to it again and is not shown in any photo! Quote Link to comment Share on other sites More sharing options...
stebro Posted April 20, 2013 Author Share Posted April 20, 2013 I didn't have that mate Quote Link to comment Share on other sites More sharing options...
gavinc Posted April 20, 2013 Share Posted April 20, 2013 Cheers for checking. The manual for this thing is bonkers! I am going to try and build this thing up tonight and assume this is a manual mistake. Another question. Did yours have the metal washers hot glued into the front of the fuesalage? Seen lots of videos showing people remove them. But mine didn't have any! Quote Link to comment Share on other sites More sharing options...
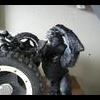
stebro Posted April 20, 2013 Author Share Posted April 20, 2013 Cheers for checking. The manual for this thing is bonkers! I am going to try and build this thing up tonight and assume this is a manual mistake. Another question. Did yours have the metal washers hot glued into the front of the fuesalage? Seen lots of videos showing people remove them. But mine didn't have any! No never had them in either. Right little update on maiden flight Launch well and was trying to trim it out ( not easy when you never flown plane before ) when i had to stop that and try and bring it under control as it started to do loops on its own. Was good to see it looping but when i couldn't control it, i got little worried. Slowly dropped the speed off and decided i would just have to try and get it at a point where it would land ok. Never happened as it fell like a lead weight straight on its nose. Split the nose open and bent it all and cracked a wing tip. Did some emergency repairs with some good old duct tape and checked why the it locked on loops, but servos seem fine. Only thing i could see was dry grass and stuff in the linkage. From the crash or the cause i dont know. 2nd try and it wouldn't launch but i realised that if i do 3/4 throttle it doesn't want to fly so dropped it back down to around 1/2 and it went ok again but think everything had slipped to the nose as it was nose heavy, tried to correct but move throttle i gave the more it wanted to nose dive, was fighting for about 30 secs to control it but just couldn't get it under control and bigger nose dive was taken. Really bent the nose this time and split the fuselage down to the wings, and broke wing from its mounting where the bolts go through. some pics for you to laugh at going to try and repair it and fly it again and go from there Quote Link to comment Share on other sites More sharing options...
aidensere07 Posted April 20, 2013 Share Posted April 20, 2013 sorry to see them pics ste, that nose should unbend, put it in some boiling hot water and then tape it afterwards. make sure you get the COG right, its pretty important to how it flies. like you said it wouldnt have helped if everything had slid to the front Hope you get it fixed and airbourne again soon only way to learn these things is to practice mate, dont let it put you off!! Quote Link to comment Share on other sites More sharing options...
stebro Posted April 20, 2013 Author Share Posted April 20, 2013 Thats handy to know about boiling water. Yer think all the velcro lets it stick on battery and esc as they where just loose. 1 Quote Link to comment Share on other sites More sharing options...
gavinc Posted April 21, 2013 Share Posted April 21, 2013 Gutted hope you get her sorted soon! I ran 8 or 9 packs through my super cub today, had a great time. UNTIL the last pack, sudden gust of wind, low concentration levels and whack. Super cub is currently stuck at the top of the bigest Quote Link to comment Share on other sites More sharing options...
seanmcgrath48 Posted April 22, 2013 Share Posted April 22, 2013 A tree surgeon buddy of mine is going to scale the beast tomorrow and rescue the cub. Did you get your Blxler back ? Sean Quote Link to comment Share on other sites More sharing options...
gavinc Posted April 22, 2013 Share Posted April 22, 2013 It wasn't my Bixler, I haven't built that fully yet. Manily because I was too busy crashing my Super Cub into trees and rescuing it! :-) http://www.msuk-forum.co.uk/topic/170237-hz-super-cub-tree-landing-rescue/ Quote Link to comment Share on other sites More sharing options...
stebro Posted April 27, 2013 Author Share Posted April 27, 2013 sorry to see them pics ste, that nose should unbend, put it in some boiling hot water and then tape it afterwards. make sure you get the COG right, its pretty important to how it flies. like you said it wouldnt have helped if everything had slid to the front Hope you get it fixed and airbourne again soon only way to learn these things is to practice mate, dont let it put you off!! The hot water trick work great mate cheers. Right think i may have figured out what caused the servo to lock up causing it to loop. When i took off the hatch to examine the servos the was a chunk of polystyrene wedge next to the servo. That may have caused it but not 100%. This may have come from when i was mounting the wings as i didn't like how the wings bolted together as 1 bolt didn't seem to tighten up, so i think the bit that holds the bolt must have broke free when i was fastening it all up as that was the peice that was by the servo. So now i just need to figure out how to mount the wing. I now there is the velcro mod like you have done but there is also a mod where you put a hook on each wing and used a elastic band to hold wings in. That sounds good but dont know what hooks to use and how to fasten them in to wing Quote Link to comment Share on other sites More sharing options...
gavinc Posted May 1, 2013 Share Posted May 1, 2013 So now i just need to figure out how to mount the wing. I now there is the velcro mod like you have done but there is also a mod where you put a hook on each wing and used a elastic band to hold wings in. That sounds good but dont know what hooks to use and how to fasten them in to wing I did this last night, bought some of these :- http://www.ebay.co.uk/itm/181129725199?ssPageName=STRK:MEWNX:IT&_trksid=p3984.m1439.l2649 1) Stuck them on the underside of the wings with epoxy 2) Pulled out the wings 3) Put rubber band through gap where wings go 4) Pushed wings back on ensuring rubber band didn't fall out 5) After epoxy dried I stretched the band onto the command hooks Worked a treat in a test flight yesterday evening. I threw those annoying wing bolts in the bin! Quote Link to comment Share on other sites More sharing options...
stebro Posted May 1, 2013 Author Share Posted May 1, 2013 I did this last night, bought some of these :- http://www.ebay.co.uk/itm/181129725199?ssPageName=STRK:MEWNX:IT&_trksid=p3984.m1439.l2649 1) Stuck them on the underside of the wings with epoxy 2) Pulled out the wings 3) Put rubber band through gap where wings go 4) Pushed wings back on ensuring rubber band didn't fall out 5) After epoxy dried I stretched the band onto the command hooks Worked a treat in a test flight yesterday evening. I threw those annoying wing bolts in the bin! Cheers mate, i seen one done the other night on youtube i think it was, where they put the hooks on the top and just went over the top of the fuselage will get some of them ordered now Quote Link to comment Share on other sites More sharing options...


Recommended Posts
Join the conversation
You can post now and register later. If you have an account, sign in now to post with your account.