Jump to content
  • Join our community

    Sign-up for free and join our friendly community to chat and share all things R/C!

Some of my Friends


atom3624

Recommended Posts

Waiting for the 8mm connectors for the installation onto the E-Maxx - better safe .....

Alloy servo horn arrived for the MERV - now with the Turnigy high torque/speed servo - installed.

Son Ed now has his 1/10 Grave Digger/Stampede - pleased as punch - already VXL installed .....

Al.

Link to comment
Share on other sites

8mm connectors have arrived.

Looks like I'll be breathing in tin and lead fumes for much of tomorrow!!

Gave Ed, my 6 year old son his Stampede Digger 'Stam Digger' and he's made up, except .....

It hasn't stopped raining!!

Perhaps during tomorrow.

Al.

Link to comment
Share on other sites

HAPPY NEW YEAR!!

1st order of the New Year - Exotek Shocks for the MERV.

Don't like the rear damping - front is fine, but the rear - probably a leak .... don't want to throw more money at a potential leak!!

http://www.stormerhobbies.com/cgi-bin/seekpart.pl?src=ns&pn=EXO1142

$ 1.62 /

Link to comment
Share on other sites

Got ready to install the XL2 ESC into the stretched FLM chassis 3906 E-Maxx.

Check out the photos.

http://www.msuk-forum.co.uk/gallery/image/19308-/

http://www.msuk-forum.co.uk/gallery/image/19309-/

http://www.msuk-forum.co.uk/gallery/image/19310-pict0202/

http://www.msuk-forum.co.uk/gallery/image/19311-/

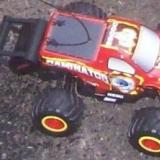
The little trucks are 1/24 Monster Jam trucks. Excellent general detailing.

Bought for my 6 year old son Ed.

Check out the size difference between the true 1/10 E-Maxx and the so-called 1/10 Stampede!!

I hate this 'convenience scaling'!!!

My '1/6' FG MT is really 1/8, JUST!

I had cut off some of the Mamba Monster ESC cable and attached to that.

It's always good not to be hasty.

I thought I would be tight on cables.

Previously the cables were fed over the top.

Even over the top, not underneath as I've fed here, I believe that the XL2 cables can connect directly to the motor cable, removing one solder joint.

It's hassle, but the fewer joints you have the better, so back out with the nuclear device again - 100W soldering iron.

Excellent point brought up in the soldering thread by someone. Keep the tip uppermost.

I noticed with the iron fed into a 'springy holder' during my marathon soldering 2 days ago, that higher up was glowing!!

I shall try another way of securing the iron - I've a 300W iron that came with this kind of mount - should work.

INSTALLATION DELAYED A COUPLE OF DAYS.

Al.

Edited by atom3624
Link to comment
Share on other sites

I LIED !!!

Installation complete!!!

I only need to power up and program the XL2.

I've had a few beers, and am wrecked - not a good way to program a high power ESC I reckon!!

Tomorrow.

Honest!!

I couldn't de-solder the old cables, so had to cut them as tightly as possible, leaving the maximum.

All is perhaps 5-8mm too short. I've spare cable but don't want to open up the ESC 'though I do have spare 8AWG cable if necessary.

Talk about a tight fit!!!

Al.

Link to comment
Share on other sites

The initial installation exposed!!

Note a couple of things:

1. The ESC is slightly to one side.

2. The shorter wires have limited a couple of things, and I've held the cables out of the way with a higher strength cable tie - here's hoping ...

3. The LHS battery has had to be installed further back, as the cables push out a little at the front. This will affect weight distribution a little.

http://www.msuk-forum.co.uk/gallery/image/19313-/

http://www.msuk-forum.co.uk/gallery/image/19314-/

http://www.msuk-forum.co.uk/gallery/image/19315-/

I'm hoping for some free time tomorrow, to program the ESC.

It did have a 19t pinion on, but I'm thinking of installing a 23t that I have .... what's wrong with a little more top end !!!!

Al.

Link to comment
Share on other sites

Need better pics, they're not great. Also, is that a 3906 box? Perhaps a 3905 would compliment this set-up better? Adaptors are available from FLM.

Otherwise, scherwing! This puppy gonna scream! You'd better vid it! Are you really aiming for 8s?

Link to comment
Share on other sites

Cheers Admiral!!

It's a 3906 but with 'upgraded and strengthened everything I could find within global Ebay' inside - no Delrin remains I don't think.

I still like the '2 on the fly' gearbox, but I was thinking of changing as the later slippers are far better, and BL doesn't need a lower gear .....

I'll have to see if I've a mate I can press gang into filming - wife has her domain, me mine, and ne'er the twain shall meet!! Happy that way!

I'm expecting to either blow the box, the motor or both!!

Don't want to, but it will be fun!!

Al.

Link to comment
Share on other sites

I did have 'titanium gears' inside, which I could never get to change properly - it's the cog that kept on pushing one side or the other.

I've changed to 'OTB' I believe - it's perhaps 2-3 years since I seriously stripped that down.

One of those 'if it ain't broke' things!!

Al.

Link to comment
Share on other sites

Just taken a few more photos.

Spaghetti at the front is because ESC cooling fan doesn't plug into ESC - got to Y-link to the motor fan to the Rx - messy, but I've tidied as best I can!!

I've zoomed in on my battery connections - the 8mm bullets mean the previously fine silicon tubing 'safety sleeve' idea is really too tight - 10mm ID on its way!!

http://www.msuk-forum.co.uk/gallery/image/19316-/

http://www.msuk-forum.co.uk/gallery/image/19317-/

http://www.msuk-forum.co.uk/gallery/image/19318-/

http://www.msuk-forum.co.uk/gallery/image/19319-/

http://www.msuk-forum.co.uk/gallery/image/19320-/

http://www.msuk-forum.co.uk/gallery/image/19321-/

http://www.msuk-forum.co.uk/gallery/image/19322-/

Holding the baby again, so trial setup will have to wait!!

Al.

Link to comment
Share on other sites

You may have noticed that I re-positioned the motor fan on it's heatsink - it was catching the windscreen of the bodyshell a bit too much.

Now it just touches.

I don't expect it to be a problem.

If it is, I'll just have to look at 'options'.

If you look at the bodyposts, they're the UE 'Knucklehead' design. Basically requires new tubing to be re-drilled, ro mount higher. Not difficult, just hassle, and I prefer it as low as possible!!

Al.

Edited by atom3624
Link to comment
Share on other sites

I posted a close up of the slipper shaft, as it's got the Kershaw designs spring washer / thrust bearing setup - removing the normal spring.

This is supposed to permit better setup of the slipper with high torque installations.

Al.

Link to comment
Share on other sites

For safety, I'm going to wait for the larger diameter silicone tubing.

I chose to use females for the batteries, males for others.

I'd mixed male and female before, but accept the 'stupid possibility' that if a battery has both a male and a female, it is possible someone, somewhere might connect the 2 - highly unlikely, but not impossible.

My 6 year old is increasing his 'curiosity'!!

Al.

Link to comment
Share on other sites

Quick update:

1. MERV Digger - going very fast - standard gearing, Digger (bigger) wheels/tyres on 3S. Scraped the 'Bad to the Bone' part of the roof sticker away doing a wheelie - I'm waiting for somebody to bring out a compatible lightweight, green wheelie bar ...

2. Ed, my 6 year old was 'racing' the MERV in his Stam Digger. Not bad control, and he ran out of charge.

3. E-Maxx? The extra, large heatshrink I was waiting for, to hold the silicone tubing on the battery connectors arrived. The silicone tubing is 'on its way', so may arrive tomorrow, and .... E-Maxx will rip tarmac very soon - can't wait!!!!

4. F360 1/5 - haven't run it for quite a while - not good. If it's dry tomorrow ..... pigs can fly I know.

5. Blue Thunder .... minor cosmetic considerations underway ... nothing for a month or so.

Al.

Edited by atom3624
Link to comment
Share on other sites

Waiting for the Postie with the silicon tubing I want to make the batteries 'safe' in operation in the E-Maxx, I've been playing with the MERV Digger.

It was flipping on its lid too easily, despite the viscous centre diff - which I'd put very thick fluid in (500k).

I stripped down last night, then thinned to 80-100k - still thick.

On replacing I had to re-position the motor to permit fitment of the pinion - getting tired as was 01:00!!

Fitted a 26t 'for fun, with the 50t spur. IT'S A ROCKET ON 3S.

Easily flipping on it's lid - shame as the previously pristine Digger stickers are now a tad 'damaged'!!

I'd replaced the nylok nut on the slipper last night, so adjustment is easier - backed off the slipper a bit.

Closer inspection found the metal gearbox case was not fully tightened onto the chassis, thus limiting pinion choice - now tightened onto the MERV chassis properly.

Fitted a smaller pinion - 23t - so will still be ridiculous, but not mental!!

Reckon I should go up to 55t on the spur - I'm currently running a Hot Racing 50t.

Al.

Link to comment
Share on other sites

Heatshrink came yesterday - to seal the silicone tubing onto the battery cables.

10mm ID silicone tubing came today.

Protective battery 'shields' are now installed!!

All is ready for setup.

Slight problem. The MadHouse is wide awake, so no chance until tonight - possibly a good thing - calm be down a bit.

A relatively unlimited (XL2 ESC in an E-Maxx) beast like this will be ..... WILD .... I HOPE!!!

Anxious Al !!!

Link to comment
Share on other sites

Ordered a Hot Racing 55t steel spur from Bizarre Hobbies - gearing is great fun, but way too tall on the MERV with the Digger wheels/tyres on!!

I'll also lower the pinion size from 23t to around 20t.

Unless I blast it, it's cogging quite a lot with the current (excuse please!) gearing.

Al.

Link to comment
Share on other sites

That Maxx is a nice ride, very similar to my own. I'll try to sort some pics, don't mean to threadjack?

8s will be insane, your drivetrain will be begging for mercy! Do try to get some video footage.

Link to comment
Share on other sites

I'll be staying at 6S for now - until these Turnigy's give up that is ....

Nice to forward plan, but the slipper would be nuked with 8S!!

I'd definitely have to go to the more modern single speed gearbox.

Threadjacking welcome mate - no worries.

Al.

Link to comment
Share on other sites

Not having fun setting up the XL2 - 8mm bullets and no on/off switch don't help.

It says to have Tx on, pull to full forward, then switch on, which means connect the batteries ...

So there I am, holding the Tx on full with my feet, whilst connecting the last battery terminal, then following the instructions.

First off, it programmed great, but had 50% forward, 100% reverse - needed to reverse the polarity on the Tx.

Then the baby started kicking off, which didn't help concentration, and I've presently got full reverse on the Tx = 0, full forward = full forward, rest = somewhere inbetween.

Charged up the batteries, ready to attack tomorrow.

Both charged up to 12.60V, and were within 1 minute of each other at 4A charging currect - nanotech Turnigy 5Ah 3S 65/130C batteries. Liking them even more.

Obviously the last 'journey' has been mentioned by Admiral, but that will nuke the motor, and the slipper. 8S !!!! That'll be next Christmas - POSSIBLY!!

I do have a 1mod Strobe slipper I can try - I forget why I stopped using it. Might give it a try again.

Al.

Link to comment
Share on other sites

Reading 'what I did with my RC's today' you may have gathered I've had a day's frustration!!

I had changed a few things on the Castle link.

When setting up, the default is 100% throttle forwards, 50% reverse. I had 50% forward, 100% reverse!!

I tried reversing on the Tx and all sorts of weirdness started to happen.

The batteries are perfect - new 65/130 5Ah 3S Turnigy nanotechs - best I've encountered so far, 'though still like my lower spec 2S 5Ah Venoms - 100% reliable ...

With the Tx reversed, I got NO zero throttle at the Tx rest, but at the full reverse position, and no reverse.

I plugged in the Castle link, and reset all to default - I hadn't changed much as it's 'early days', just adding 10% drag brake initially.

I took a closer look just now, and noticed that I could reverse the motor polarity ..... got ME thinking!!

I reset the Tx as Normal.

I re-programmed the XL2 in the E-Maxx.

I got 50% forward, 100% reverse.

I switched off, then re-plumbed in the Castle link and reversed the motor polarity.

I tested - in case you're not aware, and following Castle recommendations, this is done WITHOUT PINION.

Outcome - PERFECTO, PARFAIT, PERFECT!!

Too dark to try, so I'll be harrassing the neighbours tomorrow. Hopefully I won't blow up the transmission - which is highly modded - and the slipper .....

PART 2 and interesting ....................

Al.

Link to comment
Share on other sites

It originally came from Kershaw with a 23t pinion - must have got it from somewhere, I think there - and I had reduced to a 19t through over-heating.

I'd never installed the motor cooling fan, so I'm allowing a little 'something', and have installed the 23t again.

This is going to be ballistic!!

It's on 32DP, not 1mod, mainly for space reasons.

The 1mod I have is a 51t Strobe I think, the 32DP 72 Robinson.

I like the idea of strengthened gears, and will look into 1mod options, 'though all seems fine just now.

Al.

Link to comment
Share on other sites

Join the conversation

You can post now and register later. If you have an account, sign in now to post with your account.

Guest
Reply to this topic...

×   Pasted as rich text.   Paste as plain text instead

  Only 75 emoji are allowed.

×   Your link has been automatically embedded.   Display as a link instead

×   Your previous content has been restored.   Clear editor

×   You cannot paste images directly. Upload or insert images from URL.

Loading...
×
×
  • Create New...