Jump to content
  • Join our community

    Sign-up for free and join our friendly community to chat and share all things R/C!

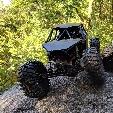
Dartmoor builds a Capra


DartmoorTrails

Recommended Posts

After reading through pages of RCC builds and watching vids I thought i'd take the plunge and grab a Capra.

It's been over a year since my last kit build, the SCX10 ii which I thoroughly anjoyed and knew i'd enjoy building this one as well.

Will be starting off with the following mods out the box after reading the recommendations of those pioneers amongst us!


Build list:

Capra Kit

SSD Servo mounts

Wraith Hexes

11t 32p Axial Pinion

Holmes Crawlmaster Sport 16t (got a 13t also just in case)

1080 ESC

Promodeler 470 (had it for over 2 years and is 'spare' now)

Castle BEC

Tower Pro  MG90D Digital Micro Servo (the recommended Spektrum is out of stock everywhere and i've seen someone else use this so should be ok with careful endpoints)

Got a DX4C and am waiting on a RX to arrive.

Went for Boom Racing wheels and tyres just cause they're dirt cheap and i'm keen to try something new.


Some pictures of the goods i've received so far (waiting on ATees)


spacer.png

Nothing quite like a delivery:)

spacer.png

Turned into this - ignore the Injora, can't actually remember when I ordered that, or wehat it's for, but hey-ho!

spacer.png

Missing the ATees order + I haven't ordered a new BEC and Y lead yet... In good stock though so shouldn't need to wait thankfully, not that i've an ESC to plug it into yet! or receiver for that matter...


  • Like 3
Link to comment
Share on other sites

Manual page 8.... here we go!

MDia0tP.jpg

Bag A, lots of parts, first impressions are there's no trees to cut down! Excellent:)

uo1yib0.jpg

Locker built, no surprises. Very comfy fit and 6 bolts instead of the old 4 which can't be bad.

70Y4O5l.jpg

Locker installed in the front axle - really nice tight fit and spins freely.

spacer.png

Portals built up, likely will be stripped in the future to accomodate overdrive and brass but for now, all ok.

sbhKAWW.jpg

Front axle complete:good:


Onto the rear now:

LsgJ6v9.jpg

D4kzbaD.jpg

u4TUleP.jpg

Both axles built and ready to roll, took this long:

jphqXBI.png

There were a few distractions but all went together smooth as.


Time for a break and should probably do some parenting...!


Back soon.

  • Like 1
Link to comment
Share on other sites

2 hours ago, stimpy said:

That parenting thing always gets in the way!! 
 

Build looks good, and....... familiar!!!.... hehe...


Enjoy 👍

Thanks Stimpy.


Managed to get on with the shocks this afternoon:


spacer.png

Going for the red springs all round as I hear she can sit a bit high so i'll aim for some droop out the box.

Aluminium shock bodies, wahey, we're being spoiled:)

O sh#% I spy e-clips:(


XOK7ww8.jpg

Grunt work done.

Green slime deployed on lower O rings.


Tip for those venturing in - do the bottom e-clips before the tops otherwise you'll spend a frustrated 5 minutes and probably end up cross-eyed.

I don't own shock pliers.... So, if you're building and need to grasp the shaft whilst tightening the link ends i recommend inner tube, doubled up, and then pliers onto the shaft.

I also used 'tap' to help get the shaft started into the plastic.


spacer.png

Finished up with the shock build.

I hate e-clips but I really really like the bleed hole and clamping bottom bracket / spring holder thing;)

spacer.png

I expect with the right tools, this ~50 minute job would be halved!!

spacer.png


Dinner time, almost, just going to leave this here:


spacer.png

That doesn't include the steering links.

152g... That's really good, like exceptional, and 4mm thread.

I cannot see me ever needing to change these, like ever.


I'm basically wasting time as I don't want to destroy my fingers putting all the link ends on.

What time is MOTD on? Oh wait...

  • Haha 2
Link to comment
Share on other sites

On 06/06/2020 at 19:18, DartmoorTrails said:

Manual error!
The 18mm bolt doesn't exist in the bag and if it did would be 7mm too short. Fortunately they packed 5x 25mm bolts to get the job done!
Reckon I must have an old manual emoji23.png75157596343c03a051ce33996b9fd52d.jpg

Sent from my Pixel 3 using Tapatalk
 

Yeah I looked for this too but the 25mm weee the only ones left for that job!! 🤪

Link to comment
Share on other sites

Loads to update on from Sunday, but the glaring issue for me with this build is how terrible the manuals are - the one in the box and the online version. You're really 'left' to your own devices to decipher some of the funky pictures and when there's lots of screws to go in on one graphic it can get a little confusing!

Nonetheless, once built (each bit) it's extremely well thought out and solid.


Put the Promodeler on and a idrt cheap 'Answer' servo horn, which I actually quite like!

6N9lBhQ.jpg

Not shaved any bump stops yet - will probably do that after i've got everything together so I know how far I want to go.


Links then - because of the turnbuckle style these are way easier to put together now and I really like the whole feel of them; a real hats off moment to Axial on these.

f02vDis.jpg

cfpHLoJ.jpg

Z9fDKX4.jpg


Stopwatch went awol as I had kids and wife to deal with throughout the day.


Next up is transmission - looking forward to that:good:

  • Like 1
Link to comment
Share on other sites

Unsure why but I love building up transmissions, it's so satisfying when everything goes together without 'slop' and is just nice and beefy in the hand!

Also, i've never 'done' a DIG before so was looking forward to getting my head round that + I went and bought a different micro servo to the recommended Spektrum so I knew there was a curve ball coming my way!


Away we go then:

99dbvoK.jpg

0GjsbcI.jpg

Done!

I didn't take any progress pictures as I was realy focused. This thing spins exquisitely smooth and the DIG went together aok - clicks nicely at each endpoint.

Didn't put the motor in as I don't have it yet! so that's to do - got a 11t pinion for it.


DIG servo time....

e0m3c9t.jpg

I compared the servo saver stuff in the bag and 'arm' that goes into the DIG 'handle'(?)

The included horns with the M90D are quite thin and will need replacing but I went ahead and drilled out the middle sized horn to 2.5mm and got the arm installed all fine.

SSD servo mounts of course;)


R3drDmq.jpg

The protruding arm on that servo might get dremel'd; will if I need to / want to!


Shaft time!:


IDDGRcw.jpg

qDnsQY2.jpg

joMsk9n.jpg


No surprises here; nicely built as expected.


Buttoned up with the axles:

Df7cy97.jpg


Close up of the skid and link positions:

zyDvFUS.jpg


The manual would have you install the upper rear links to bottom most position but experience tells me with a crawler that you should place that a little higher to ahcieve some decent squat, or something like that!


All put together (as it is) it's so smooth, way smoother than other rigs i've built up.


Cage time next up.

  • Like 2
Link to comment
Share on other sites

Not much to picture on this. It's a cage..... However, my gawd how many bolts?!?!?!?!? Feels like I've a forearm to rival Atlas; incredible amount of hardware to screw in.

Once together it feels great though, really solid.


mvUwRFE.jpg


And 'offered' up:


37FkFzt.jpg


I can't really do anymore till I get my Atess order unless I rob another rig 'cause i'm impatient...

Awaiting a 13T and 16T Holmes Crawlmasters; 1080 ESC, wheels, tires and foams. All fairly important stuff really!


BEC and Y lead with Modelsport so expecting that tomorrow.


New 3 channel receiver via Ebay - just had shimpent notice but i'm swapping that with a 4 channel from my shafty as that only needs 3 channels and I need 4 on the Capra so will go ahead and get that done today ready for the BEC tomorrow.


Till the next time.


  • Like 2
Link to comment
Share on other sites

Looking good man and yes.... What a load of pippin screws!!


You're expected motors - 540 or 550? If 540 you'll be wanting the 16t and a small pinion. The 13t may be ok in a 550 or if 540 only good for racing around really... Depends what you want out of it...


Must get back on mine this week.... Though it may fall down the line with other projects.... 🤪

Link to comment
Share on other sites

10 minutes ago, stimpy said:

Looking good man and yes.... What a load of pippin screws!!


You're expected motors - 540 or 550? If 540 you'll be wanting the 16t and a small pinion. The 13t may be ok in a 550 or if 540 only good for racing around really... Depends what you want out of it...


Must get back on mine this week.... Though it may fall down the line with other projects.... 🤪

Cheers Stimpy.

540 can, I don't think a 550 fits without modification.

Will go for the 16T on 11T pinion and then swap out if needs be but hoping I don't need to.........


Need to think on a colour scheme now!

Link to comment
Share on other sites

I have mine on a 16t 5 slot and 13t pinion at the mo as thats all I had at the time and it is too fast for crawling but not as bad as the rep is. I have a 9 and a 10t to try..... I suspect once ive banged the 36% OD in it will need the 9!!

Link to comment
Share on other sites

44 minutes ago, stimpy said:


Ousing??

Lol, housing...!

Transmission housing to be exact from Vitavon I think?

I've not read into it too much but I've a feeling the closeness of the motor to the transmission housing limits you to a 11t pinion, so naturally someone's made a replacement!

You may be able to sort yourself out though - don't take my word as gospel!

Link to comment
Share on other sites

Thought I’d already posted in this one or someone else’s, a 4 hole mounting position motor will fit a 9 in the standard tranny. The vitavon looks lovely but only helps with a 2 position motor mount  and adds weight!.... 


Most of the rebuildable motors and I believe all of Holmes have 4 holes in for mounting the motor.... 


Dont listen to everything the yanks say!! They like to worry.... and like to add lots of expensive weight to their trucks!! ( Not all of them!)... 

Link to comment
Share on other sites

After driving my Capra for the first time on Saturday, I’d say it definitely needs the COG lowering. So I’d keep it as light as possible above the skid to make best use of those wide axles.  

  • Like 1
Link to comment
Share on other sites

Thought I’d already posted in this one or someone else’s, a 4 hole mounting position motor will fit a 9 in the standard tranny. The vitavon looks lovely but only helps with a 2 position motor mount  and adds weight!.... 
 
Most of the rebuildable motors and I believe all of Holmes have 4 holes in for mounting the motor.... 
 
Dont listen to everything the yanks say!! They like to worry.... and like to add lots of expensive weight to their trucks!! ( Not all of them!)... 
Good to know thanks stimpy [emoji106]

Sent from my Pixel 3 using Tapatalk

Link to comment
Share on other sites

Join the conversation

You can post now and register later. If you have an account, sign in now to post with your account.

Guest
Reply to this topic...

×   Pasted as rich text.   Paste as plain text instead

  Only 75 emoji are allowed.

×   Your link has been automatically embedded.   Display as a link instead

×   Your previous content has been restored.   Clear editor

×   You cannot paste images directly. Upload or insert images from URL.

Loading...
×
×
  • Create New...