Jump to content
  • Join our community

    Sign-up for free and join our friendly community to chat and share all things R/C!

how to connect 2 wires together?


froggy8

Recommended Posts

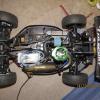
hi guys, the wires that connects my receiver to the esc is slightly shorter so i was wondering how you guys would make it longer?


i thought the wire that connects to the esc would be a plug but it looks like it is soldered inside the esc so i was thinking cut the wire and put another length onto it without making it too fat.


i really want to put the wire through a braided thread to make it look nice.


cheers again guys

Link to comment
Share on other sites

the esc is working fine but the wire is not long enough to reach the rx, so i have managed to cut another wire off a spare servo i had.


i, then, twisted each wire to the correct color and taped it all up but it looks a right mess! also it is now too fat to fit in a braided thread :(

Link to comment
Share on other sites

the esc is working fine but the wire is not long enough to reach the rx, so i have managed to cut another wire off a spare servo i had.

i, then, twisted each wire to the correct color and taped it all up but it looks a right mess! also it is now too fat to fit in a braided thread :(

I need to redo my xerun switch but my soldering is pants!!....but i don't wanna do what u jus described here...lol...what if u twisted them togather then used heat shrink tubing ..i thought of doing it this way as it'll look tidyer then taping it up...long as ur not pulling on it it should b ok... Edited by evssv
Link to comment
Share on other sites

Wires must be soldered to make a proper connection. I can make extension leads at whatever length you need, however, a plug on the ESC end would be handy, the plugs are too large for some widths of cable braiding however, nowt you can do about that ;)

Evssv, the new switch should be soldered, either to the board or to the existing cable leaving the board....delicate work I'm afraid...

Link to comment
Share on other sites

no it doesnt have a plug which i thought all esc has one.


if it did have a plug, i was thinking i could just get a normal servo extention and just plug one end to esc and the other to rx.


well all i have done is twitsted each of teh 3 servo wires together and taped them all up until i can find another solution :(

Link to comment
Share on other sites

Wires must be soldered to make a proper connection. I can make extension leads at whatever length you need, however, a plug on the ESC end would be handy, the plugs are too large for some widths of cable braiding however, nowt you can do about that ;)

Evssv, the new switch should be soldered, either to the board or to the existing cable leaving the board....delicate work I'm afraid...

which I'm not ready to do...as I'll mess it up...
Link to comment
Share on other sites

I would suggest that it may be worth getting some old wire and giving soldering a try. With practice you can get to a standard that your happy with and you'll have a new skill. I'm not great with the soldering iron but I get the job done and you can hide it with the braid knowing you have a good connection. Go on, give it a try!

  • Like 1
Link to comment
Share on other sites

cheers guys! i have now resolved this problem, i have twisted all the wires together then use heat shrink and another heat shrink over that then put them through braided thread. i am more than happy with the outcome!


many thanks guys!

Link to comment
Share on other sites

yep soldering IS EASY. 


many have used advice from forum about practicing with old wire,

learning to join splits and make tails , then move onto soldering batterys and connectors.


some tips : 


my soldering station/table area has some key tools you need.

sandpaper to clean off the tip for re-tin. blacked up tips need cleaning so sand lightly then let it warm up hot and pop a lite sodler onto tip its now re-tinned

damp cloth/sponge to clean tip of iron. each time you solder wipe the tip on the damp cloth/sponge to keep it clean before soldering more parts

a few clamps / tape / helping hands to hold and secure work.

GLASSES !!!! Glasses yeah you look a geek but a geek with eyes still. use them all the time !!! 

FLUX !!!! a wax flux , do not use that waterbased rubbish grab a tin of waxy soldering flux (waxy is better it dont burn as much)


Rules 


1 never blow on your solder, it causes it to rapid cool and lift away, your sodler also takes a dull hue/black tint

2 risk burning, place iron safely down into stand or a flat none flamable surface. Never just throw an iron down thinking its safe.

3 FLUX if its a wire dip it into the flux, if its a pad/bullet connector use a brush and brush on some flux.

5 GOOD SOLDER, that cheap stuff is cheap for a reason its a pain to work with, an expensive solder is worth its weight and gives best results.

6 IRON a good iron for the job required, no good trying to solder a 8 gauge wire to a 8mm bullet with a 30w iron. if you can get an adjustable temp iron all the better. 

7 practice , solder two wires together and pull on them both, if the solder breaks re do it. over time you learn how much heat you need and how to control the iron.

and when i say practice i mean practice, take a single thread of wire and join it to another  make a Y  then make another and branch of another two wires.

learn to solder and how its best to line up work 

Edited by Tamiyacowboy
  • Like 1
Link to comment
Share on other sites

Join the conversation

You can post now and register later. If you have an account, sign in now to post with your account.

Guest
Reply to this topic...

×   Pasted as rich text.   Paste as plain text instead

  Only 75 emoji are allowed.

×   Your link has been automatically embedded.   Display as a link instead

×   Your previous content has been restored.   Clear editor

×   You cannot paste images directly. Upload or insert images from URL.

Loading...
×
×
  • Create New...