
Leaderboard


Popular Content
Showing content with the highest reputation on 26/08/13 in all areas
-
WOOOOOOOOOOOOOOO2 points
-
Go around and kick his head in?2 points
-
Leave the esc and motor in a bag of dry rice overnight. This will attract some asian people who will fix it for you.2 points
-
Editing completed!!! 26 mins left to piece everything together to make one file then the upload to YouTube. 7 minute long video!!!2 points
-
Nowt wrong with KM Bajas!2 points
-
Generally speaking, Integy stuff is crap. Looks nice and shiny, but has the consistency of cheese. The only alloy upgrades worth fitting are made by Innovative RC, FLM, or Alza Racing. All top quality stuff.2 points
-
right am back again. have been slowly bashing away and now have topdeck nearly fitted. i just have two small end sections to glue in place ( i ran outta glue again) i have also cut the cabin sides out and also the windows in the cabin sides. 5" ratchet clamps helped lots here clamping two sheets together i made one cut and have two side panels. next i need to cut out a roof top and window fairing flange, and get my booty down the shop for some more superglue. i shortened the cabin sides to i did not want them running all the way back to the transom so i have them swooping down to midway between frames 4 and 6. the front of the cabin sides sits about an inch or so forwards of frame number 2. pictures will follow when i have a tidy area and some not so bright sunlight. so keep tuned in to see how the whole cabin cruiser starts to finally take its finished form.2 points
-
Yeah as djr said, always bag up when de-anodising. .............................2 points
-
As MarcusF said, Caustic soda. But wear googles, gloves, mask & a condom & keep an eye on the process!!2 points
-
Great vid Rusty. What's the soundtrack? I like it...1 point
-
noooooooo 77% 90% 96% 99% processing now......1 point
-
Here are my current Lunchies and my Pumpkin. This one is the least hopped up. Purchased from Modelzone cheap in their closing down sale. Modded slightly with Ansmann dampers, bearings and 3rd shock. Running standard silver can and Tamiya ESC. Got this one off Ebay. Was a bit cobbled together with a Mad Bull gearbox which has recently been swapped back to a Lunchbox one. Current mods are : Full lights and spotlamp kit FX10 conversion 3rd shock mod Metal bearings Uprated servo horn HPI wheels Running 15t Clash motor and M.Sonik4 ESC respray in black with Rolling Thunder decals This one is my fastest Lunchie. Purchased chassis from Ebay and was built by someone on here I believe. Not done much to this one apart from metal bearings and a EZ RUN 60 amp combo. Colour scheme on the body is to replicate the Interceptors from Mad Max, but havent got around to adding the decals yet. And finally my Pumpkin. Totally stock apart from a 3rd shock mod. Doesnt get used much as I dont want to scratch it lol.1 point
-
+1 on the corrosionX Used the stuff on my hyper TT. The above vid shows it completely submerged. I just did the RX, ESC and had a waterproof servo. The motor is fine being totally submerged. Bit of a clean up job afterwards though! When I first got the corrosionx I was sceptical about the claims for it. So I took an old 27Mhz rx to test it on first. Sprayed the RX, waited about 3 minutes, then dunked it straight into water. It carried on working perfectly fine. Servo and ESC were still connected to it and they were fully functional. Protecting your electronics like this will be much cheaper than they money you'll lose getting rid of the truck.1 point
-
Do you offer any other services Purcy? On a serious note, good luck buddy. I'll keep you in mind if I need servicing soldering doing.1 point
-
Right, been out playing with the SCX. Decided crawling isn't for me. It's just too slow. Anyone wanna buy it?1 point
-
I get mine done for free by a pro1 point
-
Well since i forgot to update after Saxmax! Guy was winning the race with Martin in 3rd until the last corner of the last lap, he ran the curbs a bit too much and snapped the steering rack resulting in him heading straight on into the gravel/wall! so guy last, Martin P2... first race Guy hasnt won all season. The crash protection on the wall must be very good as there was hardly any damage to the car! got the steering rack replaced, car tracked and ready to roll again in an hour which im pretty impressed with myself for! Guy won the last race with Martin in 3rd! yeah sorry i couldnt really stop to chat! Yeah he put in the quickest tiimes in the wet and dry in pratice, just had an unfortunate weekend. we did get this pretty cool picture of him entering the gravel though not so fun when it comes in and you have to clean out a few inches of stones out of the entire undertray this is one of his steering rack stops after he got shunted off, clearly took quite a hard knock!1 point
-
Wasn't you monitoring the temps through out the run and noticed temps were rising rapidly before it got to the stage off reaching 230f :0. At that temperature it should have demagnetised at that stage or started to, think you might have been lucky! You shouldn't need a fan if its geared correctly. Thanks.1 point
-
well the met office and bbc weather couldnt make their minds up on what was meant to happen it was changing every 30 mins all friday evening, So i took that risk of just me going and drove over 6am saturday morning. Weather was ok all weekend so could have taken the gf and kids. As it was I had a great time there as usual and met some great guys. We even had enough small scales to hold a race needing 2 heats then the final on sunday,I broke the e-revo in heat 1 so ran again in heat 2 with the stock slash 4x4 qualifying for and finished second in the final. Spent a lot of time repairing cars but to be honest that was fun too as there was always others close by doing the same and ready to help any way they could. Big thanks to Niel, Rob and William for organizing the event shout out to deadmeatuk and the rest of the lincs bashers and to the group from wales for all the help and making me feel part of their groups over the weekend. will def be going to the may one next year once the date is finalised,1 point
-
Pat that is sick!1 point
-
I used to run a 2200 kv in the MT4 on a 13t temps were quite hot but then I was using silly big tyres .. I reckon a 12t would be about right as volt up gear down springs to mind !. At 230f I reckon you may have started to melt the glue on the rotor. Might be an idea to open it up and have a peek before you next go out with it don't want to end up overloading the ESC and frying that .1 point
-
nope not been on ebay yet the ones that sold for 66.52 post on ebay are from scotland1 point
-
No only the rear tie rod deletes from integy, everything else is hit and miss. Check out flm for quality alloy upgrades that have a lifetime warranty1 point
-
Trimmed and drilled the new shell!1 point
-
Got it out of the car, and put it back in the car.1 point
-
For a min I thought for real lol.... Goldman1 point
-
If your running on sand a lot the turtle racing v2 clutch system would be a good buy.1 point
-
i think we need to get out pat, the school hols are making you crazy..1 point
-
The double brake setup is also used on hobbyoro models and Carson, as some older fgs had the double brake it depends on what gear carrier you have fitted. Might be better for you to upgrade to the single metal disk, but check that the carrier will take it as the single setup is a bigger disk Also check freeprawn or rc online for parts This takes the 2 disk setup http://pages.ebay.com/link/?nav=item.view&id=221273624262 This uses 1 disk http://pages.ebay.com/link/?nav=item.view&id=130973549869 Fgs use 2 brake bars different lengths One has 2 screws that push on pads The smaller brake bar has a cut out on the bar ,pads fit into it1 point
-
I know what you mean. Over the last 2 weeks I've been doing summer school and the kids have (along with making rockets) been doing speed calculations. This included timed runs over 10m for my RC's. I wanted to use the 210 - it should be a little faster in a straight line and it looks way more bling, but the only place we could do this was the school yard. Unfortunately its very dusty due to building work and I just couldn't get it to hook up. So out came the 410 - 44mph on 2S in racing trim ie not geared for top speed. But thats not the interesting part. Because I did this every day (with a different group of kids) for 2 weeks I had a play with how much run-up I need to get that speed and its just over 5m. So it can go from stationary to 44mph in 5m and a little under a second! With your gearing I'd expect more around 40mph, but you'll be hitting that even faster! BTW your RC collection looks far too neat and clean. Do you actually run them?1 point
-
Thought I'd post this in here as not everybody frequents the rally section. Basically it's a Losi Mini Short Course chassis with an ABC hobby Datsun Sunny shell, the build thread is here: http://www.msuk-forum.co.uk/topic/178290-rally-projectwith-a-bit-of-a-difference-updated-25-8-13-new-pics-and-vid/ And a quick couple of vids:1 point
-
Yummy nice thread and a nice looking kit1 point
-
I found nothing wrong with the HPI procedure, as long as its new you're backed up by warranty anyway. The last thing I'd recommend is just taking it to a model shop as breaking in is an art that you need to learn to do yourself.1 point
-
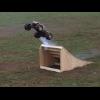
Decided to see what it jumps like. The only ramp I have is too big for this really, it's the one I use to launch my 1/8 stuff into orbit, but the little rally car took it really well, here's a vid of my son jumping it: Considering that ramp is too big for it really, it jumps brilliantly. When I tried launching it off that ramp as a SCT it was just a case of launching it and hoping for the best, and it would rarely land cleanly due to parachuting and pretty much no control, but the rally shell and smaller wheels have made it jump much more cleanly. I sails through the air nicely and just a little dab of the brakes brings the nose down for a clean landing Cracking fun this little car1 point
-
Video from today at Whickham http://youtu.be/NHoasJYI80s1 point
-
Are any of the paving slabs slightly higher then ther rest, causing a step? You could of bent them drifting over the step, if your travelling the same speed over the step sideways from both directions that might of caused the metal to 'stress' and bend as the car went over it1 point
-
Yeah use caustic soda. But that stuff is proper hardcore. Makesure you wear gloves and goggles in case of splashes. Might be good to wear a mask too if you have one as the smell makes your ears laugh. Works a treat though and probably only takes a minute or two.1 point
-
That might explain the delay of my newest RC not arriving yet. Should have arrived yesterday too.1 point
-
25% nitro is fine with that engine..no matter what brand fuel it is.....but 20% is cheaper and will also work without problems...a few quid difference may matter to you....the performance difference is not massive. If your shop has Model Tecnics fuel then I would ask for DynaGlo or DuraGlo....Dura is a safer option but has lower performance. The fuel I would recommend to you is Byrons Race Gen2 25%...but it is not cheap.1 point
-
This little pocket rocket....1 point
-
None taken, but I can't help it if NTO is a man of taste! Lol NTO if you don't fancy doing the scoob in classic blue & gold then how about white with black roof, spoiler & wheels,1 point
-
Well its late but i took some more time and plugged away at the bow plating and got it all glued down. it needs some extensive wood filling and sanding down to a nice profile but it is ok. not pleased but its done. next is the cabin and cabin roof, then i can seal it and shelf it.1 point
-
Well am back with a small update and a couple pictures i will add in the evening. now if your following the plans you could be somewhat lost. your not seeing any bow curve. nothing like my images. but do not worry. you will use two balsa blocks. these will glue direct to frame n1 and make your bow. there is one tool i highly recommend any new comer to building buy, a David Plane , this is also called a razor plane sometimes. we use this palm plane to trim away and put curves into our wood, it will allow you to carve your balsa very fine. and let you do it without making a mess of the bow. remember your first boat is not going to become some uber model. but your next ones will. so if the bow looks a little wonky dont worry. i had planes looking like a bomerang , but hey they still flew abit lopsided. well i have pressed a damp form into a small sheet of 2.5mm balsa, took a boiling kettle a paper towel and hot hot hot fingers. very damp balsa then compressed to the form and gently worked as it cooled and set. need to pop to maplins and grab a can of ISP 170 ( isoproply alcohol in a spray) , this will let me bend the balsa even more. a few sprays and 5 mins to work its magic the basla should become very flexi. just like it would if we used ammonia. I also skinned the topdeck bow area, i was way off cutting the rough shape for the decking. i messed up so had to add a couple 3mm stringers centre line of the keel/bow. but its good. sanded down and also saved the sanding dust/sawdust i will use this with woodglue for a filler. well thats it for now i will pop a couple images up this evening to show the nearly formed steamed plate and the bows topdeck. toodle pips and tally ho !! kept to my word here is the hull bow plates in place and sanded for profile curves. Under the two bow plates sits the keel laid down date. when we build a ship/boat we mark our keels with the date they got placed down on the board and fitted with frames. we also sign our work to hence under the thumb is the model makers name. it will be sealed away until a plate is replaced or the hull is damage to much for repair. only then will the maker be unmasked1 point
-
most woods will work but for the black-black effect your wanting wood that has a good high tannin ratio. mahog - balsa and the likes will have high tannins, but other woods may lack so thats where we add the tea steep mix. test a small area unseen, if wood does not give effect you want right away ( leave an hour to get full chem reaction.) you can then give the wood a wash with a towel dipped in the tea, then a new towel to swipe your solution on. the tannins in tea will start reacting. if your not happy at all , sand and/or plane the piece down and start again. little tips from the trade, when i left school i got myself a job in a joinery. was a saw mill boy, used to work with the huge crosscutter saws hulking block and plank, we would cut and plane it to length , then send it down the line to joiners to be made into windows doors and even pencils. the old chaps were a blast at dinner time, a game of footy and a yarn about the tips n tricks used.1 point
-
well we are back with another installment. this time lets start to make some impact on the eye. we shall now sheet some of the bottom. word of warning i would say if your building this, at the same time as myself. you will need to sheet from transom to frame number 3 ( counting from bow to stern/transom) now what you are going to do is take a sheet. eye it up along the keel and mark where frame 3 sits. infact make the centre of frame 3, one mark where frame three joins keel and a mark centre where frame 3 sits on the chine stringer. you should have a nice little panel and the grain runs up and down along the keel. Take that panel and flip it over, now check and see how it fits the other side of the hull from transom to frame 3. now if like me it is a good fit, so glue them both into place. you can use superglue here, or better still your wood glue but you will need to use rubber bands and likes to hold panels into place while the wood glue sets. ( Go the wood glue route if i was you). OVERHANG !!! your going to have an overhand , do not worry, as our grain runs up and down along the keel we can trim this away with a knife very easy. TAKE YOUR TIME !! remove to much and you cannot put it back so slow and easy, think shaving that sheet down to the edge of side panels. use your ladys nail file it .makes short work and gives you a lovely flush and sanded finish. In the images below notice i have left the wings on the panel as i par away from the transom to the bow, i sand as i go along so i have less work, more tea drinking time lol. So image 1: you can see how the transom gets cleaned out from the overhang, panel by panel. take your time here and use the ladys file as i mention above. image 2: notice our grain on the balsa sheet runs long ways, this gives us a little flex and the sheet contours to the frame three shape. you can also see the curve of the hull starting to form up. image 3: here we go from a flat transom to a curving hull and bow, you can see the definite curve being formed as we go along. well thats it for today, go grab a cool one or a nice cup of your fave hot drink. sit back and start to admire what you have created. grab some tracing paper and trace out your cabin sides and sections 7 and 8 from plan, your going to want these later. toodle pips and tally ho till next time !!1 point
-
Noticed a couple of creases in the body shell which is disappointing but not the end of the world. Also found out I'd have to cut out the window masks myself, not too tricky but prefer having these pre cut. Masks on and the roof sprayed white (missed out the body masking pic sorry) No masks for the headlights so... Perfect Tamiya Corsa Grey for the body and silver grill (can't make it out here though). More cutting! These were still straightforward, decided not to use the side stripes and window seals though). Glad new Tamiya kits have these all pre cut now! Stickered up shell. That's the shell done. I'm part way through the chassis build. Need to sand down the left front upright as it's binding with the lower arm. More pics soon. Still waiting on motor and ESC to turn up too.1 point
-
1 point
-
Get the MST. Nothing on the market will come close to what you get for your money. Not saying it as a fanboy but its honestly the truth. With parts nearly always available and same with delivery, its hard to go wrong. Its defo1 point
-
These sensored combos from Hobbyking are great. Here's the 17.5t version: http://www.hobbyking.com/hobbyking/store/__22601__hobbyking_x_car_brushless_power_system_1900kv_45a.html1 point


-
Member Statistics
