andyknight Posted April 26, 2015 Author Share Posted April 26, 2015 Rear shocks now fitted. Had to do some grinding and cutting of the pivot mountings. http://www.msuk-forum.co.uk/gallery/image/33194-/ They are awesome, loads of damping. Not sure on the 60wt oil yet but we'll see. http://www.msuk-forum.co.uk/gallery/image/33195-/ 1 Quote Link to comment Share on other sites More sharing options...
andyknight Posted April 26, 2015 Author Share Posted April 26, 2015 Had to do some small adjustments to the end of the dominator. It needed rotating to angle the exit pipe to the side which was alot of drilling and taping. http://www.msuk-forum.co.uk/gallery/image/33212-/ Quote Link to comment Share on other sites More sharing options...
andyknight Posted April 26, 2015 Author Share Posted April 26, 2015 Cheeky vid clip of the first start up with the 5t dominator on. https://drive.google.com/uc?export=view&id=0BydkETMLZI2-YV92LTRQOXRKYVE Quote Link to comment Share on other sites More sharing options...
andyknight Posted May 1, 2015 Author Share Posted May 1, 2015 Ok, so lots of stuff arrived today including Team Chase cage and a HPI 5SC-1 shell plus some fixing hardware. http://www.msuk-forum.co.uk/gallery/image/33254-/ http://www.msuk-forum.co.uk/gallery/image/33255-/ The keen eyed among you will notice I've had to jack the cage up quite a bit to give the shell clearance over the wheel when the suspension compresses. Anyway I reckon it looks quite good. I just need to de-sticker the body. Now for the down sides. It's a bitch to refuel etc with the cage on and it's fiddly to put the body support extender thingies back on again when you have taken the cage on and off. I'm willing to put up with it though because it gives me a rock solid truck. Quote Link to comment Share on other sites More sharing options...
smeghead28 Posted May 1, 2015 Share Posted May 1, 2015 (edited) As far as fuelling goes. If you take the body off you should just be able to squeeze your hand through the cage on the left side and unscrew the cap. I then had a short piece of hose pipe connected to a funnel that was long enough to reach into the tank. It is a squeeze but better than taking the cage off. EDIT,Just noticed your exhaust so that idea might not work Edited May 1, 2015 by smeghead28 Quote Link to comment Share on other sites More sharing options...
John_RCModelz Posted May 1, 2015 Share Posted May 1, 2015 Get somthing like thishttp://www.rcmodelz.co.uk/new-gas-cap-orange-935.html the have tie wrap on it to open it. Then cut out your window and use funnel to fill through window Quote Link to comment Share on other sites More sharing options...
andyknight Posted May 2, 2015 Author Share Posted May 2, 2015 (edited) All good ideas! I have to say I'm a bit disappointed with the shell. Nothing to do with rcmodelz but this thing is painted on the outside!! Now I haven't sprayed my own shell for 15+ years but whenever I did it it was always on the inside so no paint scratches off. How come hpi paint on the outside???? Edited May 2, 2015 by andyknight Quote Link to comment Share on other sites More sharing options...
Leo Posted May 2, 2015 Share Posted May 2, 2015 It's painted on the inside then has a coat on the outside to get the matte finish. If you want easier refuelling then you might want to invest in something like these. Quote Link to comment Share on other sites More sharing options...
Titaniumrc Posted May 2, 2015 Share Posted May 2, 2015 Should not be painted on the outside, my SC shell and any other Shell have always been on the inside. After removing the shell it's easy to refuel with a standard 5 litre fuel can with supplied hose, failing his then the Kraken fueler is the way to go. Sent from the I6 via talktapa Quote Link to comment Share on other sites More sharing options...
smeghead28 Posted May 2, 2015 Share Posted May 2, 2015 Only thing I dont like about the Kraken fueller is the price! Quote Link to comment Share on other sites More sharing options...
smeghead28 Posted May 2, 2015 Share Posted May 2, 2015 All good ideas! I have to say I'm a bit disappointed with the shell. Nothing to do with rcmodelz but this thing is painted on the outside!! Now I haven't sprayed my own shell for 15+ years but whenever I did it it was always on the inside so no paint scratches off. How come hpi paint on the outside???? Interesting. When I got my clone 5T shell there were stickers applied to it already (some of which were upside down!) but in doing so the over spray film had been removed. The picture on the website showed it as totally clear. There definetly seems to be something a bit hit and miss with these shells. I wonder if yours was cheap cause at some point in the HPI production line it was rejected because of this? Quote Link to comment Share on other sites More sharing options...
John_RCModelz Posted May 2, 2015 Share Posted May 2, 2015 (edited) All our shells come with stickers in pack but on rare occasions if someone wants a shell I've not got in stock then I will take if off a car until order comes then you may get it with the stickers on. As for the hpi shells I've no idea all I know is they went on offer with hpi so when we sell them we have them at the offer price. Edited May 2, 2015 by John_RCModelz Quote Link to comment Share on other sites More sharing options...
Leo Posted May 2, 2015 Share Posted May 2, 2015 (edited) The silver matte hpi shells are being discontinued, they're on clearance sale at the moment on www.hpiracing.co.uk Edited May 2, 2015 by Leo Quote Link to comment Share on other sites More sharing options...
andyknight Posted May 2, 2015 Author Share Posted May 2, 2015 (edited) It's painted on the inside then has a coat on the outside to get the matte finish. I can 100% say there is no paint on the inside of this shell. I can do a small scratch on the outside and can see straight through and see my finger on the other side. Is this some kind of manufacturing defect?? EDIT: After doing some internet searching it seems this is how HPI do their shells, they print the coating onto the outside. Looks like I'm going to have to buy some silver paint and spray the inside silver as well. Edited May 2, 2015 by andyknight Quote Link to comment Share on other sites More sharing options...
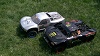
andyknight Posted May 3, 2015 Author Share Posted May 3, 2015 (edited) http://www.msuk-forum.co.uk/gallery/image/33272-/ Hpi stickers removed which was a ball ache, lots of acetone used which mostly worked ok. had some 1/8 scale stickers laying about so just wacked them on. opened up an exhaust exit whole in the shell and one for the pull start (made a quick and dirty pull start extender which I'll replace with something better next week). Edited May 3, 2015 by andyknight Quote Link to comment Share on other sites More sharing options...
John_RCModelz Posted May 3, 2015 Share Posted May 3, 2015 Looks good Quote Link to comment Share on other sites More sharing options...
super sharp shooter Posted May 3, 2015 Share Posted May 3, 2015 Did you manage to sort out your shocks Andy?? Quote Link to comment Share on other sites More sharing options...
andyknight Posted May 3, 2015 Author Share Posted May 3, 2015 (edited) Rears are great, fronts are not bad after replacing arms and pins but they will get ripped out when I get my front I-rc big bores on Wednesday. When I tested the rears off the car one of them was sticking a bit so I reckon it needs a strip down and grease etc. if I ever use them again I'll give them a full service. Edited May 3, 2015 by andyknight Quote Link to comment Share on other sites More sharing options...
andyknight Posted May 3, 2015 Author Share Posted May 3, 2015 Masked off the inside http://www.msuk-forum.co.uk/gallery/image/33276-/ First coat http://www.msuk-forum.co.uk/gallery/image/33277-/ Quote Link to comment Share on other sites More sharing options...
andyknight Posted May 4, 2015 Author Share Posted May 4, 2015 Ran out of paint to finish shell so re-worked my pullstart extender instead. http://www.msuk-forum.co.uk/gallery/image/33291-imag0068-1/ http://www.msuk-forum.co.uk/gallery/image/33290-/ Quote Link to comment Share on other sites More sharing options...
flatout! Posted May 4, 2015 Share Posted May 4, 2015 Be careful it dosnt burn through that rope kid! Itll get bloody hot that pipe will, if that's how you want it,try a steel killer rc pull cord Quote Link to comment Share on other sites More sharing options...
almighty15 Posted May 4, 2015 Share Posted May 4, 2015 Ran out of paint to finish shell so re-worked my pullstart extender instead. With the amount of spare space you have get the remote electric start fitted Quote Link to comment Share on other sites More sharing options...
andyknight Posted May 4, 2015 Author Share Posted May 4, 2015 Be careful it dosnt burn through that rope kid! Itll get bloody hot that pipe will, if that's how you want it,try a steel killer rc pull cord It's about the only config I can use with the cage and shell. Got a pit bull extender on order which might improve things, need to test a few configurations. Quote Link to comment Share on other sites More sharing options...
andyknight Posted May 4, 2015 Author Share Posted May 4, 2015 With the amount of spare space you have get the remote electric start fitted This thing is going to get too lardy, it's got enough weight as it is without add electric start motors lol Quote Link to comment Share on other sites More sharing options...
andyknight Posted May 6, 2015 Author Share Posted May 6, 2015 Happy birthday to me, happy birthday to me... http://www.msuk-forum.co.uk/gallery/image/33297-imag0070/ 1 Quote Link to comment Share on other sites More sharing options...


Recommended Posts
Join the conversation
You can post now and register later. If you have an account, sign in now to post with your account.