

rctruckz
-
Posts
1,795 -
Joined
-
Last visited
-
Days Won
1
Recent Profile Visitors
3,671 profile views


rctruckz's Achievements
")


-
Tuned pipe for a LOSI DBXL 2.0 (will also fit the 1.0) It's an Olimat unsilenced end bleed pipe that I bought new from Taylor RC not long ago. https://www.taylorrc.co.uk/product-page/olimat-losi-dbxl-2-0-exhaust-non-silenced Comes with all fittings etc. Great pipe, easy to install, no dents/damage, mint condition. £150. If paying via PayPal, buyer pays fees/postage, can deliver locally for free or your welcome to pickup in person from Ellesmere Port (CH65). Cheers

-
ok a bit of a long shot this... I have an FG monster & im trying to source the Elcon Drive Train that was once available for it (i had it on my old FG that i sold many years ago!!). Its basically a 1 piece design for the FG drive train as seen in this pic: the pic also shows the elcon heli gears, but im just after the actual drive train which consists of the main gear plate/clutch bell plate/rear diff holder/spur carrier. If you have 1 your willing to sell or know of anywhere or anyone that is selling one please let me know!! why did I sell my FG years ago, it was basically full elcon incl the XL rear arms/shock tower!! I live in UK, but I'm willing to pay postage/fees etc, Thanks guys/gals!
-
 rctruckz changed their profile photo
 -
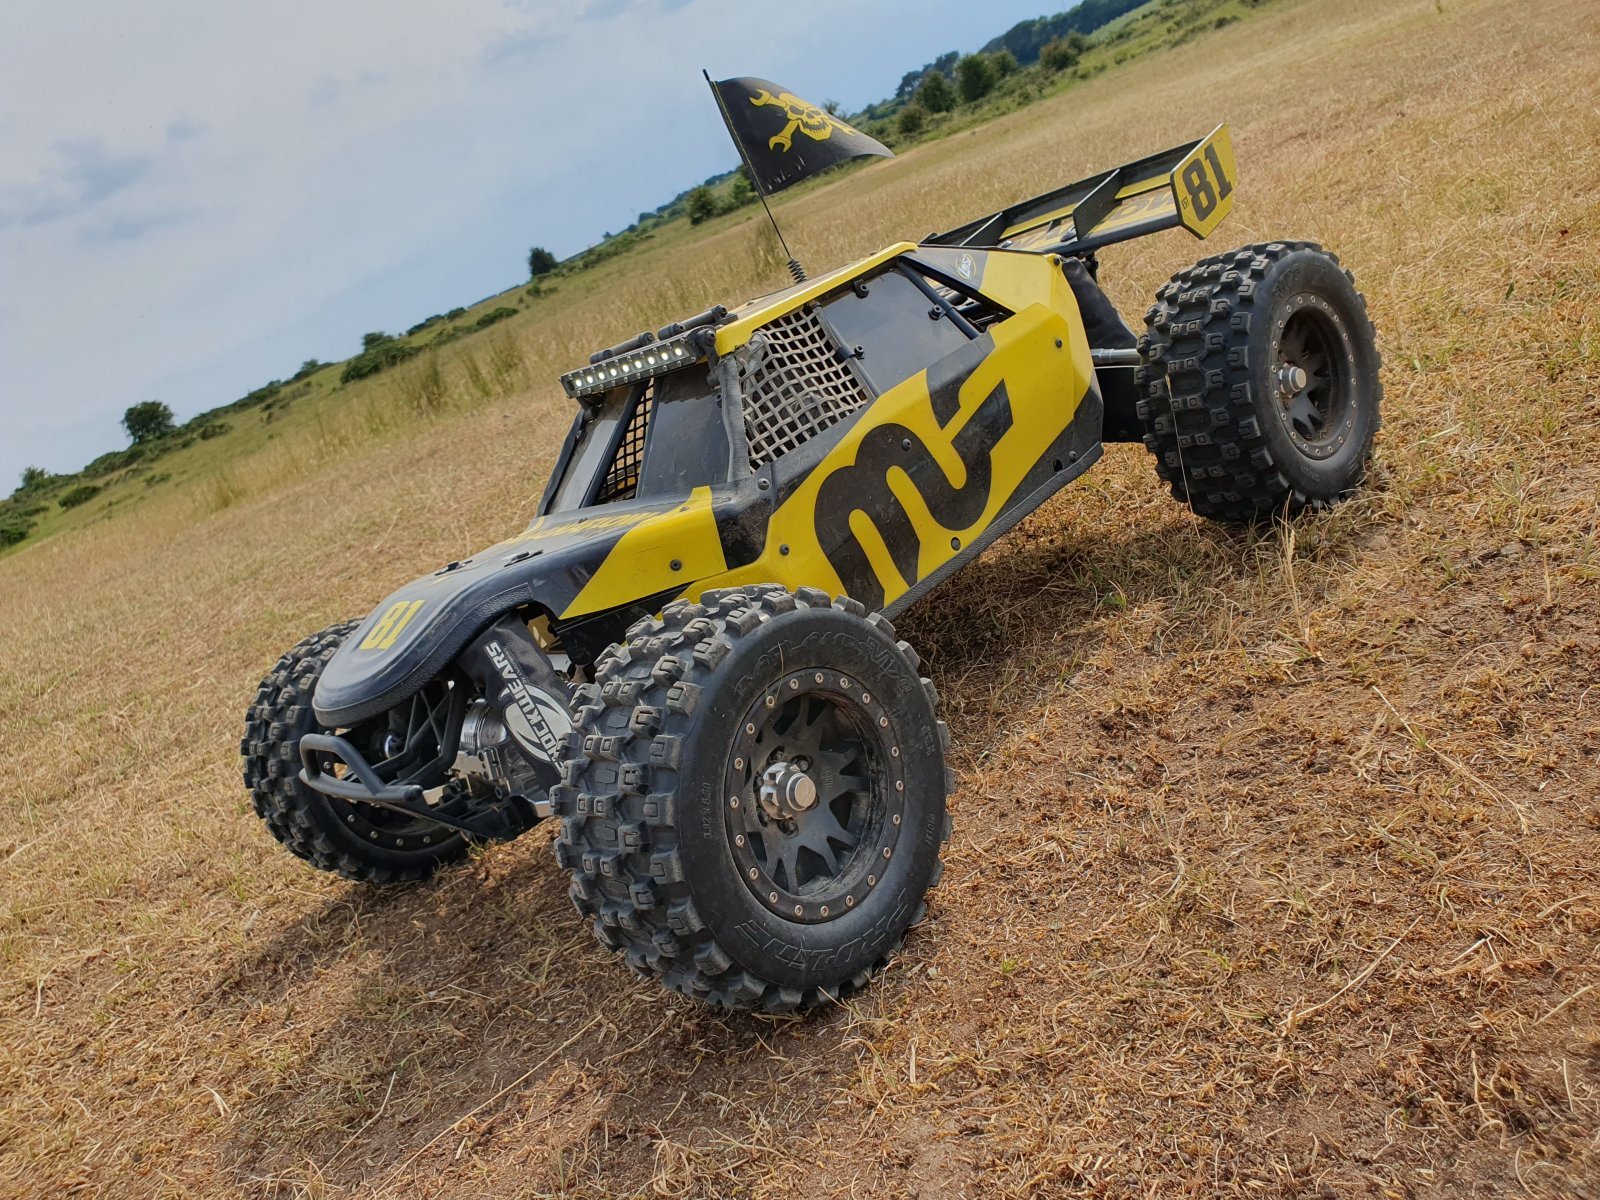
Ive just bought a 2.0, in middle of upgrading it at mo 🙂
-
RAND NEW never used. Cost £25. Asking £17+P&P (PayPal: Buyer pays fees) pickup welcome (Ellesmere Port) Can deliver locally free.More info here: https://www.jperkins.com/products/4444410
-
Thanks guys Indeed it is! How are you fella? Heres a pic (the only pic!) i managed to get of today
-
thanks guys Ive just got back from new brighton for her first water test!! All went well, heres a lil vid
-
Rudder Linkage / access holeI cut out access hole for access to the rudder servo/linkage, this will be hidden once the deck/fittings are finished.I used a little JB marine weld to hold the position of servo support beams, JB Marine Weld is quite slow setting so It gave me time to make small adjustments during the cure so I made sure alignment was good.I then used some P40 to bond the beams in place & I also made a timber frame around the rudder support & filled this with some P40 & then Gorilla Epoxy around the edges to be sure it was watertight.. More pics soon
-
Time for an update, Finally finished the rudder..First I cut out the rough shape of the rudder from a 2mm Brass sheetI then filed & sanded to give the final shapeThis was the (not so fun) part! ..Silver soldering the Rudder shaft to the rudder it's self. I did this using a Butane blow torch which I picked up off ebay, I used 2 house bricks for a base, I then lay another brass piece I had on top of the house bricks (to help with reflecting the heat) I then keyed the area to be soldered using some sand paper & put some flux on the contact sides & then lay the rudder & rudder shaft in position using 20pence pieces as shims as these were just the right thickness so the rudder was centre to the shaft, I also used a couple of die pieces to keep the shaft firmly along side the rudder. It took about 5mins for the flux to run which indicated the correct temperature to add the silver solder.All sanded down, solid as a rock! ..tested the alignment & all good!I then used some JB Marine Weld along the joint, this ensured that if there was any area missed with the soldering this would fill the join as well as add extra strength.Once the JB weld set, I then sanded for a smooth finishNext I cut out 3 strips of 1mm brass & wrapped it around the shaft & onto the rudder, these were fixed in place using JB Marine Weld & then I used 3 small pieces of wood along with clamps to hold in place while it set. This will again add extra strength to the rudder as well make it look more like a rudder!All set & solid!Time for more sanding..Next I added some rivets (well, kind of!) I cut off the head of some button head bolts, filed them smooth & then using JB Marine Weld I placed them onto the strips & then filled the head with the weld.Once all set I sanded down to a smooth finishOne more final sanding..Mission Complete!Im pretty happy with the final outcome, once sprayed I think it will look pretty decent, not bad for my 1st attempt Prop shaft & rudder all done, will grab some video soon of it in the water, but i did a dry test with the prop running & its very smooth with no vibrations which is good as it means of course that the alignment is good etc.Also stained/varnished the wheelhouse & made a start on the wheel, also cut out the rest of the deck pieces which are ready to be fixed in place & also made a cutout on the stern for access to the rudder linkage/servo..Using some 2mm copper sheet I made some braces for the keel, I made a simple jig using some wooden dowel so just a fraction of the dowel was exposed, I then placed the brass brace over this & tapped it with a hammer, this then gave the shape of the prop shaft so it sat around it snug on the keel..The top half of keel is screwed in from inside of the hull through a piece of 3x2 block of wood which I fixed in place using EpoxyI used JB Marine Weld to fix & seal the keel to the Hull & Prop Shaft..I then covered the keel with JB Marine Weld, this made it solid as well as make it water proofI then added the copper braces to add strength joining the top & bottom parts of keel to the prop shaft, again these were fixed in place using JB Marine Weld, these were held in place using a few pieces of scrap wood while the Marine Weld set..Once set I then sanded down to a smooth finish..I then used some Epoxy Putty to shape the area above the prop joining the keel to the rudder support/rudder shaft, I then coated it using JB Marine Weld & then sanded for a smooth finish..I cut out the rest of the deck pieces, once I have the electrics sorted, these deck pieces will be perma fixed in place & then covered with some filler..Hole made for access to Rudder Linkage & Servo..Wheelhouse Stained & Varnished..Made a start on the wheel, need to add handles which will be in form of 4mm Brass tube..
-
-
DECKELECTRICSMOTOR/MOUNT PROP & SHAFTSUPERSTRUCTURE WHEELHOUSE
-
Hi guys/galsBeen at this on/off for around 8 months so far but the past few weeks I decided to go full on with it & I've got quite alot done, hoping to have her ready for sale for the summer This is my first ever build.. yup I jumped in at the deep end as they say \o/Anyway will let the pics do the talking, as I say, its a largescale TID Tug details are:Hull: T.I.D Harbour Tug, Glass Fibre (Models By Design)Scale: 1/12 (Length: 71" & Beam: 18")Motor: 24volt DC 12 Pole - 3800rpmPower Source: For Motor: 4x 12v 22AH SLA battery's (Total output: 24v 44AH - Series/Parallel configuration)For Aux: 1x 12v 22AH SLA BatteryESC: Action Electronics P98 High Power (Modified)Prop: Brass 5" (12.9mm) 4-BladeProp Shaft: Mobile Marine Models MaxLine 12.5mm Brass Outer tube / 8mm solid stainless steel inner with bearingsRudder: Brass Misc. itemsSound Unit: Beier Sound Module USM-RC-2Smoke Unit: Steam Master Unit (SMU)Electrics:Action Electronics P98 High Power ESC (ModifiedAction Electronics P107 Switched Power Distribution Board (Modified) Action Electronics P103 Parallel Power Board (Modified) Action Electronics P95 Indicator Fuse Boards Action Electronics P112 Fused Power Distribution Board With Main Power SwitchAction Electronics P44 Universal Twin SwitcherAction Electronics P95 Indicator Fuse BoardMore info about my build can be seen here: http://www.tizdaz.co.uk/boat/build.htmlHULL
-
indeed.. http://www.tizdaz.co.uk/forum/
-
hiya mate Problem is, too many people compare the dbxl to the 5ive. The 5ive IS a better built model out of the box & the price reflects this, (about £300-£350 difference) If you were to spend the amount saved on buying the dbxl instead of the 5ive on hop ups for the dbxl, you will have a very reliable & durable 4wd truck. Some hop ups from the get go i would suggest if you bash quite hard is: Alloy chassis braces (front & rear) FLM CVD kit Alloy Clutch Carrier Alloy Center shaft bracket Alloy engine mount Then just replace as you break with hop ups Set you back less than £100
-
website working now
-
couple of more bulkheads added..


