

CarlC
-
Posts
729 -
Joined
-
Last visited
-
Days Won
21
Content Type
Profiles
Forums
Prizes
MSUK-Forum - RC Model News and Community
Articles
Events
Everything posted by CarlC
-
@Jens That's a bit of a pain, but I bet the disc brakes look cool.
-
@JensI use the weighted Fastrax ones, they are well make and available in the UK - just a bit more expensive than the Chinese ones https://www.modelsport.co.uk/index.php?product_id=424517&gclid=Cj0KCQiAwMP9BRCzARIsAPWTJ_Eg-6E_bjv5dDHCSGLQJoKdKLmzTBHHswOZRxuFrG6XQVKGv1zWq14aAnGjEALw_wcB
-
Try Newton's third law, every force has an equal and opposite reactionary force thingy. Tap the rim of the housing, not to hard but repeatedly and the bearing should slowly raise out of the housing. Seriously, it does work.
-

Associated CR12 FJ45 Body Shell - Opinion
CarlC replied to DartmoorTrails's topic in Scale Crawlers & Replicas
Just had a look at the Fj45 CR12 page on the Associated site. The CR12 is 1/12 and the the wheel base is pretty short at 225mm. It does look like a nice shell but the scale may be put...........Sorry Page for reference https://www.associatedelectrics.com/teamassociated/cars_and_trucks/CR12/Toyota_FJ45_Pickup/specs/ -
Traxxas TRX-4 G500 Upgrade/Rebuild Project
CarlC replied to Jens's topic in Scale Crawlers & Replicas
Will be interested to see how the alloy gearbox housing works out. Looks very nice. -
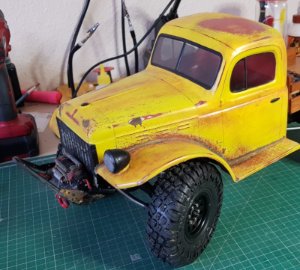
OHOs OG SCX10 gets rebuilt, '46 power wagon!
CarlC replied to Oh How Original's topic in Scale Crawlers & Replicas
Stunning -
So a long time ago, when radios where 27mhz and 2 channel was all my Dad could afford to get me for my birthday, I started RC with model boats. I haven't had a model boat for over 40 years but saw one on Facebook last night. Collected it this morning. I've checked out the electrics, there is a little to tidy up but basically all good. It came with a brushed motor and ESC, steering servo etc. I have now added a receiver, and set the ESC for LiPo. Plugged it in and it just sprung into life. Am so chuffed. I will clean up the electrics but an very pleased with a vintage little trawler yacht. As soon as lockdown ends it will be down the boating lake.

-
Not the postie but I collected this vintage beauty this morning. All ready to go, just add radio and battery......
-
I've got a gens ace shorty for my crawler, love it, my best battery
-
We both got rained on ☹️
-
@.AJ. That is going to look sweet
-
@Jens Good find on the PinChangeInterrupt.h library, I've always used the defined pins but being able to move them is really useful. Will also look at the ServoInput lib too, I always do my PWM readings myself but if I can use a lib even better.
-
I went with interrupts straight away. Primarily, because I use that approach on other platforms.
-
replaced the broken portal input gear on the TRX-4
-
New front portal gear for the TRX-4. Going with the original type rather than the hardened as this is the first breakage in a year or more and I like to have an easily accessible weak point in the drive train.
-
Good luck with your coding, really looking forward to seeing your project once it is working.
-
Hi @Jens Unfortunately, I can't read your code, I get a forbidden message. On reading the receiver inputs, its pretty straight forward, just use the interrupts on the board and you'll be well away. Here is a simple example to read a single channel: Configure the interrupt in Setup as follows: attachInterrupt(0, rising, RISING); then I use the following to read the the values on rising and then on falling: void rising() { attachInterrupt(0, falling, FALLING); ch3_prev_time = micros(); } void falling() { attachInterrupt(0, rising, RISING); ch3_value = micros()-ch3_prev_time; }
-
Totally understand your logic, I have the same issues on most of my Arduino projects. If you want to drop the delay() function and still be able to have fully timed operations, such as when you have the indicators on and blinking , the Adafruit article covers the whole gambit for pseudo multi tasking on an Arduino.
-
Great plan. I just finished building a light flasher using an Arduino Pro Mini for a member here. You're right to be wary of driving the LEDs directly off the Arduino as the max drain across all pins is 200ma, fine for a few LEDs but no good for a large project. I like the transistor setup, that should work well. On my TRX-4 sport I did build a setup with an Arduino that controlled headlights/taillights (on/off), brake lights and reversing lights all driven from the board (single LED per pin) but that was about as many as I was prepared to try. There is a great article on ditching Delay() on the arduino site but I guess you've probably found that - its here if you haven't https://learn.adafruit.com/multi-tasking-the-arduino-part-1/ditch-the-delay Good luck, will be interested to see how your project goes.
-
Neil Smith on Facebook , or his site is http://www.ndesigncustompaint.com - he comes to my club in Herts and has done a lot of very nice shells 1/8th shells, plus a few crawlers and has also build all of the buildings on our crawler track. Could be worth a chat with him about what you want.
-
Same here, can't see @Fuzzock's pics at all, just a no entry sign
-
Printed new inner fenders for the front of the UMG10, plus a set for one of the members here.
-
Lol, I use the Gens Ace 3s shorty packs, can also run them up front too as my Defender ended up shortened to 313mm with a cage on the back and inner fenders on the chassis at the front. Am just trying some carbon fibre reinforced PLA for the inner fenders on my UMG10, seems like a nice material, will have to see how it holds up with use.
-
It is well sandwiched between the rails so PLA+ should hold up well. I took a thingiverse one and modded it to get rid of the conflict with the upper links. Mine is also 2 part and screws together so I can print it easily. PETG seems to hold a thread pretty well too. I didn't worry about the rear brace either as I only run short packs.
-
I did the same thing, well remixed one off of thingiverse to make it work for me. What do you print yours in? I was going to go with nylon but ended up using PETG.


