Jump to content
  • Join our community

    Sign-up for free and join our friendly community to chat and share all things R/C!

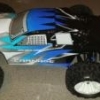
Received FTX Carnage and think car is on drugs.


turtletom100

Recommended Posts

Also what are them t - plug connectors

I thought it was just a case of cutting tamiya maybe sliding some heat shrink down the cable re soldering Dean connectors to the cable then slide heat shrink over the solder joint and heat it up to shrink it. *embarrassed*

Sorry Turtletom if I'm not being very clear (looong day at the office). Think deans are sometimes referred to as t-plug. Your bang on with this.

Link to comment
Share on other sites

Sounds like your soldering skills are more than adequate! Sorry, bit of a typo. When I said "solder insulating" I meant cut one lead off e.g positive, solder to new plug and insulate using the heat shrink. Then cut the second eg negative lead and repeat. This minimises the risk of shorting the terminals - the terminals are pretty close on the deans plugs and you don't want a wobbly hand or stray solder bridging the connection.If using the ESC I think you are planning (link?) then no need for separate alarm as the ESC is capable and space in the buggy is already very limited. I've not put one in and setting via programming card to lipo "auto" has served me well so far.Nimh resale value is probably not worth while. I use my Nimh's in my tamiya lunchbox. As you've read, one you go lipo, you'll never go back. It will feel like double the speed. Run times on the batteries I suggested are also very good. Had as long as 40 mins from one battery.

Ahhhhhh I see so basically solder one of the cables to one side of the t plug then heat shrink that. Then do same to other side with other cable? (I know it's a bit basic) and don't allow the solder on the base of the plug to bridge/touch?

I not as clever as you using links but here is the item on eBay for the brushless motor I am going to get 281391601702.

And I guess I will just leave the nimh to one side so if I decide to expand my collection of rc vehicles might get some use of them as resale is worthless. :-( lol

Link to comment
Share on other sites

Sorry Turtletom if I'm not being very clear (looong day at the office). Think deans are sometimes referred to as t-plug. Your bang on with this.

No worries thanks for your help with regards to all this being very useful and have definately swayed me into purchasing a couple 2s lipos even more so now I know someone who is using the same battery as I was looking at and possibly motor.

I think I pretty clear on what I will have to do with regards to the Dean connector/t connector now.

I guess after it soldered you just plug the connector into the other end of the Dean plug? Is that correct?

Link to comment
Share on other sites

I have also watched this video -

I think this explains everything as you have.

My only concern are I don't have the heat torch/blow torch thing he used and my soldering iron does not look like that it is a point/flat point (if that makes sense)

Link to comment
Share on other sites

No worries thanks for your help with regards to all this being very useful and have definately swayed me into purchasing a couple 2s lipos even more so now I know someone who is using the same battery as I was looking at and possibly motor.

I think I pretty clear on what I will have to do with regards to the Dean connector/t connector now.

I guess after it soldered you just plug the connector into the other end of the Dean plug? Is that correct?

Yes, this is the same as the Etronix and I also have this Leopard in another car. I went for the 9T version rather than the 12T in the Vantage. 9T is a faster but less torque than the 12T. I use the higher torque 12T in the heavier Carnage and the 9T in the Lighter Vantage buggy.

Deans connectors are simple. Solder female socket to battery and male plug end to ESC. As the video suggests don't let battery terminals touch. Blow torch is a little "American overkill" for me. Basic soldering iron is sufficient.

Link to comment
Share on other sites

Yes, this is the same as the Etronix and I also have this Leopard in another car. I went for the 9T version rather than the 12T in the Vantage. 9T is a faster but less torque than the 12T. I use the higher torque 12T in the heavier Carnage and the 9T in the Lighter Vantage buggy.Deans connectors are simple. Solder female socket to battery and male plug end to ESC. As the video suggests don't let battery terminals touch. Blow torch is a little "American overkill" for me. Basic soldering iron is sufficient.

Good to know that someone has actually used the leopard motor as I have read that the first ones had a few issues (these are now v2) I am personally looking at the 9t for the carnage. I noticed the kv went up the higher the t (9t/12t) and thought that the higher the kv the more strain you putting on the spur and pinion?

It does seem pretty straight forward with regards to the Dean connectors I need to get some solder and 10awg heat shrink. One thing I did notice is that in that video the first one he soldered if you look when he shows the connector there is solder showing St the bottom of the heat shrink, will this not be a problem if it gets moisture on?

Link to comment
Share on other sites

Join the conversation

You can post now and register later. If you have an account, sign in now to post with your account.

Guest
Reply to this topic...

×   Pasted as rich text.   Paste as plain text instead

  Only 75 emoji are allowed.

×   Your link has been automatically embedded.   Display as a link instead

×   Your previous content has been restored.   Clear editor

×   You cannot paste images directly. Upload or insert images from URL.

Loading...
×
×
  • Create New...