Jump to content
  • Join our community

    Sign-up for free and join our friendly community to chat and share all things R/C!

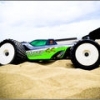
My Thunder Tiger EB4 G3 Brushless Buggy


Recommended Posts

I found this site, I think it's located in Greece (not sure), they have most of the spare parts but they seem suspiciously cheap... don't know what to say. They have paypal payment so I guess you could recover your money in case of ... whatever.

http://www.ruberkon....pare-parts.html

Yeap, it's in Greece.

In Greece lots of people buy Thunder Tiger and Kyosho because it's very easy to find parts for these two brands here. (I know, it sounds strange but it's true!). Ruberkon from what I know is trustworthy, it's the Thunder Tiger dealership in Greece. They import everything Thunder Tiger and supply the stores but they also made a web shop so you can get what you want directly from them. Drop them an email for more info.

Another trustworthy site is http://www.giatrakos.gr/information.php?info_id=18&language=en but I suppose they get Thunder Tiger parts from Ruberkon too since Ruberkon is the official dealer.

  • Like 1
Link to comment
Share on other sites

Here's my effort.

97156596.jpg

De-stickered to make it a bit different :)

For a RTR it needed a bit of work,steering adjustment was way out as was the camber and the pinion mesh.

Also had a leaking shock out of the box,not sure why but it seems to be okay now after some fiddling.

The only other issue I have is this.

81872507.jpg

With the 2x2s wired up in series with the supplied lead the negative lead sticks out straight meaning the top cover cant be fitted,it would be better if it was at 90 degrees like the positive one is.

Might have to make a new lead or just buy 4s packs instead and use these ones in the Exo and SCTE.

There is no other way to put the packs in other than back to back.

Link to comment
Share on other sites

I feel you m8. Same issue I've had. But it was a simple fix, just un-solder the connector and solder it back in a 90 degree angle.

That solved my problem ;)

Yeah I know,should have thought about it sooner rather than being an idiot!

All sorted,desoldered and resoldered now and all good and the top goes back on :)

Link to comment
Share on other sites

Couple of quick bit I have done.

There was an opening at the back that exposes the drive shaft to the rear of the car,not a big deal except that some of the battery wires end up quite close to it by the time you get the top on.

I cut out a bit of a milk container and stuck it in place just to stop any chance of any wires getting caught up in the drive shaft and rubbing through the insulation.

Also I have put some non slip matting in the bottom of the battery compartment just to give them a bit more "stick"

dsc01652t.jpg

All charged and ready for tomorrow.

Link to comment
Share on other sites

This: ;)

A shower... seriously. Taken the mud and sand off... Then WD40 allover it.

Now will see if my waterproof method fails or wins :D

Well... it failed

Ended up with a fried ESC, lots of smoke and a small fire. :36_11_6[1]:

Oh well....

Upgrade time :030:

Edited by catalin4u24
  • Like 1
Link to comment
Share on other sites

Well,what a morning :)

This thing is just a beast!

Maybe all buggies are the same but this seems to take a beating and just keep going,okay I haven't thrashed it that badly but it has taken more abuse this morning than most others RCs I have had for the last 20 or so years combined.

I did spin a rear wheel nut off so had a 20 mile round trip to get some replacements,oddly the ones I got were Losi as they were the only ones with the correct thread pitch,I thought they were all the same?

Anyway love this thing so far and it can only get better when the weather gets better,hopefully.

Also got some PTFE tape,might give it a go on the wheel nuts just in case.

Edited by smeghead28
  • Like 1
Link to comment
Share on other sites

Well mine smells like dog turd :(

Obviously been through something unpleasant somewhere.

I thought it was just mud till I got close to it.

Body and wheels/tyres are clean now,washed them several times in washing up liquid and then poured boiling water over them to make them a bit more sanitary.

Link to comment
Share on other sites

Well its not as bad as I first thought,whilst it was a bit wiffy there wasn't much thickness to it :yucky:

More just a dried on thin smear.

Its clean(ish) for now and I will go wash my hands for about the 50th time :)

Just to add something,I used this in long wet grass quite a bit as well as some speed runs,nothing seemed to get even warm to me,kept taking the shell off expecting to find it quite toasty underneath but nothing.

Edited by smeghead28
Link to comment
Share on other sites

Was curious as what was in the centre diff.

The front wheels were ballooning and seeming to get over loaded.

Anyway I opened it up to find nothing in it at all,not even any large amount of grease.

Cleaned out what little there was in there and refilled with some 20000wt oil.

Might not do much and I have a wait of a few weeks to give it a serious test, but happier that there is something in there now.

Link to comment
Share on other sites

Join the conversation

You can post now and register later. If you have an account, sign in now to post with your account.

Guest
Reply to this topic...

×   Pasted as rich text.   Paste as plain text instead

  Only 75 emoji are allowed.

×   Your link has been automatically embedded.   Display as a link instead

×   Your previous content has been restored.   Clear editor

×   You cannot paste images directly. Upload or insert images from URL.

Loading...
×
×
  • Create New...