

JonnyUK
-
Posts
392 -
Joined
-
Last visited
-
Days Won
4
Content Type
Profiles
Forums
Prizes
MSUK-Forum - RC Model News and Community
Articles
Events
Everything posted by JonnyUK
-
This evening I started cleaning the wheels up. The chromed plastic on the bead lock rings was scraped and tatty so cleaned that off of all eight. If anyone needs any chrome I'm pretty sure most of it is in my lungs 🙄 Did think about painting the rings but it won't last one outing off-road. Swapped the screws for stainless self tappers.
-
Receiver is definitely dead, not heard about a refund/replacement yet 🤨 So did a bit of mounting the servos etc and slipped some plastic over braid on the cables. Not sure if the alloy servo horns I got will work, bit too short. I'll either extend them or just fit the plastic ones.
-
 Had no issues with any recent hpi RCs I've had. They all have quirks no matter who the manufacturer is. Bit like Traxxas, everyone seems to love to slate them. Personally they are some of the best RCs I've owned I'd avoid the modern 'Maverick' hpi low budget ones. If you want fast, try the hpi wr8 flux, loads of rally sliding fun even on 2s lipos. If you want slower, get into crawlers/trailing. Lots of enjoyment when you find a nice rocky area. Plus not much breaks on them due to the slower speeds. I've rolled some Traxxas Trx4's down cliffs and nothing snapped. My only issue with crawlers is when people stick high powered motors and 3s or 4s lipos in them and race bash jump. Backwards engineering really seen as they are designed to do things slower.
 -
User manual is available to download here. https://teamxray.com/xb8e/2019/en/download/
-
Lots of info in this link. Mostly relates to tuning for racing though. https://teamxray.com/xb8e/2019/ Are the electronics stock in it?
-
Well sorting the electronics has come to a halt, the dumborc receiver I got last month is dead. First time I've tried it today 🥺 Trying to sort it out with AliExpress but it's like pulling teeth.
-
I have a spare transmitter bag but it's this one in this link. No foam padding inside. https://www.modelsport.co.uk/product/35662?gad_source=1&gclid=CjwKCAiAuNGuBhAkEiwAGId4ahLCJUan5p3O88sPK6zL2R2ascrBfyRlvCpAiokpuf5tWUp8GOWHYBoCk-oQAvD_BwE
-
Was it previously soldered or welded? If soldered, I'd be tempted to resolder it but make sure no heat goes into the cell or you might have a fire.
-
Enjoying this one, I'll be disappointed when it's finished to be honest.
-
In the photo it looks like the connection has ripped off from the actual 'tape' inside the casing. Not sure that could even be connected to for discharging. Must have been a big crash. 🤪
-
Todays effort was sorting out the steering servos. I'll have to stay stock until sort the funds out for two new servos. This one didn't work, wire broken on the cable to circuitboard. Plus one of the motors brushes had come off of the soldered terminal. Seems to work ok now and doesn't stall etc. Already have a new small servo in my parts drawer so will use it for the throttle/brake. And that's where I'm up to today, should hopefully get time to do a bit more soon. 😁
-
New transmission gear cover with a rubber gasket made and fit. Missing all the brass bushes for the steering centre piece. Added a second bar so I could fit the wider bearings I had spare. I also filed a flat onto each pin in all of the four wheel hex hubs. Less chance of them coming loose, plus threadlock used.
-
Added extra bearing here. Added grub screws to this piece. Filed this shaft to suit the above mod. Also added an extra bearing with spacers to the left shaft in above photo. Seen online about the gear carrier on this shaft spinning on the shaft an not turning the bearings. It's because of the oem design, tightening the nut normally just crushes the bearings due to no centre spacer or step on the shaft. Adding a centre spacer allows you to tighten the nut and all of the force is on the bearing centres, so no damage to the bearing. They did add a stepped shaft on the clutch shaft with a larger inner bearing, no idea why they didn't do the same to the middle shaft. Minor setback due to dropping the chassis and breaking the part.
-
Went with stainless screw/bolts for most of the truck. Sleeves over the cups because the rubber gaiters I bought were a bit too large. Plus adds a bit of strength and stops me loosing the pins.
-
Engine checked etc and put back together, not ran it yet but don't see why it shouldn't work. Seen on youtube about the exhaust always coming loose due to vibrations. So instead of the bolts I fixed studs into the head and then nuts on the outer. Carb mount is also converted to studs instead of bolts. Cleaned the gunk and crystals out of the carb internals and made gaskets for the air filter, intake mount etc. I have got a dust cover to fit over the pull start and air filter. Need to find some pipe to make the rest of the exhaust yet.
-
Every piece was taken apart and washed, then inspected to see if useable or not. All of the bearing are being replaced with good quality rubber shielded ones.
-
I'll be using this radio and with the 10 channel receiver (no gyro). It's budget but seems like a nice bit of kit and lots of features. I have a bodyshell for it which needs painting, looks large enough so hopefully it'll fit.
-
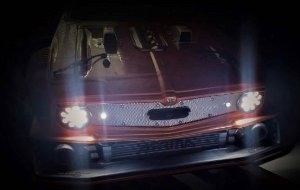
Figured I might as well start a thread about the 1/5 Blackout I've been slowly putting together and modifying along the way. Slowly being buying a few old parts in boxes, loose parts, cheap old stock on ebay marketplace etc plus a smashed up model over the past 12 months or so. Then decided to start trying to put it all together. I know I could have just bought a RTR truck but I wanted a project plus, so far, its been cheaper. Took a few photos along the way so I'll just add them here. Managed to find one of these as 'new in packet' on ebay. Most UK shops are out of stock of these and no expected stock date for some reason.
-
Guess you have to figure out a way to fully discharge it now before binning safely. Or put it outside, bang a nail through it, sit back and wait for the fire 🤫
-
Spent far too long messing with large scale servos today. 😵💫 Need two for the steering and a normal sized one for the throttle/brake. I have the smaller one because it's the same size as Trx4's etc. I have one large servo which doesn't look too good but works and is strong. The matching one to that works but stops when hold the servo arm. Doesn't click or slip so I'm guessing it's a weak motor. No part numbers on the motor so I can't just change that part. Have another servo, same part number but isn't as tall, alloy body and all brass gears. Didn't work so took it apart, wire came off the board. Re-soldered all 3 wires but still didn't work. Noticed one loose terminal on the motor so took the end cap off of the motor and the clip to the brush had come off. Fixed that and now the servo seems to be working ok, can only just stall it by hand. Pretty sure it's the same speed as the other one so they'll do for now and until I have funds for two new servos.
-
Nice to start off with a clean one though lol 😆🙃
-
Did some more assembling from the boxes of Blackout parts, most are too worn but luckily there are good parts in there. The steering bar (ackerman?) was missing the brass bushes but I did have some bearings that would fit. Reamed the holes to fit and had to double up the bar because the bearings were too narrow otherwise, each end has 3 bearings fitted. Pretty smooth now, no idea how smooth the oem setup would be. Made a soft rubber gasket (2mm) for the transmission gear cover, try to keep the dirt and sand out of there. Self adhesive foam would also work but I didn't have any. Aluminium piece to seal the open corner, think there is usually a separate plastic piece there. Also added some extra screws to keep the gasket a snug fit. And here is how it sits now, still work to do. Quite happy at how clean the parts came up after a lot of cleaning in soapy water with some toothbrushes. I should probably make a thread of this in the large scale section 🤔
-
They might fix it by issuing a software update, should be quite simple to load it into the transmitter hopefully. I think there is a mini usb on it, no idea if that's to plug it into a computer for updates or to charge a lipo pack though.
-
At the moment I'm only using it for the one petrol RC. Not had it long really.
-
I've got the same transmitter. If you mean the problem is just that it will control all of the other bound RCs at the same time then just make sure only one RC is powered on at a time ie the RC you are driving. If you mean that it doesn't save each trim setting separately for each model on each stored in the transmitter then yes that would be a problem.


